How to make graffiti in Krita
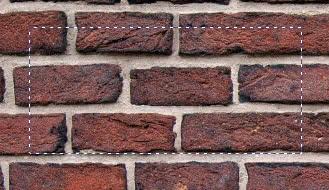
In this tutorial in english for Krita we will see how to create graffiti in Krita. We will use as a base texture the image of a wall (the "diffuse" texture of the mini course "Blender course: from photo to 3D wall" of which this tutorial is a part) downloaded from pixabay.com (currently located at https://pixabay.com/photos/wall-bricks-brick-wall-red-bricks-21534/) on which we will apply a text.
So let's load it with "File > Open" and save the project file with "File > Save As" as graffiti_krita.kra.
The wall image was inserted directly into the "Background" layer.
Let's create the text of the graffiti on the wall:
Download the ReskaGraf font (https://www.dafont.com/reskagraf.font) from the dafont.com site and install it on our computer.
We restart the Krita software by opening the graffiti_krita.kra file.
We select the "Text" tool

We press the left mouse button and, by dragging it, we draw a rectangle (almost as wide as the wall).
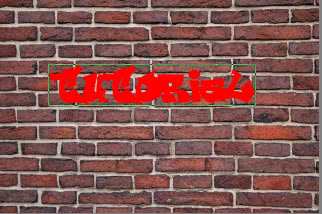
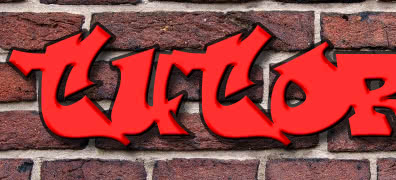
In the popup window, which appears when you release the button, we create a red "tutorial" text (255, 0, 0) with ReskaGraf font and size 250
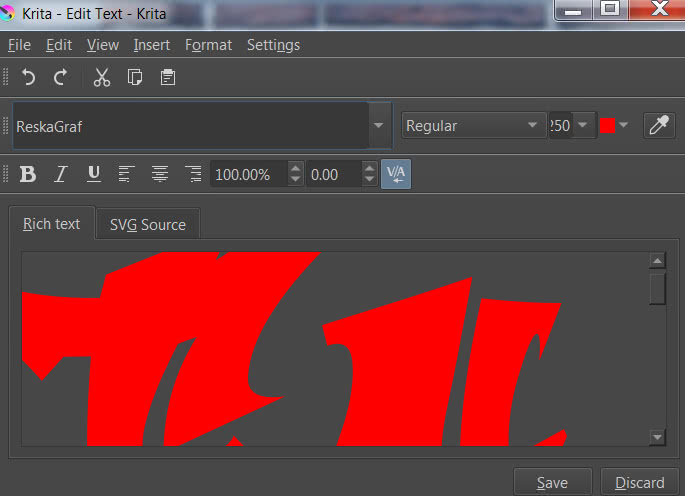
Press the "Save" button at the bottom, to save the changes, and the "Close" button to close the popup window.
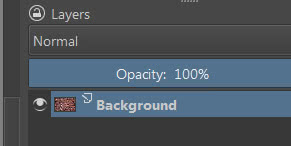
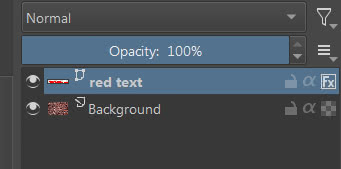
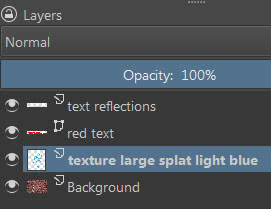
If we look to the right in the docker "Layers" we notice that a vector layer "Vector Layer" has been created (the text is considered a vector element) which we rename as "red text"
Let's select the tool that allows you to move a layer
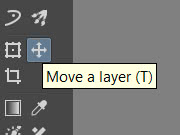
And let's move the text more or less to the middle of the wall, slightly shifted to the left
Let's now change the style of the text, adding various effects, to give it a thickness and a shadow.
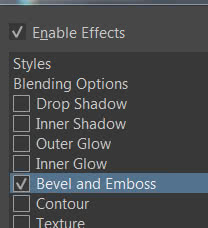
Right-click on the text layer and select "Layer Style"

In the dialog window that appears, check the option to activate the "Bevel and Emboss" property
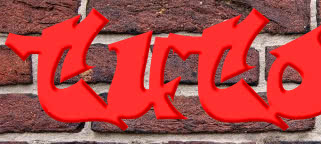
Even if the text has a slightly edgy font, let's try to create a soft-edged Bevel:
Style: Inner Bevel
Technique: Smooth
Depth: 100%
Direction: Up
Size: 5px
Soften: 5px
Shading:
Angle: 135°
Use global light: no
Altitude: 30
Highlight Mode: Screen
Highlight Mode-Opacity: 50% otherwise it lightens the red of the letters too much
Obtaining, in the preview, as the first result
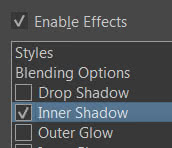
Now let's highlight some parts of the bevels obtained with the bevel, activating the "Inner Shadow" effect
with parameters:
Blend Mode: Normal | Black (0, 0, 0)
Opacity: 100%
Angle: -45°
Use global light: no
Distance: 5px
Choke: 0%
Size: 4px
Noise: 0%
With result

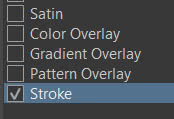
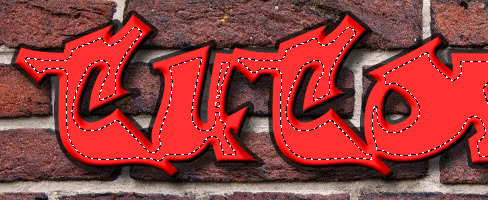
Let's now add an outline to the letters, typical of all graffiti, but without exaggerating. Let's activate the "Stroke" effect
with parameters:
Size: 7px
Position: Outside
Blend Mode: Normal
Opacity: 69%
Fill: Color
Color: Black (0, 0, 0)
and we will get
Finally, let's add a shadow to the writing, activating the "Drop Shadow" effect
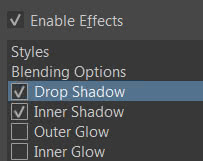
for which we set the parameters:
Blend Mode: Multiply
Color: Black (0,0,0)
Opacity: 75%
Angle: 120°
Use global light: no
Distance: 21px
Spread: 0%
Size: 21px
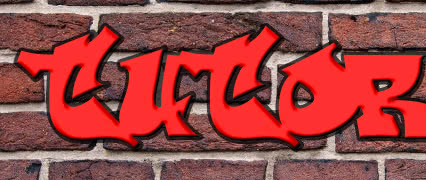
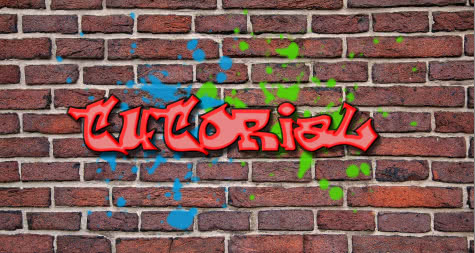
We click on the "OK" button and the result will be
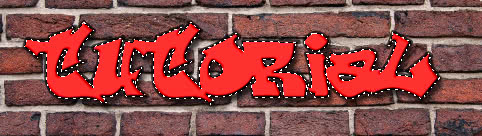
Now, to vary the graphics of the writing a little, let's add a lighter color above the writing, almost a "reflection", which underlines the shape of the letters.
We activate the magic wand tool, which in Krita is called "Contiguous Selection Tool"

and, holding down the Shift key, click with the left mouse button inside the letters, in order to select them all
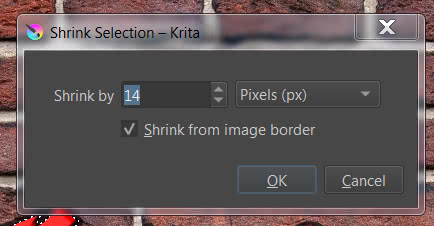
now retrench the selection, clicking with the right mouse button on the text and selecting "Transform > Shrink Selection"

Let's shrink the selection ("Shrink by") to 14px

We soften the selection, to make sure that the color (used to fill the inner part of the letter) is subsequently faded: click with the right mouse button on the selected area and then select "Transform > Smooth"
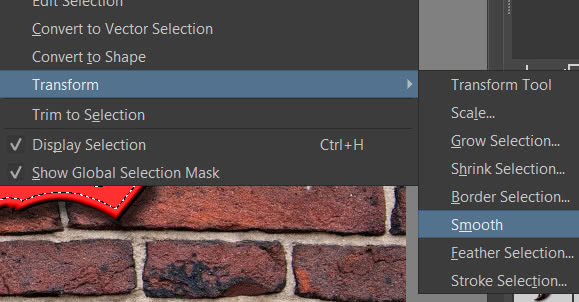
We repeat this operation a second time and we obtain this type of selection
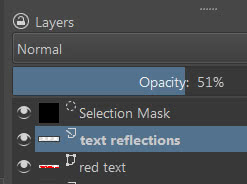
We add a new layer (level) and we call it "text reflections"

we choose a gray color (212, 212, 212)
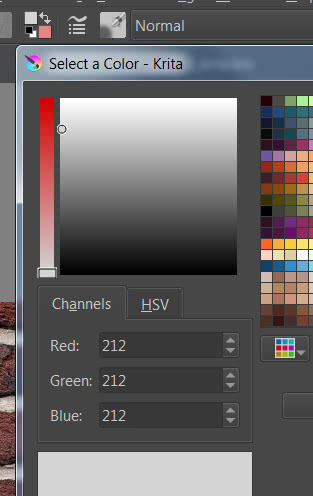
let's choose the paint bucket tool

and color by clicking on the selection
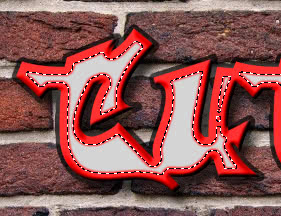
let's change the layer opacity to 51%
and we eliminate the selection (eliminating the layer relative to the selection mask), obtaining
Let's create the paint stains on the wall:
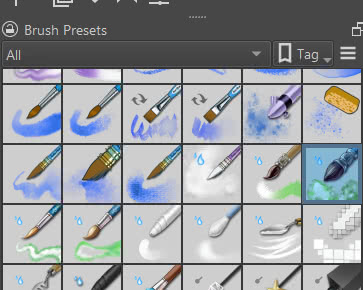
We add paint stains to give liveliness and resemblance to a graffiti to our text, helping us with the brushes already present as standard in Krita.
We select a light blue color (3, 153, 220)

select the "Texture Large Splat" brush (with Size 1000 px)
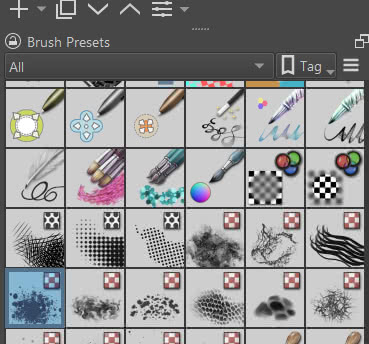
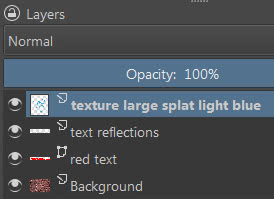
and create the layer (a Paint layer) "texture large splat light blue"
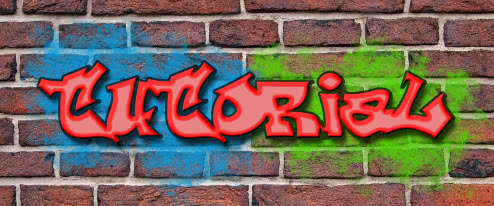
then we add some spots
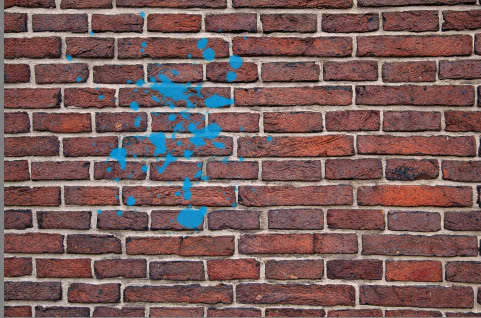
that will end up under the text (move the "texture large splat light blue" layer under the "red text" layer)

We invert the foreground and background color (in order to preserve the blue color) and select a light green (78, 212, 3)

we perform the same operations as before, creating a "texture large splat light green" layer and with the "Texture Large Splat" brush used before we create green spots that will be positioned under the text.
Now let's use the "Watercolor Texture" brush (with Size unchanged = 220px),
with the same blue and light green colors, to create color smudges in two new layers "water color texture light blue" and "water color texture light green" (to better visualize the added spots, we temporarily hide the others)

To blend the various stains in the center, use the "Texture big" brush

with Size unchanged: 435px, again using the blue and light green colors, creating the "texture big light blue" and "texture big light green" layers. Thus getting
Displaying all the spots painted so far
Let's create the graffiti effect:
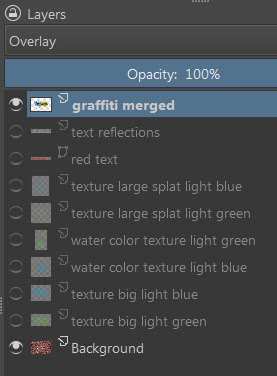
We blend everything we have created so far, i.e. the text and the stains, with the wall, so as to make it appear that they have been painted on the brick wall: we select all the layers, except "Background" containing the image of the brick wall,

click on it with the right mouse button and in the popup window that appears select "Duplicate Layer or Mask" (or we could press the "Ctrl + J" keys)

we select the duplicate layers

and, by right clicking on them, select "Merge with Layer Below" in the popup window that appears

we call this new layer, containing those merged together, as "graffiti merged" and hide the original layers. Then we select "Overlay" as the blending mode for the new layer
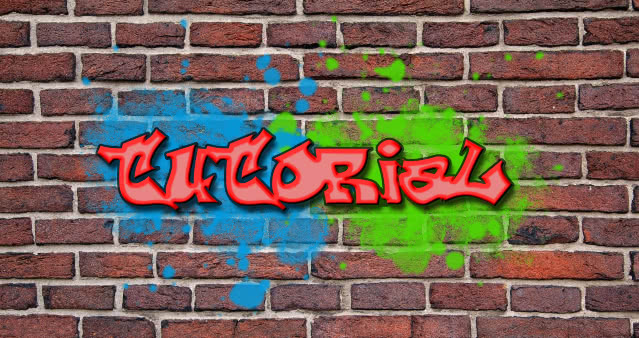
and we will get the graffiti effect on the wall

The tutorial for Krita ends here; now, after saving the project, let's export the graffiti to use it with the Blender software.
We export the graffiti:
We eliminate all layers except "graffiti merged" for which we choose "Normal"

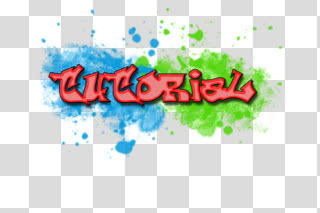
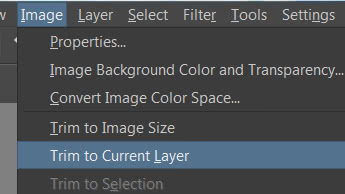
We crop the image, so that there are more or less only the painted areas, with "Image > Trim to Current Layer"
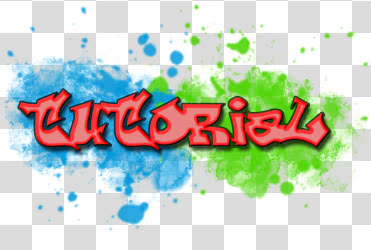
and export with "File > Export" as "graffiti_krita.png"
That's all for this tutorial, we'll see in the next how to add this text to the wall in the Blender software (Blender: how to add graffiti to a wall) .
Back to "Blender course: from photo to 3D wall" course
![Krita tutorial: Introduction [ENG]](../../../../immagini/copertina/cover-tutorial-krita-introduction_130x130.jpg)
