How to use Bézier curves in Krita, complete guide
In this tutorial we will see how to use bezier vector curves in Krita and how to subsequently modify them with the other tools present. Although Krita is very effective in free drawing and raster digital painting (where images are represented as grids of points, pixels), it also has many tools for vector graphics that, using mathematical formulas, allow you to create resizable images without decreasing their quality.
In addition, vector tools are both more suitable for designing logos and icons and some types of illustrations, and help in drawing and finishing traditional illustrations.
Table of Contents:
- What is a Bézier curve
- How to draw a Bézier curve in Krita
- Operations with the Bézier tool in Krita
- Bézier tool options in Krita
- Let's modify the Bézier curve with the "Edit Shapes Tool"
- Modifying the Bézier curve with the "Select Shapes Tool"
- Using Beziers in the "Paint Layer"
What is a Bézier curve :
A Bézier curve is a curve that is mathematically defined and can be represented by a third-degree polynomial, hence the name "cubic Bézier curve", whose parameters can be identified by four points
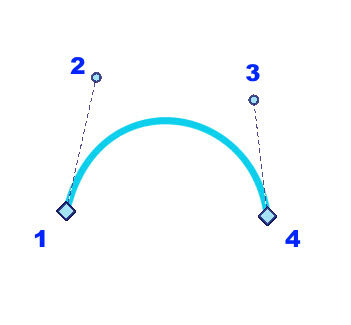
The curve begins at point 1, with a tangent with direction towards point 2, and ends at point 4 according to a direction identified by point 3.
Points 1 and 4 in the figure, which define the beginning and end of the curve segment, are called "anchor points", or nodes, while points 2 and 3 are called "control points", or direction handles.
How to draw a Bézier curve in Krita :
To draw a Bézier curve in Krita we must first choose, or create, the type of layer on which to draw it: if we draw it on a "Paint Layer" the currently selected brush will be used for the stroke, with all its properties and advantages, but we will no longer be able to modify the curve vectorially; while if we draw it on a "Vector Layer" a predefined uniform brush will be used, but we will be able to modify the curve vectorially, moving vertices and handles, using all the functions of the "Edit Shapes Tool" and "Select Shapes Tool", which allow non-destructive modifications of the curve.
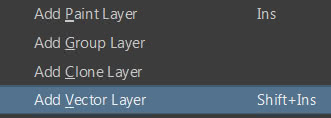
In this tutorial we will create and modify a Bézier curve by drawing it on a "Vector Layer", so we activate the drop-down menu to the right of the "+" button, at the bottom of the "Layers" tab, and choose "Add Vector Layer" to create a vector layer (or press the "Shift+Ins" keys).
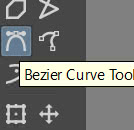
Now let's choose the Bézier tool in the left toolbar
To draw the Bézier curve, click with the left mouse button on the canvas and a first handle appears that "asks" us in which direction the curve that starts from this point should go,
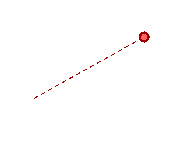
drag and move the mouse to shorten or lengthen the handle, then if we release the mouse button the direction and length of the handle is confirmed, the first anchor point is marked with a white diamond and a curve is created in which the slope and the starting point are fixed, while the arrival point depends on the position of the mouse which is currently varying, continuously deforming the curve
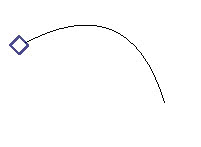
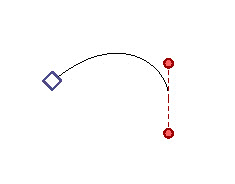
when we have found a good position for the second anchor point, we press the left mouse button and a pair of handles will appear, two because we have to define the slope with which the first segment of the curve arrives at the second point and with which slope a possible second segment of the curve will start from this point
we drag, rotate and then confirm, pressing the left mouse button, the same for the subsequent points
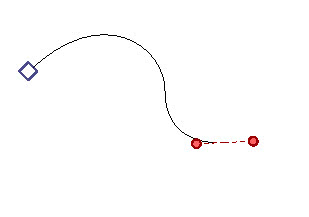
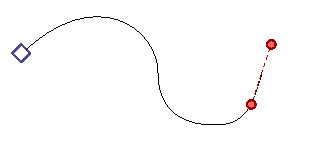
We have seen that to draw you have to click and drag to move the handle, which the longer it is, the greater the influence of the tangent to the anchor point on the curve, which will be wider and adhering to the line to which the handle belongs
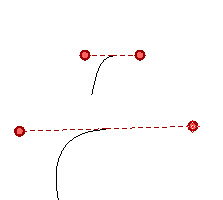
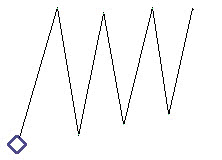
To create a broken line without curves, simply click with the left mouse button on various points of the Krita canvas, without dragging the mouse
How to finalize and save the drawing of a Bézier curve in Krita: when you have drawn all the segments of the curve, with the relative anchor points, you can finish by double clicking the left mouse button, or by pressing the "ENTER" key. The stroke drawn by the temporary standard fine brush of the Bézier will then be replaced, if we are in a vector layer, by one with the foreground color and the dimensions set in "Size", in the top bar.
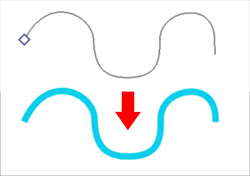
(if you don't see anything after finalizing the curve, it may be because you have chosen a color that is the same as the background color, or you are trying to draw outside an active selection)
Operations with the Bézier tool in Krita :
How to delete the last unwanted node: if we are drawing a curve
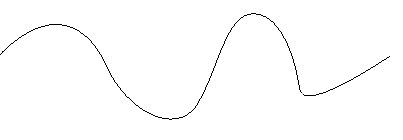
and we realize that we have drawn the last node wrong, for example because it is too high or low or with a wrong direction of handles, we can delete it by pressing the right mouse button, thus starting to draw with the previous curve segment

How to undo the drawing of the Bézier curve we are drawing: to delete the entire curve that we were drawing, simply press the "Esc" key, thus exiting the activity.
If we have already drawn and confirmed with "ENTER", simply press the usual "Ctrl+Z" keys to delete what was previously created.
How to close a Bézier curve in a cycle: when we are building a closed line
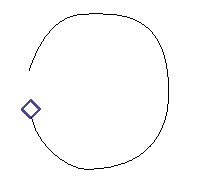
and we want to join the final curve segment with the initial node, simply move the mouse to the initial node when you are drawing the last segment
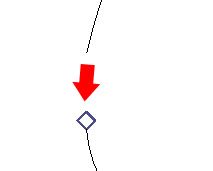
and the rhombus of the node, initially white, will turn red
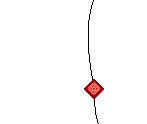
at this point you just need to press the left mouse button to confirm and the curve drawing will be finished.
Remember that once we have positioned the mouse pointer on the first anchor point, we can still drag and create handles, to determine what slope the curve will have in the last segment.
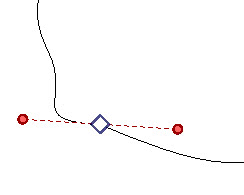
In this case the diamond will be colored white again, however, if you have not moved the mouse pointer before pressing the left button and dragging, the connection and the closure of the loop will be finalized anyway.
How to create a cusp, a tip, in a node with non-symmetrical handles: we have seen that when we create an anchor point and drag the mouse, two symmetrical handles are formed
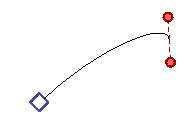
However, if immediately afterwards, before confirming by clicking with the mouse, we press the "Alt" key, we can move the second handle independently
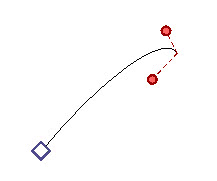
allowing us to create particular curves, which can be useful for drawing waves, leaves, claws and much more
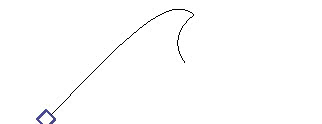
If instead we immediately hold down the "Alt" key, only the second handle will always be displayed, allowing us to easily draw some cuspids

a function that can be useful when, for example, we also want to draw stylized speech bubbles or speech bubbles for comics etc.
If we release the "Alt" key while moving the handle, the symmetrical handles will reappear.
How to move the node (the anchor point) independently from the handles: after creating a node, pressing the left button, and dragging the mouse, symmetrical handles are usually created
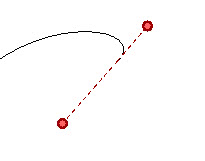
if before creating the node and dragging the mouse to move the handles, we have held down the "Shift" key, we can move the anchor point independently from the handles
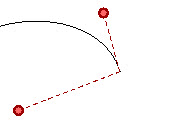
Once this freedom of movement is activated, we can also release the "Shift" key. When we have placed the node in the desired position, just press the left mouse button once to confirm.
Hidden trick: this function can also be activated when you are dragging the handles (i.e. by pressing the left mouse button and dragging): just press the right mouse button first while dragging, release the left mouse button and continue moving the mouse (and eventually release the right mouse button, as once the function is activated it is no longer needed) click the left button to confirm the position of the point and handles.
To resume normal use of the handles, starting from the new position of the point, do not press the left mouse button just once, as for confirming the operation, but press the left button while dragging the mouse.
So we have seen how to draw a Bézier curve, do not try to be so precise, just a sketch is enough, you can take care of the details later using the "Edit Shapes Tool" tool that we will see later.
Bézier tool options in Krita :
Now let's look at the tool options in the "Tool Options" tab. If you have not already activated this docker, select it in "Settings > Dockers" in the menu .
Coloring and filling the bézier curve: with the bézier tool we can create both open curves and closed shapes, with a certain filling. As you can see in the tool options tab
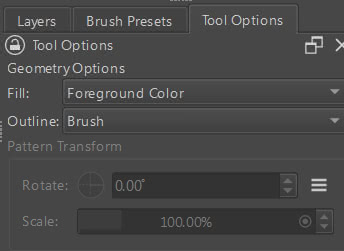
there is both the "Outline" parameter, which allows you to color the line with the foreground color ("Outline: Brush") or the background color ("Outline: Brush (Background Color)") or create a shape without an outline ("Outline: No Outline").
We can also choose what automatic filling the shape can have, painting it with the foreground color ("Fill: Foreground Color"), with the background color ("Fill: Background Color"), with a pattern ("Fill: Pattern") of which we can define rotation and scale (which however, at the time of writing this tutorial, works correctly only when we create the Bézier curve on a painting layer),
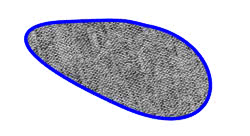
or leaving the shape empty inside ("Fill: Not Filled")
There are also some options that are typical of this tool
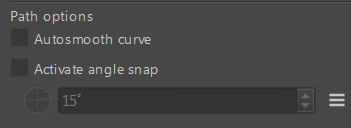
Autosmooth curves: if the "Autosmooth curve" option is active, the curve near the node will always be smoothed even if we create a broken line, without dragging the mouse to expand handles
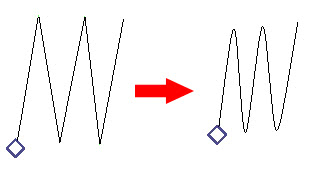
Snap handles on corners: by checking the "Activate angle snap" option, you can activate a snap on the handles, in fact if we insert "30°" in the box below, the handle will change graphic representation (with a more intense hatching) when we rotate it by a multiple of 30 degrees (0, 30, 60, 90 etc.)
Let's modify the Bézier curve with the "Edit Shapes Tool" :
If we have drawn our Bézier curve in a "Vector Layer"
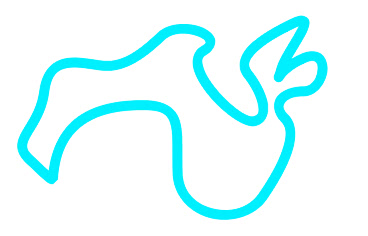
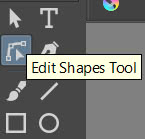
we can modify it later, in a non-destructive way, with the tool "Edit Shapes Tool": simply select it in the left toolbar
and click on the curve that we want to modify
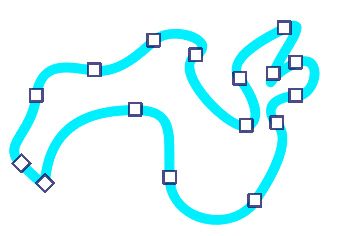
As you can see, all the nodes of the curve have appeared and it is possible to immediately perform some adjustment operations, such as clicking with the left mouse button and dragging not only the nodes and their handles, but also the individual segments
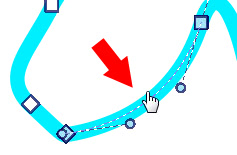
To select the nodes you can click on them or use the rectangular selection (press the left mouse button and drag); to select more than one, hold down the "Shift" key.
The symbols of the unselected nodes contain the color white, the selected nodes are filled with light aquamarine.
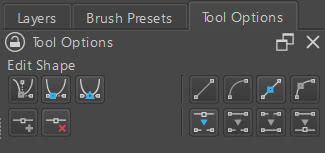
In the options tab of this tool we see the other operations that can be performed
Modify the type of node/handles:
As we have already seen when we selected our curve

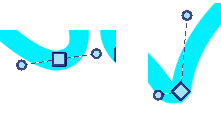
there are different types of nodes, some indicated by squares (with symmetrical handles), others represented by diamonds (with independent handles).
The first three functions in the options tab are used to change the type of node/handles

If we select a node (or multiple nodes at the same time) and press one of the buttons we will get:
A) A node with handles independent of each other, to create sharp and cusp shapes. Its symbol shape is a rhombus.
B) A node with non-symmetrical handles, which can be resized independently but will both lie on the same line. It is used to create smooth curves but with non-symmetrical influences. The node will be represented by a circle.
C) A node with symmetrical handles lying on the same line, suitable for creating anchor points to connect curve sections symmetrically or with the same influence of the handles. The node will be represented by a square.
(As you may have noticed, at the beginning the buttons of the options tab that we are looking at are all gray, when we select the right nodes the symbols inside the buttons become colored)
Tip: If we hold down the "Ctrl" key, clicking several times on a node with the left mouse button we can change its type: a different type will be presented in succession each time we click.
Add or delete a node:

To add a node, you need to select two adjacent nodes (by clicking on them while holding down the "Shift" key, or by using the rectangular selection of the "Edit Shapes Tool") and press the button marked "+". Or you can double-click on the segment between the two selected nodes to generate a new one in the middle.
To delete one or more nodes, simply select them and then press the button with the "X". Or you can press the "Del" key (or the "Backspace" key).
From lines to curves and vice versa:
The following tools transform not only straight segments into curves and vice versa, but also smoothing nodes into corner nodes

1) Transform a segment into a line: the "Edit Shapes Tool" can transform a curve into a line: simply select the two nodes at the ends of a curve
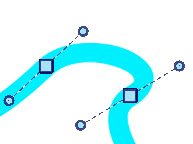
and press the button with the line-shaped icon (or press the "F" key), thus transforming the segment
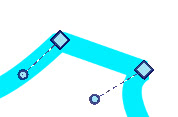
2) Transform a segment into a curve: if in the last situation, in which we transformed the curve into a line, we press the button with the icon depicting a curve (or press the "Shift+C" keys), two handles will appear at the ends of the segment, which will allow us to recreate the curve we want,
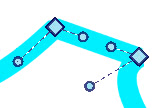
perhaps later transforming the nodes into anchor points with the symmetrical handles.
3) Transform a node into a point of a line: given a point that contributes to generating a smooth curve

pressing this button the node will be transformed into an angular anchor point, like the vertex of a broken line (and visually it seems without handles)

4) Transform a node into a point of a curve: if we consider the node just seen and selected, we can transform it into a node of a curve by pressing this button. Handles will be created automatically
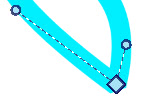
and using the buttons seen before we can transform it into an anchor point with handles

thus smoothing the curve
Cutting and joining Bézier curves:
The last group of functions of the "Edit Shapes Tool" allows you to make cuts and stitch the Bézier curve

5) Cutting in one or more points: if we choose a node
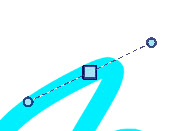
and press the button, the type of anchor point will change, apparently without any other consequences

but if we drag it we notice that in reality they are two overlapping nodes and a cut has been created in the curve. (In the figure the two nodes created, both selected only to display their handles)
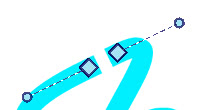
6) Cut a segment of the curve: to cut a segment of the curve just select the nodes on the sides of this segment
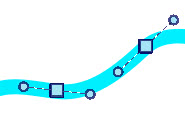
and press this button, obtaining

7) Create a segment between two points: if we select two points of an open curve
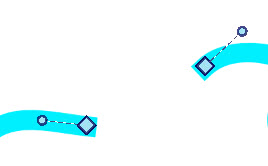
if we use this function by pressing this button (or you can press the "J" key) a segment will be created intermediate
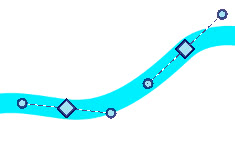
8) Join two separate points: This function joins two separate points.
Returning to the previous example

this time the two nodes will be merged into a single common node
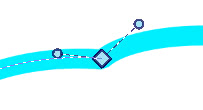
Modifying the Bézier curve with the "Select Shapes Tool" :
Another interesting tool for modifying a Bézier curve already created is the "Select Shapes Tool", also known as the arrow tool, which you can find in the toolbar on the left

Selecting the Bézier curve, which we had previously created, with this tool, some external white squares will immediately appear

We can immediately carry out some operations, such as moving the curve (by pressing the left mouse button and dragging),
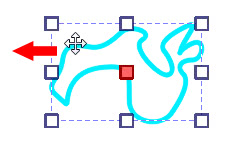
rotate it (with the cursor changing shape near the square symbols located at the corners),
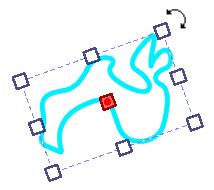
deform it (with the cursor changing shape near the median square symbols)

or resize it (by dragging the squares)

To maintain the proportions while resizing, simply press the "Shift" key when dragging the squares with the mouse, after pressing the left button, or in the tool options, in the geometry tab, select the option with the "chain" icon.
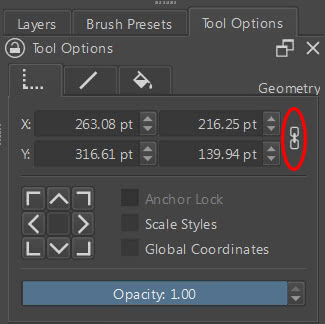
Resize the curve section as well: to also resize the curve section, when we drag the relative square with the mouse, simply activate the "Scale Styles" option, which is located a little further down in the previous figure of the tool options.
If the option is disabled, only the curve will be scaled and the stroke will remain unchanged
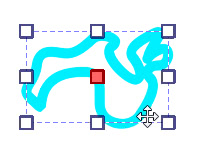
While if we activate the "Scale Styles" option, the stroke will also be scaled

Global or local coordinates: to activate global coordinates, simply activate the "Global coordinates" option, which can be useful when creating animations.
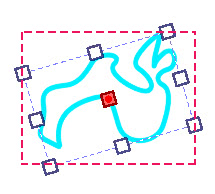
However, it must be taken into account that when we rotate the figure

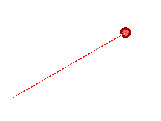
if we use local coordinates (i.e. with the "Global coordinates" option deactivated) the width and height are always those of the starting figure, while with global coordinates activated the widths and heights indicated in the tool options are those of the envelope rectangle (in the following figure indicated by the red dotted line) of the rotated vector figure
Modify the stroke: in the "Stroke" tab you can change the type of stroke to null, solid or gradient; for the gradient
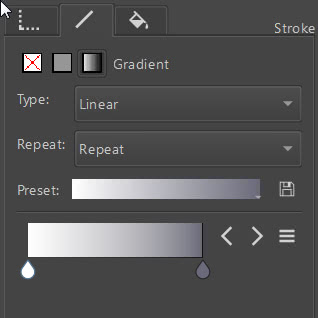
you can choose the type, whether radial or linear, also useful for creating light effects;
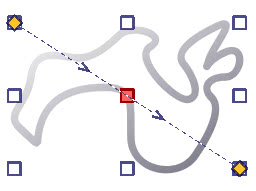
you can choose to repeat the gradient or not, or even mirror it; you can choose between several presets and obviously choose the colors of the gradient.
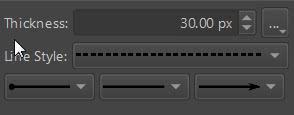
Below you can see the menus to change both the thickness of the stroke already drawn and those to transform the line from continuous to dashed with various styles.
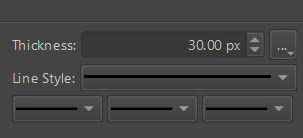
If we use the central one by choosing one of the hatching options
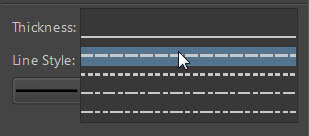
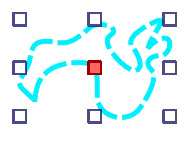
the curve will immediately become dashed
the three drop-down menus at the bottom are used to insert symbols at the beginning, in the middle and at the end of the curve. The symbols are provided with different sizes,

but all depend on the "Tickness" thickness indicated above.
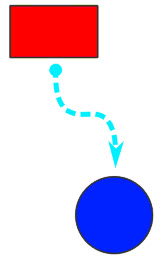
Let's see an example: if we want to create an illustration in which we want to represent the logical connection between two objects (here a rectangle and a circle, connected by a bézier curve)
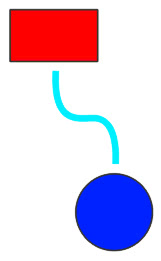
we can outline the curve, decrease the thickness a little, choose a circle for the starting point and an arrow for the arrival point
thus obtaining
To the right of the "Thickness" field we see a drop-down menu with which we can, for example, smooth or not the end part of a curve.

Changing the filling of a bézier curve: in the "Fill" tab we find the options to define the filling of the curve, which can be null, a single uniform color (solid) or the gradient, with the options we saw before. Also interesting is the "Gradient Mesh" option
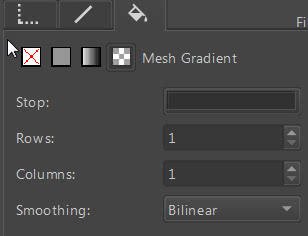
which not only allows you to modify the area of the gradient with handles,
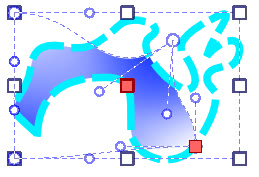
but by selecting one of the nodes of this mesh (for example the one on the bottom right), we can change the relative "stop" color

providing an additional degree of freedom to the gradient;

if we then increase the number of rows and columns
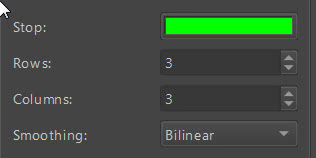
the subdivision of the mesh will increase and we can decide to build multiple gradients with the colors we want where we want
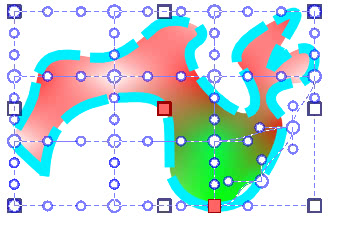
Filling a non-closed vector curve: the filling function can also be used in non-closed curves, to create particular effects
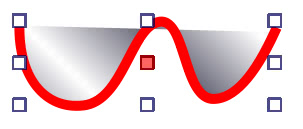
or as a basis for creating illustrations
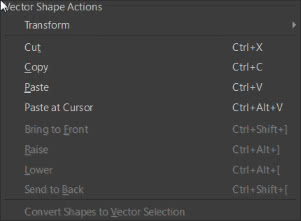
Bringing to the front and back and transforming vector curves: Always using the "Select Shapes Tool" in a vector layer, clicking on a curve or a vector object with the right mouse button, a context menu will appear with various functions, including those for bringing the active curve to the front or back (with respect to the other vector objects present in the layer), or useful transformations such as 90 and 180 degree rotations, or horizontal and vertical mirroring.
Using Beziers in the "Paint Layer" :
By drawing a Bezier curve on a painting layer we cannot subsequently modify it, but we can use the custom brushes that we usually use for painting. For example, if we select the brush "Pencil-6 Quick Shade"
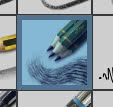
and draw a curve
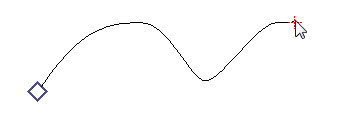
once confirmed with the "Enter" key, we obtain the curve drawn with the preselected brush

Therefore with the possibility of creating interesting distributions along a curve, using custom brushes

With this we have concluded this tutorial on Bézier curves, in all their facets and functions. Even if Krita is famous for digital painting, this tool is undoubtedly useful, to be used alone or as a support for the freehand brush. Happy painting!
