Krita guide to new shortcuts/hotkeys and pdf
In this guide we present the main shortcuts/hotkeys for Krita (tested in version 5.2.2), to be used with keyboard and mouse, with a brief explanation of the functions they are associated with. At the bottom of the page you can download a document in pdf format with the list of shortcuts.
We have re-divided/grouped the shortcuts by topic in order to give a more concise and efficient setting:
- Brushes
- Brush Blending Mode
- Colors
- Canvas display management
- Resize an image in Krita
- Tools to select
- Other useful drawing tools
- File management
- Edit
- Layers
- Vector layers and objects
- Filters
- Help
- Animation
- Gestures
- Organize and activate your favorite scripts
As a convention we denote by:
LMB = Left Mouse Button
MMB = Medium Mouse Button (middle button of the mouse pressed, or wheel pressed in mice that are equipped with it)
RMB = Right Mouse Button
Drag = after pressing the keys, drag the mouse
Since computer keyboards are not the same for all countries of the world, we have sometimes presented some alternatives for the hotkeys (if at the moment you can't find the right keys, don't despair and experiment, keeping an image of an American international keyboard in front of your eyes)
In most functions, to confirm an action use the "Enter" key, to cancel it use the "Esc" key.
Let's examine shortcuts/hotkeys, starting with brushes, the most used tool in Krita
Brushes:
Choose the brush tool: B
To choose the brush tool simply press the "B" key (from "Brush") on your keyboard.

Line tool in Krita: V
If we are using the brush tool, holding down the "V" key you can use the line tool (which works by clicking on the left mouse button and dragging), releasing the key you will return to the brush tool.
To change the size of the brush there are several alternatives
Increase brush size: ] (or "ì" or "Alt Gr"+"+")
Decrease brush size: [ (or "'" or "Alt Gr"+"è")
or
Change brush size: shrinks with "Shift"+LMB+"drag left", enlarges with "Shift"+LMB+"drag right"
which correspond to dragging, with the mouse, the cursor in the top menu of Krita

You can also increase or decrease the opacity of the brush, because sometimes we don't want the effect of the stroke (or the extent of erasing with the eraser) to be particularly evident
Increase brush opacity: O (the letter "o" on the keyboard)
Increase brush opacity by 10%
Decrease brush opacity: I (the keyboard letter "i")
Decrease the brush opacity by 10%.
When we paint, we color the outline of a person or object with a base color, then use a slightly darker color to draw the shadows and a slightly lighter color to highlight the areas hit by the light.
Make brush color darker: K
Make brush color lighter: L
With which we will then be able to paint lights and shadows faster
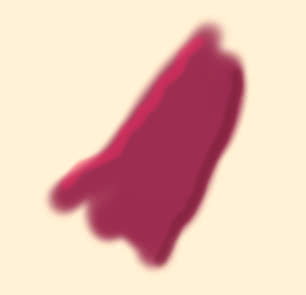
which we will then go to blend (with the appropriate "Blender Blur" brush)
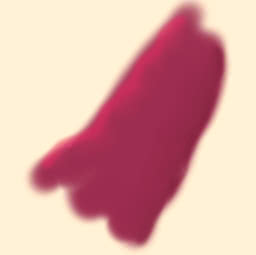
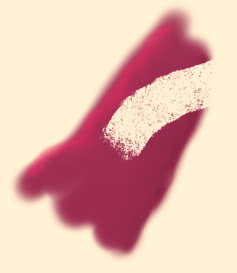
Set brush erase mode: E
By pressing the "E" key it activates the erase mode for the active brush we are using

In this way we can also obtain particular cancellations; for example using the brush that simulates the charcoal tool as an eraser
Show available brush types: F6
By ressing the "F6" function key the available brushes are quickly shown, so we can also avoid activating the display of the relative panel (convenient if we are using the full screen to paint on the canvas)

Select the previous brush: "."
Select next brush: ","
Select the previous and next brushes from the list in the Brush panel. It becomes especially useful when we have organized brushes into a small group of few brushes, whose relative positions we know
Switch back to the previously used brush and vice versa: / (or "ù")
If we are currently using only two brushes (a brush and an eraser, or a brush and a smudge, or one that colors and the other that traces the outlines etc.), it can be convenient to be able to switch from one to the other quickly, using the "/" key
Show brush properties: F5
By pressing the "F5" function key, the window in which to change the brush properties is shown; also because the default brushes do not always correspond to our needs and it may be necessary to change its parameters "on the fly" before using it

Show/hide the palette: click right mouse button
Shows the palette where you can quickly choose colors, brushes, their size and opacity and much more
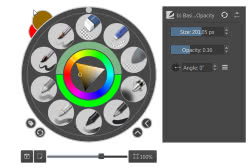
To hide the palette just click the right mouse button again.
Organize and activate your favorite brushes: Ctrl+Alt+number
We can use the "Ten Brushes" script, which can be called from the "Tools" menu

to organize ten of our favorite brushes

and place them in their numbered boxes, so we can activate the brush that is in the first box with Ctrl+Alt+1, the brush that is in the second box with Ctrl+Alt+2 ... the brush that is in the ninth box with Ctrl+Alt+9, the brush that is in the tenth box with Ctrl+Alt+0
Brush Blending Mode:
Similarly to when we want to superimpose two layers, even when we want to paint within the same layer we can use different blending modes, which allow us to obtain particular effects both when we want to add something special to our drawing and when we paint normally and we want, for example, to add lights and shadows to objects or characters.
The drop-down menu for choosing the blending mode is located at the top, below the main menu

If we select, for example, the Burn tool we get

To navigate within the drop-down menu and choose the most commonly used blending modes:
Previous blending mode: Alt+Shift+"-"
Next blending mode: Alt+Shift+"+"
Behind: Alt+Shift+Q
Clear: Alt+Shift+R
Burn: Alt+Shift+B
Color: Alt+Shift+C
Color Dodge: Alt+Shift+D
Darken: Alt+Shift+K
Difference: Alt+Shift+E
Dissolve: Alt+Shift+I
Exclusion: Alt+Shift+X
Hard Light: Alt+Shift+H
Hard Mix: Alt+Shift+L
Hard Overlay: Alt+Shift+P
Hue: Alt+Shift+U
Lighten: Alt+Shift+G
Linear Burn: Alt+Shift+A
Linear Dodge: Alt+Shift+W
Linear Light: Alt+Shift+J
Luminosity: Alt+Shift+Y
Multiply: Alt+Shift+M
Normal: Alt+Shift+N
Overlay: Alt+Shift+O
Pin Light: Alt+Shift+Z
Saturation: Alt+Shift+T
Screen: Alt+Shift+S
Soft Light: Alt+Shift+F
Vivid Light: Alt+Shift+V
Colors:
Select a color from the canvas:
Select the foreground color with the color sampler: P
By pressing the "P" key it selects the color sampling tool;

if we use it by clicking on the various parts of the images, the foreground color of the pixel under the cursor will be assigned, regardless of the selected layer.
Select the foreground color using a drawing tool: Ctrl+LMB
This option can also be convenient when we create our color palette directly on the drawing sheet from which we will be able to draw colors quickly and practically when we are drawing with the brush tool;

in fact, just press the "Ctrl" key and (also visually, by changing the cursor icon) the tool will transform from a brush into a dropper, so let's sample the color on one of the "spots" present (pressing the left mouse button) and continue to draw after releasing the "Ctrl" key.
This function can also be used with other drawing tools such as the line tool, bezier tool, circle tool, rectangle tool, etc.
Select the foreground color, only in the selected layer, using a paint tool: Ctrl+Alt+LMB
In this case the colors of the current layer are sampled, even if hidden by colors and drawings of the following layers.
In the same way we can sample the background colors, but by clicking on the right mouse button
Select the background color using a drawing tool: Ctrl+RMB
Select the background color, only in the selected layer, using a paint tool: Ctrl+Alt+RMB
Choosing and setting a color:
One of the most usual ways to select the foreground color, and the background color, is to click on the small squares at the top, just below the menu

so there are shortcuts for them too
Reset foreground color and background color to black and white: D
By pressing the "D" key it returns the foreground and background colors to their original state, i.e. black for the foreground color and white for the background

Swap foreground color and background color: X
By pressing the "X" key you can invert the foreground color with the background color.

Show history of colors used: H
A very useful tool is the history of colors used
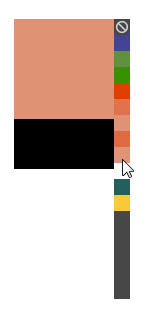
which allows, for example, to recall that particular color whose tone we no longer remember or to exceed the memorization limit of the two primary and secondary colors, which we may not want to modify.
Show color picker: Shift+I
By pressing the "Shift+i" key the color picker appears,

which allows you to select the color as in the dedicated panel, using the left mouse button to select the foreground color and the right mouse button to select the background color
Show the Wide Gamut Color Selector: Shift+O
By pressing the "Shift+o" keys the selector appears which allows you to select colors in wide ranges instead of just sRGB.
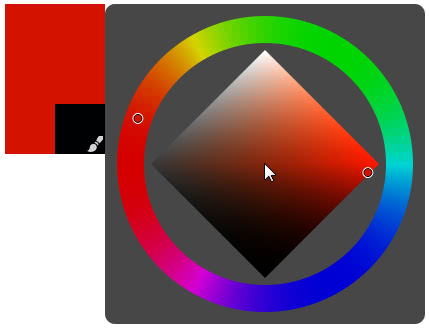
It can also be activated as a panel in Setting > Docker, in which it can be configured by clicking on the relevant icons.
Show MyPaint shade picker: Shift+M
By pressing the "Shift+M" keys, the shade selector that was imported from MyPaint appears; this allows, starting from the current foreground color, to select more shaded varieties or those that are close to other colors
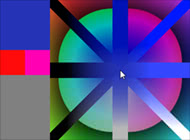
Show a minimal shading selector: Shift+N
like the previous one, but it has a minimal interface and with less possibility of variation

Show the common colors of the current image: U
By pressing the "U" key, a superimposed panel will appear, initially empty. By clicking on the icon in the shape of circular arrows, the "common colors" of the image will be calculated, making an average if there are gradients or shadings. For example, here in the figure we see 3 shaded circles drawn in blue, green and yellow

Using this tool, a palette will appear containing not only the blue, green and yellow colors, but also some of the colors given by the fusion of these three primary colors, since they also blend in the drawing.
Coloring:
Once we have selected the colors, we can start painting, not only with brushes but also filling areas instantly, thus speeding up the work.
Filling tool (bucket): F
By pressing the "F" key it activates the fill tool, which has a bucket icon

which uses the foreground color and can fill an entire layer, a selection, or an area bounded by a color. In the tool options panel you can adjust the threshold, diffusion etc.
However, there are also faster and more specialized tools, which can help on certain occasions
Fill a selection or layer with the foreground color: Shift+Backspace
Just position yourself in a layer or use the selection tool and then press "Shift+Backspace" to completely paint the whole layer or inside the selection. Convenient for quick coloring of backgrounds or profiles of characters. It always colors in a full way, without taking into account transparency or anything else.
Fill a selection or layer with the background color: Backspace
Like the previous function but using the background color
Fill a selection or layer with the foreground color (opacity): Ctrl+Shift+Backspace
Fills the layer or selection with the foreground color, taking opacity into account, for example if the opacity is 33% it fills with the foreground color at 33% opacity.
Fill a selection or layer with the background color (opacity): Ctrl+Backspace
Like the previous one, but with the background color
Gradient tool: G
By pressing the "G" key it activates the gradient tool

which creates a gradient from the foreground color to the background color or transparency, depending on the type of gradient chosen

Also of this tool you can control the settings in the options panel
More color tools:
"Soft Proofing" CMYK preview: Ctrl+Y
Shows a preview of the image in a CMYK color model. To go back to RGB, simply press the "Ctrl+Y" keys again
Activate "Out of Gamut Warning": Ctrl+Shift+Y
To be used together with "Soft Proofing", shows which colors deviate the most from the original color model (resulting in loss of contrast or otherwise)
Quickly change the exposure value for HDRI: Y+LMB and drag
To be able to paint an HDRI in Krita it is necessary to activate the OpenColorIO (OCIO) color manager, to do this we activate the "LUT Management" panel in "Setting > Docker" and select "OCIO" as the "Color Engine"
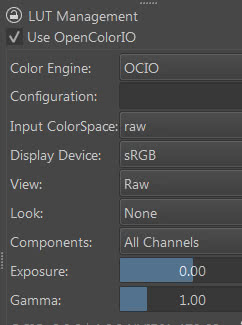
To quickly increase or decrease the exposure value, press the "Y" button; a square cursor with "+ and -" will appear,

keeping it pressed, we also press the left mouse button, if we drag the mouse upwards we increase the value, downwards we decrease it.
Canvas display management:
Moving the Canvas:
How to move the canvas (Pan): MMB and drag, or Space Bar key+LMB and drag
To move the canvas we are painting on in Krita, simply press the middle mouse button and drag. The cursor will turn into a hand clenched into a fist to indicate grip on the paper.
If you have a wheel on your mouse, just press down on the wheel and drag the mouse. If on the other hand there are only two keys on the mouse, or for some reason we are unable to press the middle key, alternatively you can press the space bar and the left mouse key and then drag.
Rotate the canvas:
Sometimes it can be useful to rotate the drawing paper, to allow you to use your hand easily on the graphics tablet, depending on the direction in which you are painting.
Rotate the canvas with the mouse: Shift+MMB and drag (or Shift+Spacebar+LMB and drag)
By pressing the Shift key on the keyboard and the middle mouse button and dragging, you rotate the canvas continuously. Alternatively you can press the Shift key, the space bar and the left mouse button and drag. Note that the shortcuts are similar to those for moving, only with the addition of the Shift key.
Rotate the canvas with the mouse in discrete steps: Shift+Alt+Spacebar+LMB and drag
This key combination rotates the canvas in discrete steps of 15 degrees
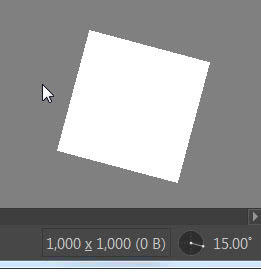
You can also rotate the canvas using only the keyboard keys
Rotate the canvas to the left with the keys: Ctrl+[ (or Ctrl+')
Rotate the canvas to the right with the keys: Ctrl+] (or Ctrl+ì)
and in a similar way to before we can rotate the canvas using the keys, following discrete steps of 15° each
Rotate the canvas to the left with the keys, with discrete steps: 6
Rotate the canvas to the right with the keys, with discrete steps: 4
6 and 4 are the keys representing numbers in the keyboard, located above the letters
Reset each rotation of the canvas: 5
Pressing the 5 key returns the canvas to its original position, straightening it
Canvas zoom:
Also in this case we can use both the mouse and the keyboard
Zoom In using the mouse: roll the mouse wheel up
Zoom Out using mouse: roll the mouse wheel down
or (if you don't have a scroll wheel on your mouse)
Zoom with the mouse: Ctrl+MMB and drag (or Ctrl+Spacebar+LMB and drag)
This activates the Zoom tool and the round lens icon appears as mouse cursor
Discreet zoom with the mouse: Ctrl+Alt+MMB and drag (or Ctrl+Alt+Spacebar+LMB and drag)
A cursor with a square lens will appear and the zoom will take place in discrete steps (assuming predefined values, for example 66.7%, 50%, 33.3%, 25%, 16.7% etc.)
The zoom with the keyboard, on the other hand, takes place only through discrete values
Discreet Zoom In using the keyboard: "+" on Numpad (or "=" or "+" on keyboard)
Discreet Zoom Out using keyboard: "-" on Numpad (or "-" on keyboard)
other useful functions for zooming in Krita:
Zoom reset (100%): 1 (or Ctrl+0)
Pressing key 1 brings the zoom back to 100%
Zoom to fit the canvas to the page: 2
If, proportionally, the canvas is wider than tall compared to the available area, the canvas will expand to its full width until it touches its edges,
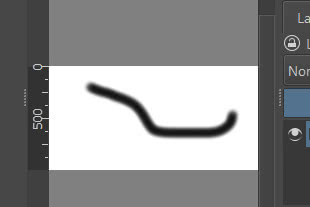
otherwise in its full height.
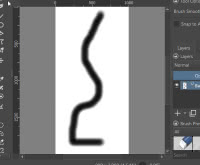
Zoom to fit the canvas widthwise to the page: 3
Whatever the aspect ratio of the page and the canvas, it stretches the dimensions of the canvas to fit the width of the page (so if it is taller in relation to the width than the page, it will be cropped above and below).
Activation of "Instant Preview Mode": Shift+L
By pressing the "Shift+L" keys it activates the instant preview mode, which optimizes allowing you to edit and view on a smaller preview while Krita edits the extended image in the background (so the smaller the canvas on the screen, the faster the image changes will be displayed on the screen)
Full Screen Canvas:
Krita in full screen mode: Ctrl+Shift+F
By pressing this combination of keys, the Krita interface will be displayed in full screen, ie with the window maximized, with no caption at the top and no operating system bar at the bottom. You will only see Krita. To return to the previous mode, simply press the "Ctrl+Shift+F" keys again
Show only the canvas in Krita: TAB
Useful when you are painting and want to see only the canvas and nothing else; to return to the previous situation, simply press the "TAB" key again. (It is especially in this mode that the shortcuts for Krita are useful, so we can keep the canvas full screen for as long as possible)
Resizing an image in Krita:
There are several ways to resize the image that we are creating:
Resize image in Krita: Ctrl+Alt+I
This function allows you to enlarge or reduce the image by acting on its dimensions; in fact by pressing the "Ctrl+Alt+I" keys a popup window will appear in which we can set the dimensions in pixels (or in percentage) for the screen display, or the resolution for the print

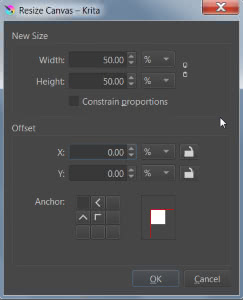
Resize the canvas in Krita: Ctrl+Alt+C
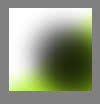
In this case, instead, only the canvas we are working on is resized, keeping the image already drawn intact; in fact given the picture
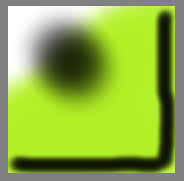
By pressing the keys "Ctrl+Alt+C" the popup window will appear with which we can shorten the canvas, for example by 50% towards the upper left corner
with result
But if we double the size of the canvas
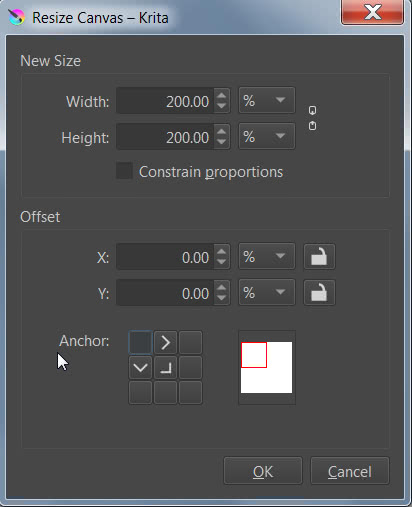
the previously hidden part of the image will be recovered unchanged

Crop tool: C
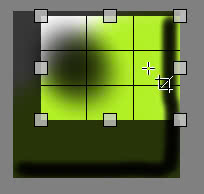
By pressing the "C" key it activates the hand crop tool

a very flexible tool, which allows you to precisely cut the image (also displaying the rule of thirds grid) by dragging the edges
Tools for selecting:
The selection tools are not only used for copying and pasting, but also for other purposes, such as taking portions of a drawing to modify them and thus create an animation.
Rectangular selection tool: Ctrl+R (then LMB and drag, with Shift for a possible square selection)
By pressing the "Ctrl+R" keys it activates the rectangular selection tool

To view and use it, press the left mouse button and drag the mouse. If you then hold down the "Shift" key while dragging, the selection becomes square.
Elliptical selection tool: J (then LMB and drag, with "Shift" for a possible circular selection)
It works as in the previous case of the rectangular selection: you press the "J" key to activate the elliptical selection tool

To draw the elliptical selection, press the left mouse button and drag, immediately pressing the "Shift" key instead creates a circular selection.
Move selection: Alt (before releasing left mouse button)
When making the selection, if you hold down the "Alt" key before confirming the sizing, you can move the selection
Select entire canvas: Ctrl+A
To select the whole canvas, press the "Ctrl+A" keys (only later will you decide whether to copy just one layer or all)
Invert a selection: Ctrl+Shift+I
Inverts the selection, i.e. selects all canvas outside of the one that was selected before.
Deselect: Ctrl+Shift+A
Deactivate a selection
Reselect: Ctrl+Shift+D
Redo the previous selection
Show/Hide selection: Ctrl+H
Always affects the same selection, showing or hiding it (without deleting it from the layers panel)
Feather a selection: Shift+F6
It is used to soften the effects of the edges of a selection, which will be graphically noticeable when we paint inside it or use it to erase part of an image.
By pressing the "Shift+F6" keys the popup window for setting the feather radius will appear

On the selections just seen we can apply some boolean operations, when we have selected the tool, just before drawing them:
Add (join) selection mode: Shift
If we have already made a selection
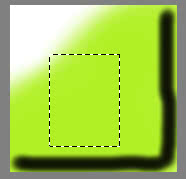
again select the selection tool (for example the rectangular one, but it also works with the others) and press the "Shift" key before making the selection we want to add to the existing one, a "+" will appear in addition to the other graphic symbols
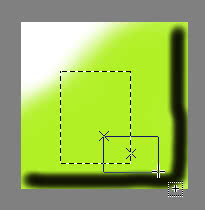
and after finishing the selection we see that it has been added to the previous one
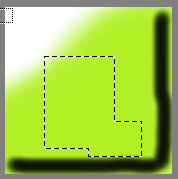
Subtract (difference) selection mode: Alt
If we press the "Alt" key before making the new selection, the "-" symbol appears
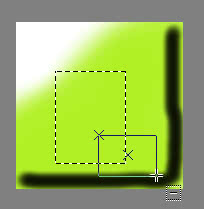
Once the selection has been made, it will be subtracted from the one already present
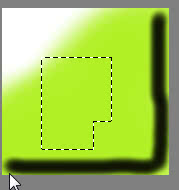
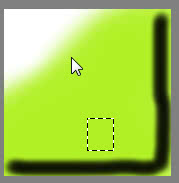
Intersection selection mode: Shift+Alt
If we press the "Shift+Alt" keys and then activate the selection, no additional symbols will appear

once the selection is finished, only the intersection between the two selections will remain
Other useful drawing tools:
Move tool: T

Allows you to move the currently selected layer, a layer group (by selecting the group in the layers panel), or the contents of an active selection.
Also pressing the "Ctrl" key moves all layers.
Move with the keys: Up Arrow, Down Arrow, Left Arrow, Right Arrow
When we have selected a vector object, but also a layer or a painted area and then selected the move tool, we can move it not only with the mouse but also with the keyboard, using the arrows.
Move faster with the keys: Shift+Arrow up, down, left, right
As we have just seen, it is possible on some occasions to move elements with the keys; pressing the "Shift" key will also move them faster (with greater variation).
Transform tool: Ctrl+T (and "Shift" if you want to keep the aspect ratio)
Pressing the "Ctrl+T" keys brings up the transform tool
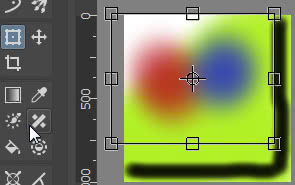
Which allows you to move, rotate, warp a selection, the current layer or groups of layers. Pressing the "Shift" key while resizing keeps the aspect ratio.
Mirroring:
Temporary mirror view: M
Given an image
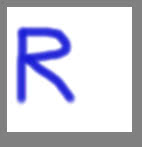
pressing the "M" key creates a temporary mirror image
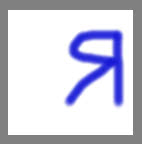
Which has nothing to do with the horizontal and vertical mirror tool that you find under the menu

Mirror view around cursor: Alt+M
While the previous mirroring was done with respect to the vertical axis, with this function we can perform it more precisely around the cursor. However, it must be taken into account that these specularities are not calculated with respect to the image but with respect to the space, the view, where the canvas is located in Krita, so if we have the cursor in the center of the view and a small canvas on the right
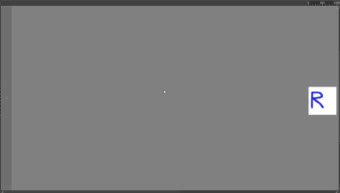
the symmetrical image will be "catapulted" to the left
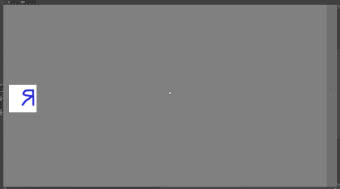
Therefore it works correctly, as we would expect, only in cases of a large canvas compared to the view in Krita.
Multi-Brush tool: Q
Although the multibrush has many features, including the ability to draw with multiple brushes in parallel, this tool allows you to draw simultaneously in multiple directions, using a central symmetry
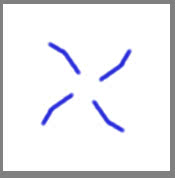
In the tool options panel you can change the number of brushes, the position of the origin and more.
Wrap around mode: Shift+W
When we are drawing a texture that must be seamless, if we want to check that our work is taking place correctly, we activate this mode and our canvas will be duplicated contiguously both vertically and horizontally
Snap:
With the snap function we can keep the elements present in our drawings in order, because we can align selections, vector objects, lines and much more to the grid provided by Krita
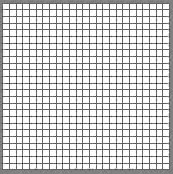
Show Grid: Ctrl+Shift+' (or Ctrl+Shift+à)
Shows the grid to which the snap should be associated
Show snap options: Shift+S
The snap can be associated not only with the grid, but also with other elements, such as guides. Pressing the "Shift+S" keys shows all the tools for which it is possible to activate it.
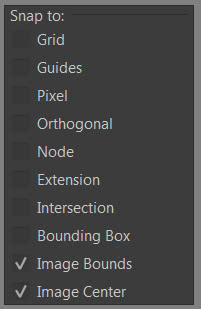
Bind snap to grid: Ctrl+Shift+; (or Ctrl+Shift+è)
Bind the snap to the grid directly, without going through other menus. It can be active even if the grid is not visible (while even if the grid is visible it is not necessarily active)
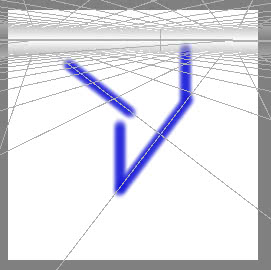
Toggle snapping to assistants: Ctrl+Shift+L
If with Krita we have to make drawings in perspective, once we have activated the assistant tool

and drawn the grid for perspective
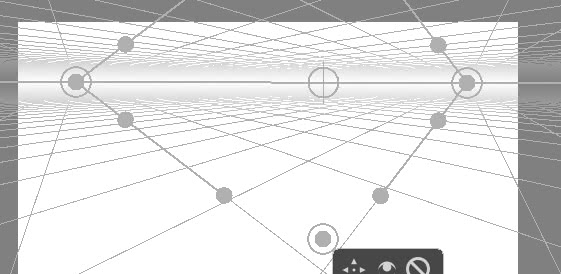
having chosen the brush tool, by pressing the "Ctrl+Shift+L" keys we can activate the snap to the assistants, as also seen in the tool options panel,
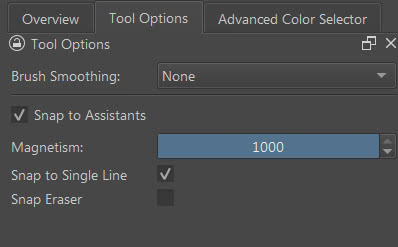
and the stroke of our drawing will be magnetized towards the guides
File management:
Below are the shortcuts of the functions that we also find in the relative menu.
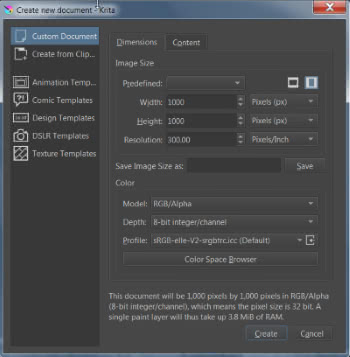
New file: Ctrl+N
By pressing the "Ctrl+N" keys the popup window for the settings of the new document appears
Open file: Ctrl+O
Opens the file browser to load a project
Save file: Ctrl+S
Command to save the file, the first time a project is saved it also opens the browser to indicate the location on disk and the type of file. To memorize because this shortcut should be used often.
Save as: Ctrl+Shift+S
It can be used to save a copy or the file with another name, since it always asks where to save the file, what to call it and what format to give it.
Save incremental backup: F4
By pressing F4 it creates a copy of the backup file: if our project is saved in the file ourprojectname.kra, every 15 minutes Krita will save the situation of the current project in a backup file ourprojectname.kra~ , so if krita crashes it will be restored the session, loading the project from this file containing the "photograph" taken periodically. However, the backup file is rewritten from time to time, so you may need to save a copy of its configuration at certain times.
By pressing the function key "F4" we can create incremental numbered copies of this backup ourprojectname~000.kra, ourprojectname~001.kra, ourprojectname~002.kra, ourprojectname~003.kra etc. However, the main project file will always remain ourprojectname.kra .
Save incremental version: Ctrl+Alt+S
As in the previous function, we can incrementally save various versions of a hypothetical project ourprojectname.kra, with names that will take the form ourprojectname_001.kra, ourprojectname_002.kra, ourprojectname_003.kra etc. The file Krita is currently using will be the one saved last (eg: ourprojectname_003.kra).
It is useful if your work proceeds by successive steps and for each step you want to save (and eventually you want to go back or later view what has been achieved in the various steps) but creating a project file with a new name.
Close: Ctrl+W
Close the active project
Close all: Ctrl+Shift+W
Close all projects currently open in Krita
Quit: Ctrl+Q
Closes the Krita software
Edit:
In the "Edit" menu there are many functions that are useful during work
Undo: Ctrl+Z
Undo the operation just performed, by pressing the "Ctrl+Z" keys several times you can go back up to 30 operations (this value can be changed in the "General" tab of the Krita configuration)
Redo: Ctrl+Shift+Z
It repeats the last undone action, if we have undone several operations, by pressing the "Ctrl+Shift+Z" keys several times we can restore them, according to their order of execution.
Clean: Del
Erases everything in a selection or in one or more selected layers.
It is also a convenient function when making quick sketches, because it allows you to quickly clean the canvas as if it were a blackboard
Copy: Ctrl+C
Copy a layer, a selection into the selected layer, a shape etc.
Merged copy: Ctrl+Shift+C
Copies everything you see within a selection, even if spread across multiple layers
Cut: Ctrl+X
Same as Copy only that deletes the copied part, copying it to the clipboard
Paste: Ctrl+V
Paste the stored image into a new layer (to paste it into the active layer, select its function in the "Edit" menu)
Paste as reference image: Ctrl+Shift+R
Paste the stored image as a reference image (after asking which color profile to choose), which we can drag off the canvas and it will be independent of it
Paste at Cursor: Ctrl+Alt+V
Paste the stored image starting from where the mouse cursor is positioned
Paste into new image: Ctrl+Shift+N
A new project is created and the new image is pasted there (after asking which color profile to choose)
Layers:
Add Paint layer: Ins
Adds the layer you use to draw and paint
Add Vector layer: Shift+Insert
Adds a layer suitable for vector shapes and curves
Remove layer: Shift+Del
Delete the selected active layer
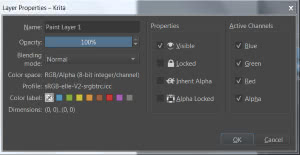
Layer properties: F3
By pressing the "F3" function key, the popup window appears where you can view and set the properties of the selected layer
Rename the current layer: F2
Pressing "F2" activates the possibility of modifying the label of the currently selected layer.
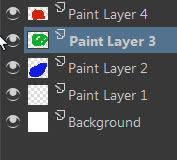
Given this configuration of layers (with labels containing decreasing numbers, from the highest layer to the lowest)
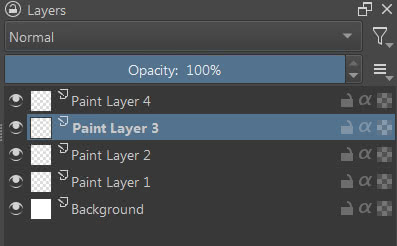
let's examine the following functions and their shortcuts:
Select next layer up: PgUp (or Up Arrow if focus on layers panel)
If the layer "Paint Layer 3" was active before, now "Paint Layer 4" will be activated
Select next layer down: PgDown (or Down Arrow if focus on layers panel)
If the layer "Paint Layer 3" was active before, now "Paint Layer 2" will be activated
"PgUp" and "PgDown" always work, even when we are painting, while the arrows work only when the focus is on the layers panel (just click on the current layer)
Activate, select, consecutive layers: Shift+LMB (or Shift+Arrow, up or down, if focus on layers panel)
Activate previously selected layer: ";" (or "è")
If previously the layer "Paint Layer 1" was active and now "Paint Layer 3", by pressing the ";" (or "è", depending on the type of keyboard) "Paint Layer 1" is selected.
Activate the top layer: Home
The topmost layer is activated, in our case "Paint Layer 4"
Activate the lower layer: End
The lowest layer is activated, in our case "Background"
Move layer or mask down: Ctrl+PgDown
If the layer "Paint Layer 3" was active, pressing the "Ctrl+PageDown" keys will move it below "Paint Layer 2"
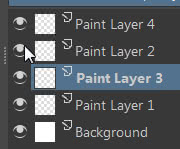
Move layer or mask up: Ctrl+PgUp
If "Paint Layer 3" was active, pressing "Ctrl+PageUp" will move it above "Paint Layer 4"
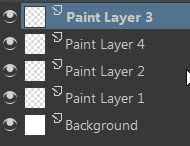
Select a layer in the image: R+LMB
A layer can also be selected just by clicking on an image. If we create drawings on several layers
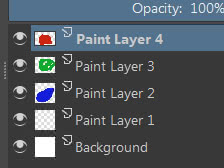
and we have, for example, selected the "Paint Layer 4" layer (which corresponds to the red drawing), we can select the "Paint Layer 3" layer by clicking on the green drawing found in that layer: we position ourselves on the green drawing, press the "R" and the mouse cursor changes to a stack of squares (the layers)
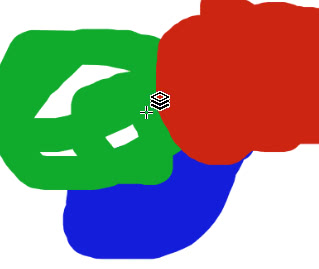
holding down the "R" key, clicking on the green drawing with the left mouse button selects the "Paint Layer 3" layer that contains it.
Select multiple layers from image: Shift+R+LMB
It looks like the previous function, only that it gives the possibility (by clicking on multiple parts of the overall image) to select multiple layers.
Copy selection to new layer: Ctrl+Alt+J
Going back to the previous example, if in "Paint Layer 4" we create a selection
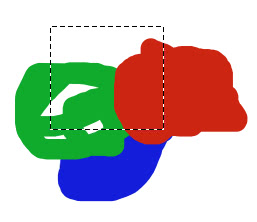
by pressing the "Ctrl+Alt+J" keys we can quickly create a new layer (having the same name), with the content of the selection already included
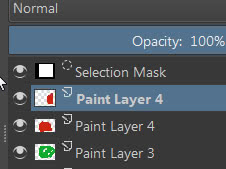
Cut selection and paste it onto a new layer: Ctrl+Shift+J
As in the previous case, only it cuts the selected part from the previous layer
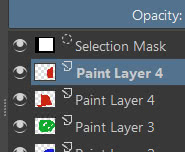
Duplicate the current layer or mask: Ctrl+J
Duplicate the selected mask or layer (or layer sets), adding the "Copy of" prefix to the generated copies.
Merge with the layer below: Ctrl+E
Merges the currently selected layer with the layer below it, taking the latter's name.
If there is a group below the current layer, the group and all of its contained layers will also be merged together.
Flatten the image (Merge all layers): Ctrl+Shift+E
Merges all images, both layers above and below
Groups:
Group layers: Ctrl+G
Move the current layer or selected layers to a new group. Pressing the "Ctrl+G" keys several times creates several nested groups
Quick clipping group: Ctrl+Shift+G
Create a group containing the previously selected layers, with a masked layer above it that inherits the alpha channel from the underlying layers (so you can only paint where it is occupied by the underlying drawings)
From our example, creating a clipping group from layers 2 and 3
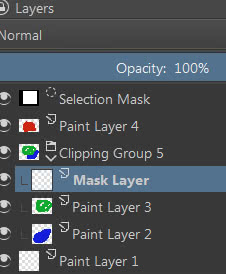
Ungroup from group: Ctrl+Alt+G
Removes the selected layers from the group. If the group remains empty, it is deleted.
Layers and vector objects:
A vector layer is a type of layer suitable for containing vector elements such as those generated by the rectangle, ellipse, polygon, bezier, or text tool. These can also be drawn in generic layers for drawing, but afterwards it will no longer be possible to act on their vertices and relative handles, thus losing all the advantages of their vectorial properties. So when we talk about vector layers, we have to include the related tools and their shortcuts as well.
How to create a vector layer: Shift+Ins
Create a new vector layer, which is marked with a particular icon

Rectangle tool: Shift+R (later "Shift" for square)
By pressing the "Shift+R" keys it activates the rectangle tool

To draw the rectangle, click with the left mouse button on the canvas and drag. If you press the "Shift" key immediately afterwards, you will instead draw a square.
Ellipse tool: Shift+J (later "Shift" for circle)
Pressing the "Shift+J" keys activates the ellipse tool

To draw the ellipse, left click on the canvas and drag. If you immediately press the "Shift" key, a circle will be drawn instead.
Once several vector figures have been created in the vector layer, you can move them "vertically" within the layer itself. For example, if we have 3 figures in the same vector layer:
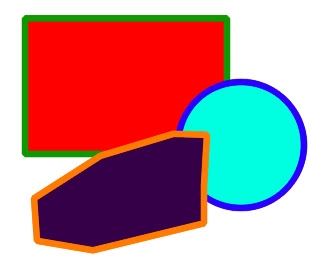
if we use the select tool

and select the topmost object

we can use some functions:
Place element lower: Ctrl+Alt+[ (or Ctrl+Alt+')
By pressing the keys "Ctrl+Alt+[", or "Ctrl+Alt+' " depending on the keyboard, we move the selected object to the second position under the circle
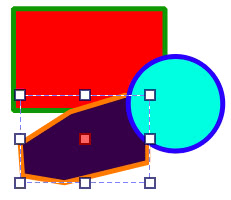
(if we pressed them again it would end up under the rectangle, in third position)
Move item to top: Ctrl+Alt+] (or Ctrl+Alt+ì)
By pressing instead the keys "Ctrl+Alt+]", or "Ctrl+Alt+ì" depending on the keyboard, we bring the selected object back above the circle

Send item to back: Ctrl+Shift+[ (or change shortcut because Ctrl+Shift+' matches to the grid function)
By pressing the "Ctrl+Shift+[" keys the polygonal object is placed at the bottom.
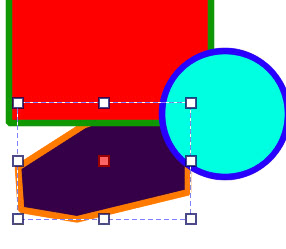
As an alternative key combination "Ctrl+Shift+'" could be used which however is used to make the reference grid appear and disappear, however given that the grid in certain keyboards is also activated with "Ctrl+Shift+à", one can choose as new shortcut Ctrl+Shift+' for the function we are considering now.
Bring item to front Ctrl+Shift+] (or Ctrl+Shift+ì)
By pressing instead the keys "Ctrl+Shift+]", or "Ctrl+Shift+ì" depending on the keyboard, the object that was previously at the bottom is now brought to the foreground

Bezier and vector curves:
Useful shortcuts when creating Beziers (and also, where possible, for the freehand vector curve tool). Some present in the old versions have been replaced by more practical mouse clicks.
End the curve: double left click of the mouse (or ENTER)
When we are drawing a Bezier curve, to finish just click twice with the left mouse button or press the ENTER key.
Undo the last point: click right mouse button
If we are drawing a Bezier curve and we see that the last drawn point is wrong, just press the right mouse button to delete it and continue drawing the curve
Insert a point between two existing points: double left click of the mouse on the segment
Given two points on the curve, let's select them

to insert an intermediate one, simply double click on the segment between the two points present

Remove a point: Backspace or Del
To remove a point of the curve, simply select it and press either the "Del" (Delete) key or the "Backspace" key
Join two points: J
If we want to join two points of a curve, for example to close a curve, it is sufficient to select them
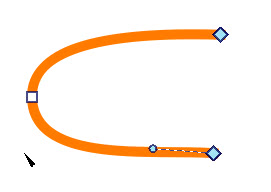
and press the "J" key

From Curve to Line: F
You can transform a curved segment into a straight line. In fact by selecting two points on a curve

by pressing the "F" key we get

Line to Curve: Shift+C
Returning to the previous example, if we press the "Shift+C" keys we can transform the straight line into a curve again, because the handles appear that will allow us to transform the straight line into a curve.

Text tool:
To create text in Krita simply select the text tool

then click with the left mouse button on the canvas and drag, as when drawing a rectangle.
After releasing the mouse button, a small window will appear in which we can change the text and its properties.
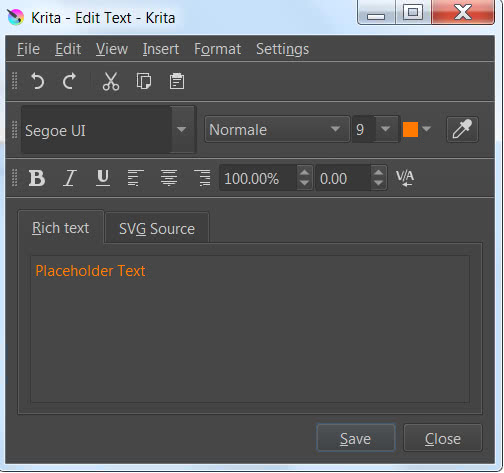
To speed up these operations, some shortcuts are available within the editor:
Bold: Ctrl+B
Increase or renormalize (by pressing the keys again) the weight of the text (if there is no "Bold" format, choose "Semibold" if available for that font)
Italic: Ctrl+I
Add or remove the "Italic" style
Light: Ctrl+L
Decrease or renormalize the weight of the text, assigning the format "Light"
Normal: Ctrl+N
Returns text to normal weight
Underline: Ctrl+U
Adds/removes underlining
Increase text size: Ctrl+">" (or Shift+Ctrl+"><")
Increase text size
Decrease text size: Ctrl+"<" (or Ctrl+"><")
Decrease text size
Subscript: Ctrl+Shift+B
Turns the selected text into a subscript, i.e. a slightly smaller text at the bottom
Superscript: Ctrl+Shift+P
Transforms the selected text into a superscript, i.e. a slightly smaller text at the top
Align Center: Ctrl+Alt+C
Align text in the center
Align the text to the right: Ctrl+Alt+R
Align the text to the right, strangely there is no shortcut for align text left
Some shortcuts common to other text editors are also valid:
File:
Save: Ctrl+S
Pressing the "Shift+S" keys change the text on the canvas, without closing the text editor.
Close: Ctrl+W
Closes the text editor.
Edit:
Undo: Ctrl+Z
Undo the last action followed.
Redo: Ctrl+Shift+Z
Redo a previously undone action.
Copy: Ctrl+C
Copy the selected text, which can be pasted into the same editor, or into another program.
Cut: Ctrl+X
Delete selected text after copying it.
Paste: Ctrl+V
Paste previously copied text, either from the Krita text editor or from another text editor.
Select all: Ctrl+A
Select all text in Krita's text editor.
Deselect: Ctrl+Shift+A
Removes any selection present on the text.
Find: Ctrl+F
You can search for a word within a text in the Krita test editor. In fact, by pressing the "Ctrl+F" keys a form will appear in which to enter the text to search for.
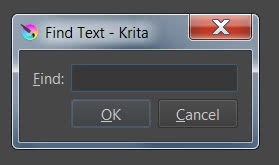
Find next: F3
After finding the first instance of the word, using the previous search form, you can search for the next instance simply by pressing the F3 function key.
Find previous: Shift+F3
In this case, pressing the "Shift+F3" keys will search for the instance previous to the one just found.
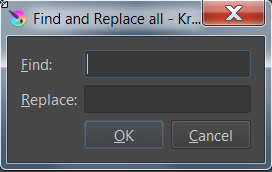
Replace: Ctrl+R
To replace a word in the text with another, just press the "Ctrl+R" keys, entering the word to replace and the new word.
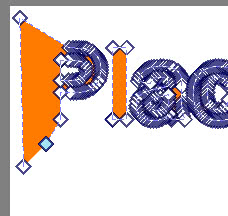
Turn text into curve: P
Once we have created the text, press the save button and close the window.
We then choose the tool to edit vector shapes

Click with the mouse arrow on the text and press the "P" key thus transforming the text into a curve

which can then be eventually modified, to create personalized writings
Filters:
While there is the ability to add filters as layers, non-destructively, there may be a need to quickly apply a filter directly to an image, so it's helpful to know the most common shortcuts.
These filters can be applied to individual layers or selections.
Desaturate the color: Ctrl+Shift+U
One of the most commonly used filters is the one that allows you to transform the selected layer into grayscale. Just press the "Ctrl+Shift+U" keys and the popup window appears
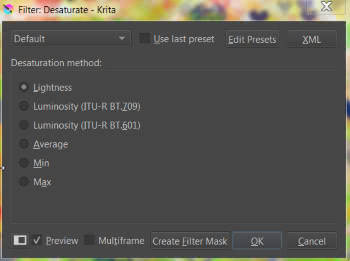
where we can choose the calculation mode or whether to load a previously created preset
Invert the colors: Ctrl+I
Inverts the colors of the current layer, mirroring it depending on the model used (eg RGB). Pressing the keys a second time returns to the original colors.
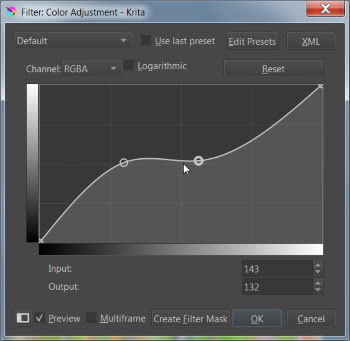
Color Adjustment Curves: Ctrl+M
Using the curves, it allows you to precisely adjust the shadows, tones and highlights of the RGBA channels
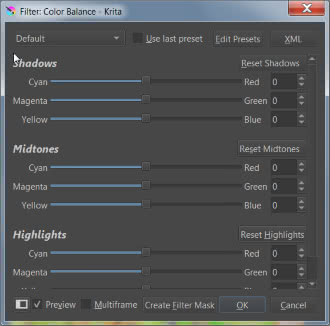
Color Balance: Ctrl+B
This filter allows you to act directly and separately on the colors of shadows, semitones and lights, moving the sliders corresponding to the RGB and CMY colors
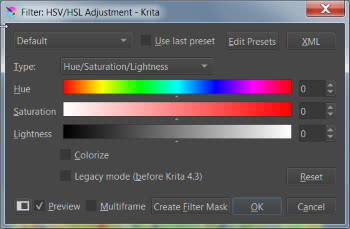
HSV/HSL adjustment: Ctrl+U
Specific filter to adjust the hue, saturation (by bringing it to zero you get a grayscale image) or brightness of a color
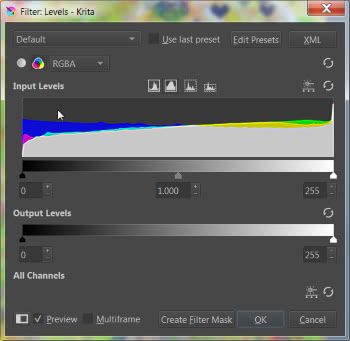
Layer Filter: Ctrl+L
This filter allows you to act on hue, brightness, channels using the histograms
Apply filter again: Ctrl+F
Last but not least, this function allows you to apply the filter again, even several times, even on another layer.
Help:
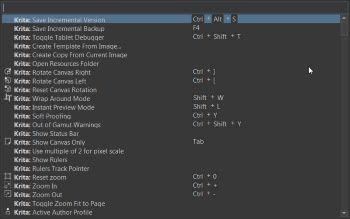
Search actions: Ctrl+RETURN
Krita provides a tool to search for each function and eventually the related shortcuts. By pressing the "Ctrl+Return" keys a window will appear in which to type what we are looking for
Krita Manual: F1
It is not a real internal function. Pressing the "F1" function key will open your default browser which will access the Krita online manual.
Animation:
Even when we are creating animations with Krita there are some shortcuts that can help us.
The timeline uses layers, so all the relative shortcuts apply to the drawing ("Ins") and vectorial ("Shift+Ins") layers seen before.
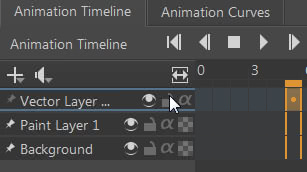
It is also possible to move between the frames with the arrows
Go to Next Frame: Right Arrow
Go to previous frame: Left arrow
To select the frames we can use both the mouse and the keys
Select the frames: click with the left mouse button and drag
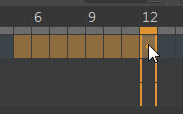
Select next frames: Shift+Right Arrow
Select previous frames: Shift+Left Arrow
Gestures:
The use of touchscreens and the possibility of using Krita also on Android (https://play.google.com/store/apps/details?id=org.krita) made it necessary to create dedicated shortcuts
Paint: One finger drag
Toggle canvas only mode: Four-finger tap
Redo an action: Three-finger tap
Undo action: Two-finger tap
Move Canvas: Two-finger drag (no rotate)
Rotate Canvas: Two-finger drag (rotate fingers)
Zoom: Two-finger drag (spread/narrow fingers)
Enable Popup Palette: Long tap with one finger
Activate the graphics tablet debugger: Ctrl+Shift+T
Sometimes it is necessary to activate the debugger for graphics cards, to test the hardware and highlight any malfunctions.
After connecting the graphics tablet, activate the "Log Viewer" panel in "Setting > Docker" (better if you detach it, to have it under your eye), press the "Ctrl+Shift+T" keys to activate the debugger, then try to move the pen and paint; the instructions you just executed should appear in the panel.
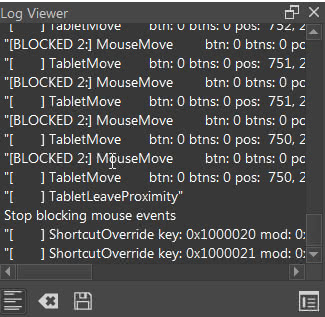
To end debugging, press the "Ctrl+Shift+T" keys again.
Organize and activate favorite scripts: Ctrl+Shift+number
As in the case of brushes, using the "Ten Scripts" function from the tools menu,

we can organize up to 10 scripts to load with the file browser
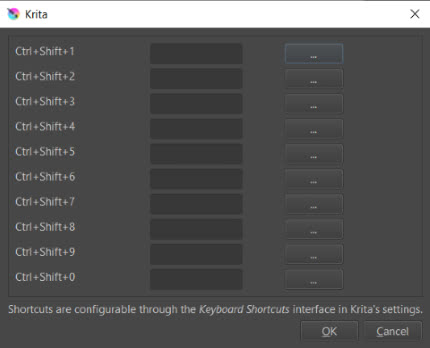
Then we can recall with Ctrl+Shift+1 the script loaded in the first position, with Ctrl+Shift+2 the script loaded in the second position ... with Ctrl+Shift+9 the script loaded in the ninth position, with Ctrl+Shift+0 the script loaded in the tenth position.
Here you can download a pdf containing the list of shortcuts for Krita just seen:
Download the pdf with the shortcuts for Krita
That's all for this tutorial on Krita shortcuts, happy drawing and painting!
![Krita tutorial: Introduction [ENG]](../../../../immagini/copertina/cover-tutorial-krita-introduction_130x130.jpg)