Krita Tutorial: How to draw a dotted or dashed line
In this tutorial we will see both how to draw a dotted line and a dashed line in Krita. These could be used, for example, to draw a path, an annotation, a line to cut out, a secondary element, or any object that is not well defined.
To draw dotted and dashed lines in Krita we can use both the brushes to paint and the vector tools, in vector layers.
We have divided this tutorial into two chapters, presented below, one on how to draw a dotted line, one on how to draw a dashed line, each with its possible methods and problems.
How to draw a dotted line with a brush in Krita:
Dotted line with a round tip brush:
First, we choose the desired brush, whatever you want ("Basic-5 Size", "Ink-2 Fineliner" etc.) but the important thing is that it has the "Brush Tip" property, in the "Brush Presets" docker or in the top bar under the menu

then, to draw a series of points with the brush, we need to modify its properties in the "Brush Editor", which we can activate by clicking on the button next to it (or by pressing the "F5" key)

When we draw a line with a brush with Krita, or even with another 2D graphics software, we actually draw a whole set of points automatically connected to generate the line; then in the "Brush Editor", in the "General > Brush Tip > Auto" section, for the "Spacing" option we deactivate "Auto" and insert, for example, a space value = 2.0
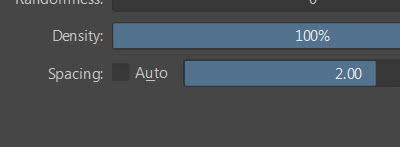
obtaining a path of this type

where the size and opacity of the dots depend on the pressure of our pen on the graphics tablet, so to make them uniform we need to disable the options "General > Size > Enable Pen Settings" (for the size of the dot) and "Texture > Strength > Enable Pen Settings" (for the opacity/strength)
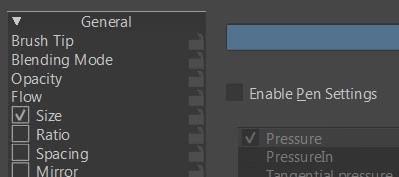
thus obtaining our dots uniform

using the mouse, instead of a graphics tablet, they already appear uniform (at 100% opacity and size), because the tracing does not depend on pressure
Dotted line with a square-tip brush:
if in "General > Brush Tip > Auto" we set "Shape:Square"
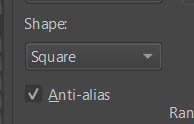
to draw squares instead of circles, we note that for the value "Spacing:2" the space between the squares is, in this case, more or less as large as the dimensions of a square

to increase the distance, simply increase the value of "Spacing" and vice versa.
If you want the squares to follow the brush stroke by rotating, activate "General > Rotation > Drawing angle"
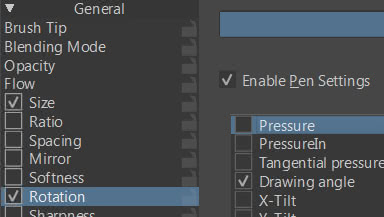
and you will get
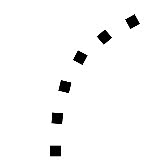
Note: you can now use the brush because, at the bottom of the editor, the option that temporarily saves the brush changes is active ("Temporarily Save Tweaks To Presets"). If you close and restart Krita, the changes will be lost, so if you want to keep them it is better to save them first by pressing the "Save New Brush Preset" button which will create a modified copy of the brush.
How to paint a dashed line with a brush in Krita:
Painting a dashed line presents more problems, especially in tight curves, let's now see some examples and examine the solutions that are generally proposed.
Dotted line with square brush, which follows the rotation:
Let's create an example, which in the first part is similar to the previous one: we use the "Ink-2 Fineliner" tool, in "General > Brush Tip" we modify the brush by setting the diameter equal to 40 pixels, placing "Shape:Square" to generate a curve using a square tip, we uncheck "Spacing:Auto" as before. However, let's introduce some changes: we set the value "Ratio:0.5", to transform the brush tip from square to line,

and "Spacing:2.5"; still keeping the "Enable Pen Settings" options disabled in "General > Size" and "Texture > Strength", we can draw a line of this type, with parallel segments
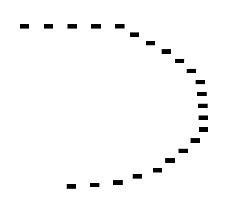
while in "General > Rotation" we enable only the "Drawing angle" sensor with the ascending line as the curve
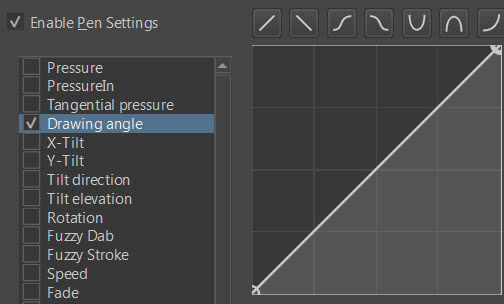
achieving a result where the segments follow the curve of the line
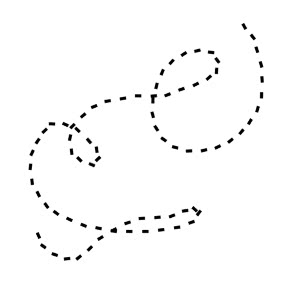
as you can see it is a solution that works quite well for large radius curves, while the "rectangles" are not well positioned in the presence of narrow curves
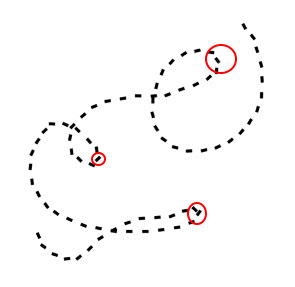
The longer the individual segments are, the more evident the deviations from a desired situation are, when the ratio (segment length/curvature radius) exceeds a certain limit.
Dotted line with segments deformed based on distance:
In this example the segments are deformed, so it is better to choose not a brush with a square tip that traces very sharp contours, with which the grooves would be more visible, but a round one in which the defects are less evident. In this case we use a classic brush (the "Basic-5 Size").
For this example, we leave the options in "General > Brush Tip" the same as the default ones, in our case we deactivate all the pressure-dependent sensors ("General > Flow", "General > Size > Pressure", "General > Strength" etc.) even if in common use you might want to leave them active, and we activate "General > Size > Distance" with an increasing linear curve
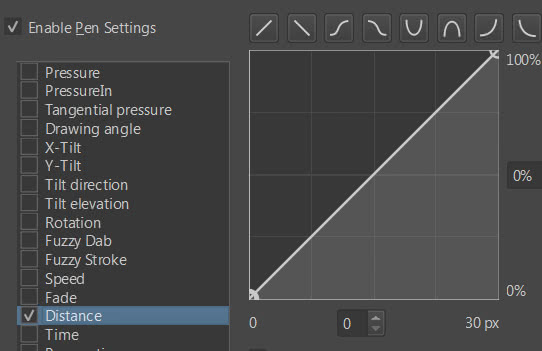
according to which, with the current settings, in the space of 30px the pen stroke starts with a very thin line (0%) until it reaches the maximum (100%). In fact, drawing on the canvas with the grid and rulers activated,
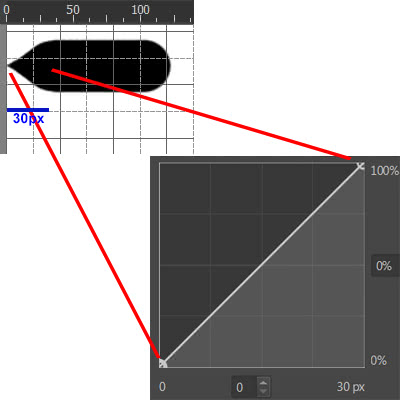
we see that after 30px it continues with the dimensions at 100%. But we want it to work "dashed intermittently", repeating the beginning of the stroke each time, so we select the "repeat" option, this time setting a length of 160px

thus obtaining a stroke that increases in size up to 100% at the 160th pixel, and then starts again from the beginning.

If we draw our curved line we notice that it already starts to become interesting, also because it deforms into a curve
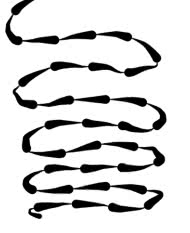
(if you have chosen another type of brush, enable "General > Rotation > Drawing angle" if it does not follow the curve)
To create the dashed line, we want to leave an empty space from the beginning up to 80px and a 100% full line from 80px to 160px. Let's see how to do it: we move the cursor that represents the beginning of the stroke to 80px (or half of the interval you chose)
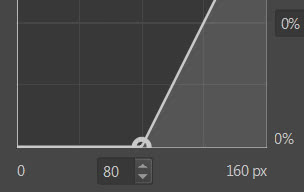
thus obtaining a tracing of this type

and we move the cursor that represented the end of the tracing, where the tip of the brush reached 100%, also to 80px
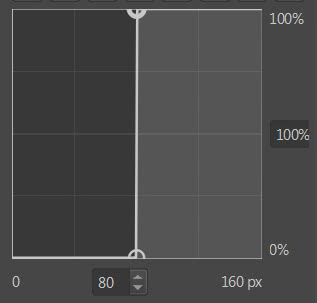
so the drawn segment will start from 80px onwards and immediately at 100%

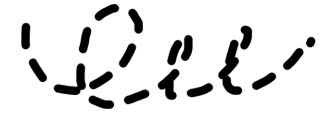
We thus obtain a type of line that manages to behave quite well both in large radius curves and in more narrow
Drawing a dotted line with vector lines (Bezier) in Krita:
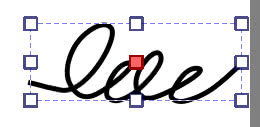
One of the best ways to draw a dotted line is to use a vector line, creating a vector layer and using one of the tools provided by Krita to draw the curve, for example Bezier curves.

Once the curve has been created
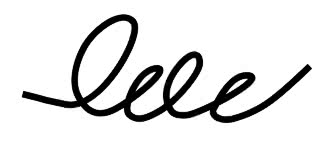
just select it with the relative vector shapes tool

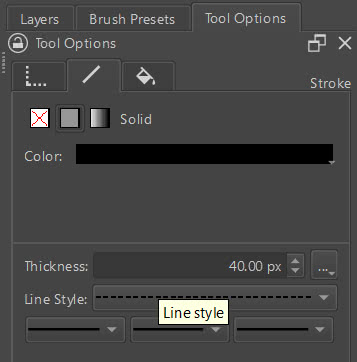
and in the tool options panel choose the dashed one in the line style
thus obtaining the desired dashed line
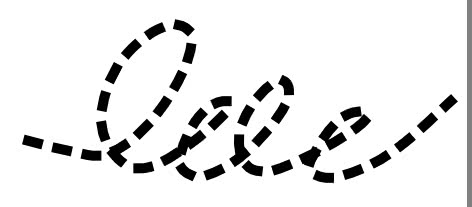
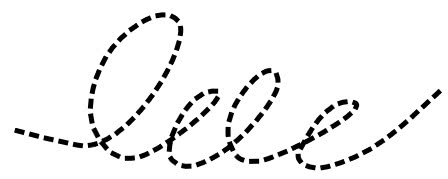
By acting on the thickness of the line

we can improve the general stroke, increasing the definition in the tighter curves.
Similarly, with the other vector tools we can create rectangles, ellipses, irregular polygons and much more
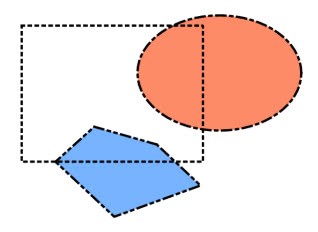
However, with the vector tools we can set the thickness and type of line a posteriori, not the distance between the lines, to do this it is sufficient to draw vectorially on a painting layer, instead of vector, using the brush previously modified as we saw before, thus preserving the advantages of both tools (even if you will no longer be able to modify the curve with the handles later).
With this the tutorial on dotted lines in Krita is finished; as you have seen there is no general solution for everything, but you can choose the most suitable method depending on your needs with a certain variety of options. Happy painting!
