Krita tutorial: how to create a normal map and displacement, height maps etc.
In this tutorial for Krita in english (updated to Krita 4.4.8) we will see how to create displacement, height, normal, roughness and specular maps from a photo. These maps are very important in the 3D world as through a texture they provide information on how the surface of an object must actually be modified (displacement map), or on how to simulate in a non-real way small details not very in relief (height map, normal map), or to specify precisely which areas of a surface, and how, should reflect light and others not (specular map, roughness map).
A clarification: there is always a bit of confusion in the use of the names of the various maps, for example a height map can sometimes be used directly in the displacement functions as the various shades of gray can help to faithfully reproduce the mesh real of an object; on the other hand, a displacement map can easily be called a height map as it can define, for example, the height of a terrain / mountain. However, a height map can also be used as a bump map in place of a normal map, when this is not available.
In our case, however, we cannot use a simple height map for displacement, obtained directly from the photo which is also good as a bump map, so we call the two maps differently: displacement map the one that is used in the displacement function and height map that which is used as a bump map, so as not to get confused with the normal map.
This is the first of a series of tutorials that will show us how to transform a photo into a set of maps to use with the Blender program to create a more or less realistic wall, equipped with writings, coli, molds, ivy and all that makes a wall seem more "lived in".
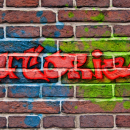
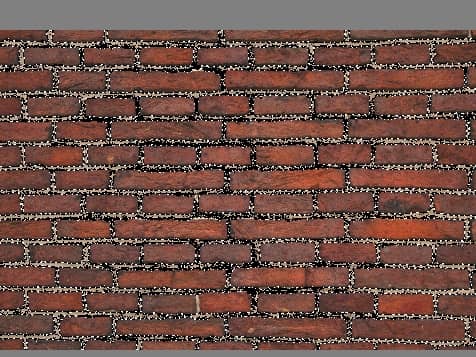
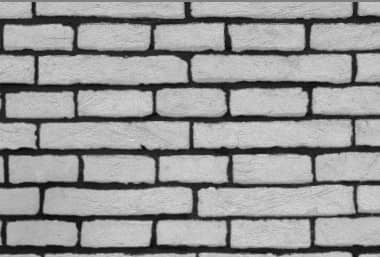
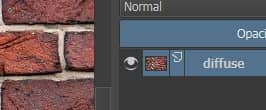
Let's start by uploading a photo of a wall (from the pixabay.com site) in Krita, those unfamiliar with Krita software can watch its introduction at https://www.graphicsandprogramming.net/eng/tutorial/krita/krita-basic-guide/krita-tutorial-introduction, and we call the corresponding layer "diffuse" (a "diffuse" map, also called "albedo" or "color", is a map that should be obtained using diffuse light, without any particular angle, ideally it should represent the colors of the surface without any lighting)

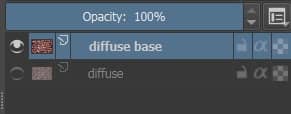
For safety, but also to possibly reuse the image, we select the "diffuse" layer, duplicate it by pressing the "Ctrl+J" keys and rename the copy with "diffuse base"
In our case we used an un-retouched photo, but a good diffuse starting map should have no shadows, or lighter areas and darker areas (which could affect the creation of the other maps), and should be improved before being used.
What is a displacement map:
The displacement map is a grayscale map (it is generally coded at 8bit, corresponding to 256 shades of gray, but for more details there are also 16 and 32bit maps) where the neutral parts, which must not be affected by the function displace, remain gray (hex color:#808080), those that must sink are black, while the parts that must emerge more must be "colored" in white. The various shades of gray correspond to the intermediate height levels.
The displacement map modifies the objects in a real way in the 3D modeling programs and above all must give a more or less approximate shape to the reliefs produced, which will then be better defined by the height map and the normal map, therefore in our case the bricks in the the displacement map must be almost uniformly white, while the covered part of the mortar must be almost uniformly black. To do this we try to somehow separate the mortar from the bricks, in order to act on them independently.
Building the displacement map in Krita:
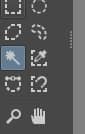
We use the "Contiguous Selection Tool" which will allow us to select contiguous elements having more or less a certain color
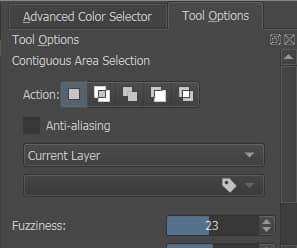
and in the docker "Tool Options" we set a value of "Fuzziness" equal to 23,
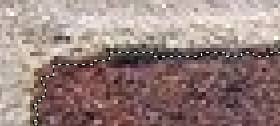
so we manage to select most of the mortar without including bricks
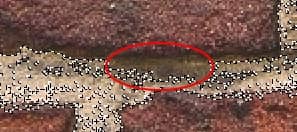
however, where the bricks cast their shadow more consistently, the mortar was not selected

so let's change the "Fuzziness" value to 13, to further limit the set of colors similar to the selected one, and holding down the "SHIFT" key (to make an additive selection), with a little patience click on all the shaded parts of the mortar or, for other reasons, not yet selected. (If, on the other hand, the selection made previously has incorporated a part of some bricks, by holding down the "ALT" key we can perform a subtractive selection, thus eliminating the superfluous areas)
Still holding down the "SHIFT" key, we can use other types of tools, such as the rectangle or freehand selection, to speed up operations.
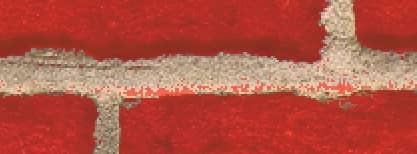
Or to improve the selection we can use the brushes; in fact if we look at the levels we see that a new one has been created automatically, corresponding to the selection just made
if we click on the layer, the unselected parts will become red and using a brush (such as Basic-1 or Airbrush_Soft, choosing the white color and opacity 100%) or an eraser we can add or remove parts to the selection, simply by painting
let's make the selection less jagged by right clicking on the selected part and using the "Transform > Smooth" function
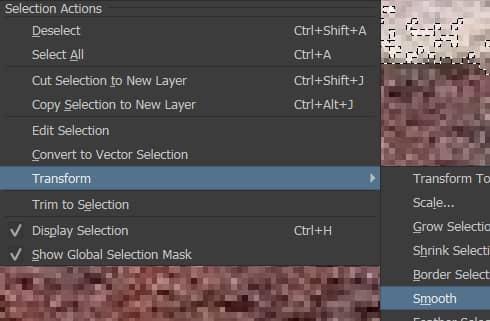
we will get
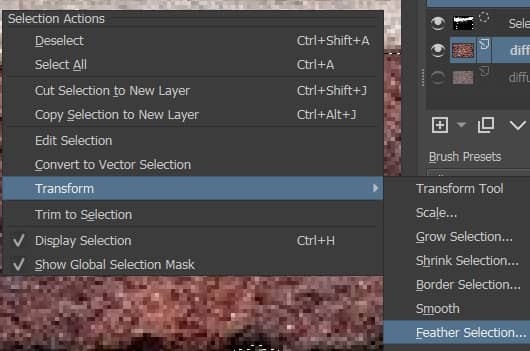
The edges of the bricks in the map must be slightly blurred, so as before we right-click and call the "Transform > Feather Selection" function with "Feather Radius" with value 2 (possibly using the "Shrink" and "Grow" to adjust the size of the selection)
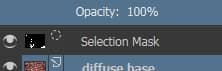
After building, with this procedure, a clean selection of the bricks
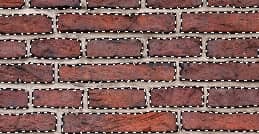
which corresponds to the layer "Selection Mask"
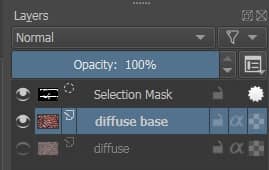
we can independently modify mortar and brick.
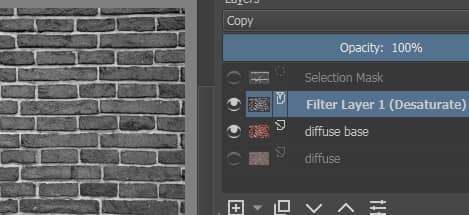
But first we desaturate, in a non-destructive way, the photo in "diffuse base" by adding an appropriate filter: we hide the selection mask
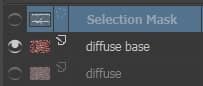
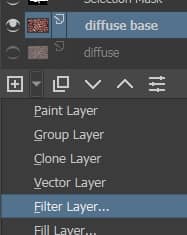
select the "diffuse base" layer and select "Filter Layer" from the drop-down menu at the bottom left
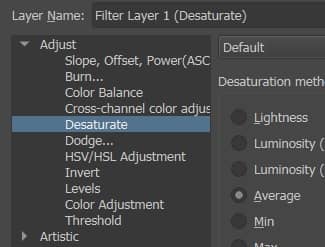
and in the popup window select the "Adjust > Desaturate" filter with "Average" desaturation method (the saturation method must be selected according to the image to be modified and the work being done)
we confirm and get
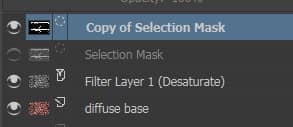
duplicate the "Selection Mask" and make it visible by clicking on the eye icon
click on the "+" button at the bottom left

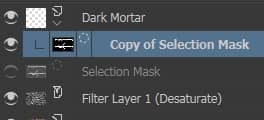
we create a "Paint Layer" which we call "Dark Mortar", rewriting the name after pressing the F2 key, and drag the duplicated selection mask into this layer
select the "Dark Mortar" layer, select the paint bucket tool (located in the left panel) by pressing the "F" key
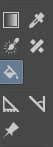
we select the black color

and we color the whole layer.
We select "Copy of Selection Mask" and transform it from a selection mask to a transparency mask, by clicking with the right mouse button and selecting "Convert > To Trasparency Mask"
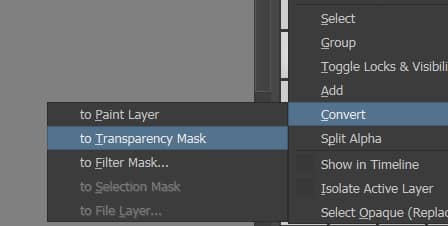
The transparency mask ensures that the black paint of "Dark Mortar" is present only on the mortar and not on the bricks.
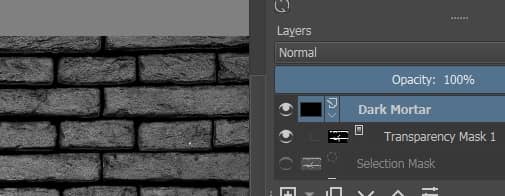
We give the opacity of "Dark Mortar" a value of 80%, or just enough, to bring out the most significant reliefs and undulations present in the mortar.
Let's select the "Dark Mortar" layer and the relative "Transparency Mask 1" and duplicate them by pressing the "CTRL+J" keys. We rename the new layer as "Light Bricks", while the new mask as "Transparency Mask 2"
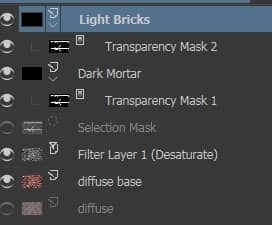
click on "Transparency Mask 2" and invert the colors by pressing the "CTRL+I" keys; in this way the bricks will be visible while the mortar will be transparent. Then we paint with the bucket the "Light Bricks" layer with the white color, bringing the opacity to a value of 60% to show the most interesting reliefs of the bricks.
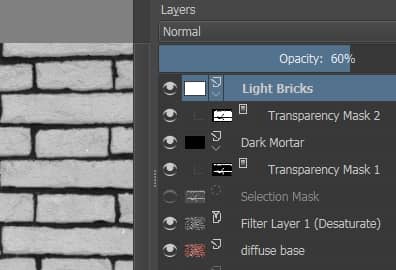
Thus obtaining the displacement map
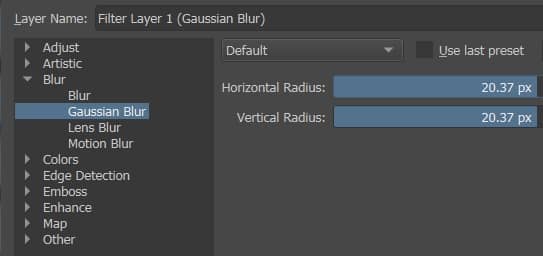
Now we have to blur the image, in fact a displacement map with too sharp edges will make the tallest elements emerge vertically at 90 degrees, thus stretching the diffuse map with unwanted effects, while we need a softer result that does not generate artifacts. in the color map. It doesn't matter if some details are deleted, because the diplacement map is used to shape the bricks, while for the details we will use the bump maps.
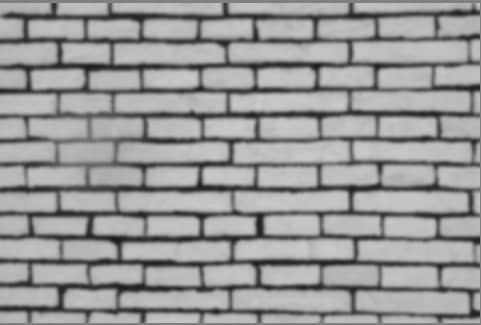
So let's add a filter layer "Blur > Gaussian Blur", with Horizontal radius and Vertical Radius with values close to 20px
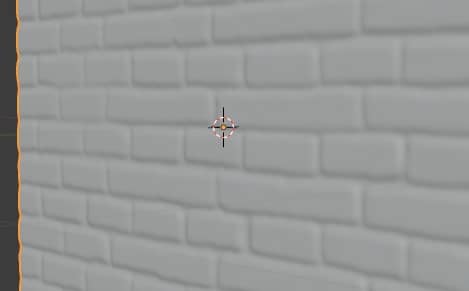
and we will obtain a displacement map like this
that we export, with "File > Export", as "displacement_map.jpg" which, used in a 3D modeling software (in our case Blender) with a displace modifier, will result
we save the file, with "File > Save As", as "displacement_map.kra".
What is a Bump Map:
We will now create the height map and the normal map, both of which are considered bump maps. Both contain data to represent only apparent details on the surface of a mesh in a 3D modeling and rendering program, therefore they do not create real reliefs but relief illusions through a play of light and shadow; this allows you to create models with relatively few polygons, but with many details, such as those used in electronic games. Since the detail they create is false and no real resolution is added, the shape of the geometry to which the bump map is applied will not be affected by the map.
What is a height map:
As mentioned, they are similar to displacement maps in file format, but not in graphics, as they must be much more detailed, as they must describe the objects they represent very accurately.
They are also saved in 8-bit format in 256 shades of gray, from black to white, in which each pixel represents the amount by which the point on the surface should appear raised: white corresponds to the reliefs, black to the areas in depth. , the intermediate gray has a neutral effect.
The height maps are very affected by the angle of the light and the camera, in a 3D environment, so you must be careful in their use, possibly associating them with an adequate specular map, to overcome the problems of semi-shaded areas.
As we said before, compared to a displacement map in a height map you have to see more details and the map must not be used inside a displace function to deform the geometry of the mesh to create the bricks, so there must be no that big difference in shades of gray between mortar and brick that we had tried to achieve earlier.
Creating a height map in Krita:
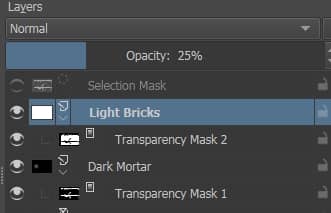
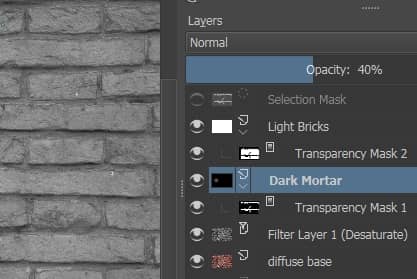
So let's start from the example of the displacement map, created before, we delete the layer "Filter Layer 1 (Gaussian Blur)", and now let's give the opacity of the "Dark Mortar" layer a value of 40%
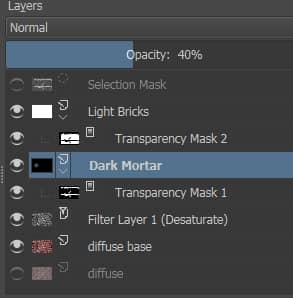
and to the "Light Bricks" layer a value of 25% for the opacity
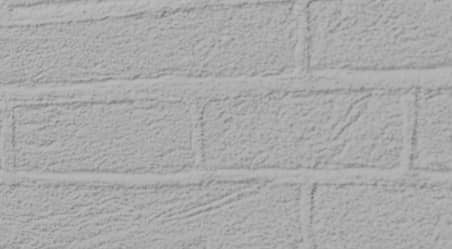
thus obtaining the height map
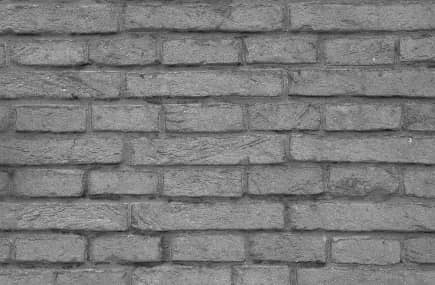
which we export as "height_map.jpg".
We then save the file, with "File > Save As", as "height_map.kra".
What is a normal map:
As mentioned earlier for bump maps and height maps, a normal map is for small, higher frequency bumps, such as grooves, scratches, porosity of the skin and wherever fine surface details are needed. However, it is actually an illusion, as this procedure does not affect the actual geometry, but the way to manage the captured light, thus saving on the number of polygons to be used.
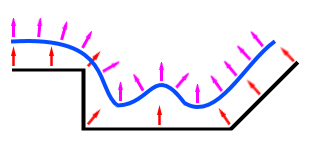
An object in a 3D environment is illuminated using the surface normals of the various polygons of which it is composed: based on the angle between the vector of the surface normal and that of the incident light, the polygon can be more or less shaded. A normal map provides information on a virtual "perturbation" (colored blue in the following figure) "above" the "real" surface of the model (colored black),
A normal map is an RGB texture, where each pixel represents the difference in the direction the surface normal should face, from its unmodified surface normal. Mathematically, for each point of the surface, a plane tangent to that point is considered (in fact it is also called "tangent space normal map"), represented by a vector perpendicular to it. A mapping is then made between the unit vectors, in the three-dimensional space X Y Z, and the RGB channels of the colors of each pixel of the map. Each color therefore represents a different axis of relative direction. Using the left hand rule and displaying only the vectors facing the user, we will obtain these correspondences:
X: from -1 to +1 -> Red: from 0 to 255
Y: from -1 to +1 -> Green: from 0 to 255
Z: 0 to -1 -> Blue: 128 to 255
These textures therefore tend to have a blue-violet predominance, due to the way the vector is stored in the RGB values and processed later.
A normal vector pointing directly at the observer (0,0, -1) is mapped to (128,128,255). So the parts of the object directly facing the viewer are light blue, the color in a normal map representing the undeformed surface, which many times corresponds to most of the texture.
Creating a normal map in Krita:
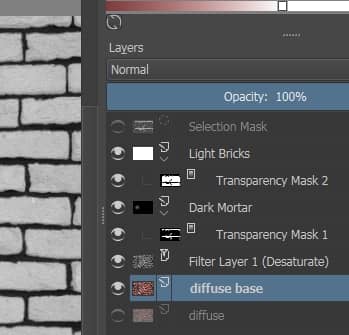
We start Krita and load the photo of the wall in a layer that we will call "diffuse"
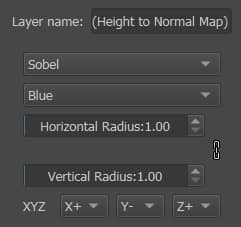
by clicking, as before, in the drop-down menu to the right of the "+" button at the bottom, we add the filter layer "Edge Detection > Height to Normal Map" and the popup window appears
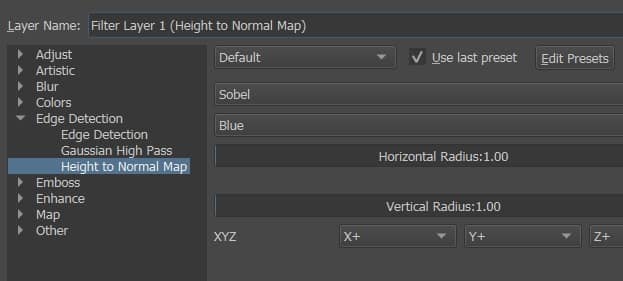
In which we can see some options to choose from:
- three different methods: Prewitt (which generates a stronger effect), Sobel (more subtle effect), Simple (computationally faster). We choose the "Sobel" option as we don't need very sharp reliefs.
- The channel from which to obtain the map of the heights on which to work. In our case we leave "Blue" selected, because it accentuates the cracks in the bricks enough but without bringing out other unwanted parts as well. (Always examine the preview to see which channel looks best for your texture, this may depend on the dominant color of the texture and the various elements present)
- We do not even change the horizontal and vertical radius, the increase of which could have the effect of accentuating the relief generated by the map.
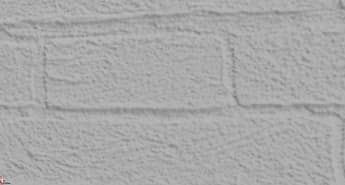
- Particular attention instead requires the choice of axes for the realization of the normal map; in fact if we leave the X+, Y+ and Z+ triad unchanged, pressing the "OK" button we will obtain a normal map as follows
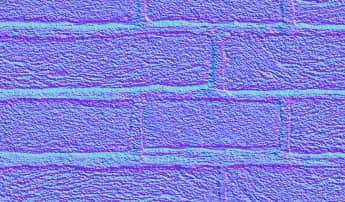
which, however, highlights the mortar instead of bricks as in relief, as we can also see by applying the map on a plane in the 3D modeling program Blender, after saving the file, with "File > Save As", as "normal_map.kra" and exported as "normal_map.jpg"
So right click on the filter layer just created, or press F3, and choose "Properties"

We appropriately change the Y axis by choosing the X+, Y- and Z+ triad
and we get the map
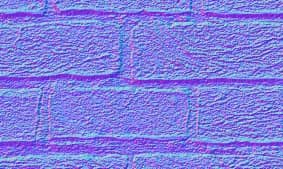
verifying in Blender, we find that a map with this choice of axes more correctly represents mortar and bricks
we save the file as "normal_map.kra" and export the file in jpeg format "normal_map.jpg".
What is a Roughness Map:
The surfaces of objects are not all the same, some are smoother, others more wrinkled, others have a surface made up of even smaller objects that are very close to each other. So when a ray of light hits a rougher surface, the small bumps reflect the light in multiple different directions and the previously concentrated ray is globally reflected in a more diffuse way. The roughness map is a grayscale map, which controls the sharpness of the reflections, i.e. whether they should be more concentrated or more diffuse (in this case they are more blurred, in a granular way).
In some sites, which allow you to download textures, you may sometimes find "Gloss" maps instead of "Roughness", but in practice they are conceptually the same, only one is the inverse of the other (so just add an inversion node to texture valley)
Creating the roughness map in Krita:
As for our case, concerning a wall, the mortar is very porous and therefore with a fairly significant roughness value, as are the bricks, increased by the fact that they are not new, but old and damaged. Dust from the crumbling wall could also amplify the effect.
Let's reload the example concerning the displace texture "displacement_map.kra" and we delete the layer "Filter Layer 1 (Gaussian Blur)"
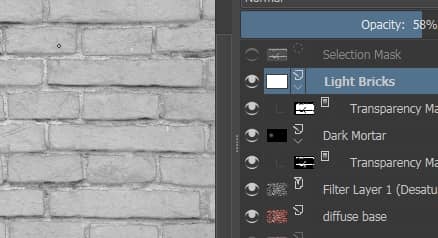
to have a high roughness it is necessary to lighten both mortar and bricks, so we put the "Light Bricks" layer with 58% opacity, while we give the "Dark Mortar" opacity a value almost equal to 0% and we obtain
we save the file as "roughness_map.kra" and export the file in jpeg format "roughness_map.jpg"
What is a specular map:
It is used in computer graphics in real time, to determine the intensity of the specular reflection, but saving some calculations with the lights present on the scene, or to force the reflection of a surface in particular situations (for example a can of a freshly pulled drink outside the fridge, a bit fogged up and with streams of condensed water), where the areas that are shinier are painted in white and the more opaque ones in black, or to emphasize some areas that should be of interest (which, for example, in dim light does not would be seen).
A specular map basically indicates where a reflection should or shouldn't appear, for this reason its use may be considered incorrect in a physics based material (PBR), for which a roughness map would be more suitable.
Building a specular map in Krita:
In our case there are no particular reflections to remark, so it would not be necessary to build a reflection map. The map could be used if the wall was wet, since in that case they reflect much more the bricks than the mortar, in this case giving a uniform value for the specularity to the whole wall would not be correct and a map would be needed to distinguish the various areas (the mortar from the bricks).
Let's open the "height_map.kra" file
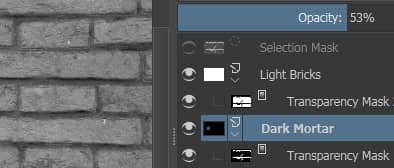
If you want to give the bricks more reflection, we increase the difference with the mortar by giving the opacity of "Dark Mortar" a value of 53%
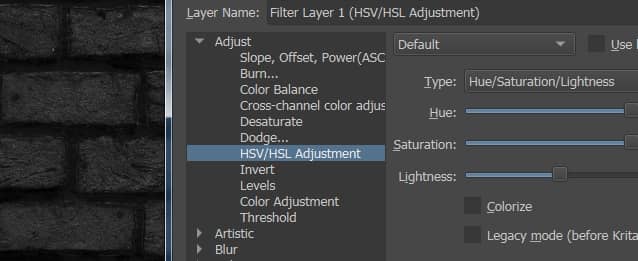
and add a "Levels" filter (adding a filter layer "Filter Layer > Adjust > Levels") to provide some contrast too, by moving the sliders to the right, giving the shadows value 16 and the midtones 0.506,

We then add a layer filter "Adjust > HSV/HSL Adjustment" with "Lightness": -45 to soften the reflections a little.
we save the file as "specular_map.kra" and export the file in jpeg format as "specular_map.jpg".
You can download the created maps here:
diffuse_map.jpg
displacement_map.jpg
height_map.jpg
normal_map.jpg
roughness_map.jpg
specular_map.jpg
With this tutorial the first part of the mini-course is finished, in the next episode we will talk about displacement in Blender, where we will start using one of the maps created here, the "displacement map" Blender: how to create the bricks of the wall with the displace modifier. See you soon!
Back to "Blender course: from photo to 3D wall" course
![Krita tutorial: Introduction [ENG]](../../../../immagini/copertina/cover-tutorial-krita-introduction_130x130.jpg)