Blender: how to add graffiti to a wall
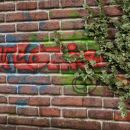
In this tutorial we will see how to add a graffiti/text/stencil to the "wall" that we had created in Blender in the previous tutorials of the "Blender course: from photo to 3D wall" mini-course. We will use as the graffiti image, to apply the wall, the one we created in the tutorial for Krita (How to make graffiti in Krita) "graffiti_krita.png"
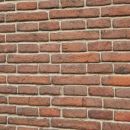
Let's start Blender and load the wall file "blender_wall_add_dirty_displace_modificator.blend" that we made in the tutorial to dirty the wall (Blender tutorial: how to add dirt to a wall).
Let's add the graffiti to the wall:
As we had already seen when we dirty the wall, we need:
- to make a new "UV Map"
- to mix the new texture with those present in the "Shader Editor", assigning its "UV Map"
- to adapt the new map to the desired size and position
- to improve the visibility of the new texture added
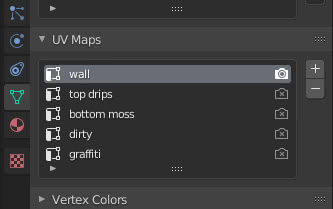
We therefore select the floor where the wall was built and in "Object Data Properties > UV Maps" we make the "UV Map" "graffiti"

We access the "Shading" workspace by clicking on the tab at the top

and in the "Shader Editor" move the "Principled" and "Material Output" nodes a little further to the right, selecting them with the mouse and pressing the "G" and then "X" keys
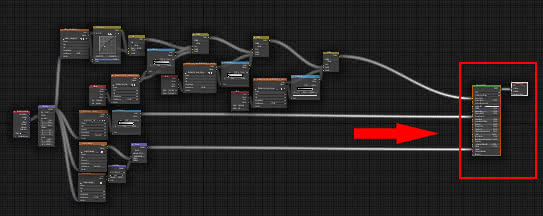
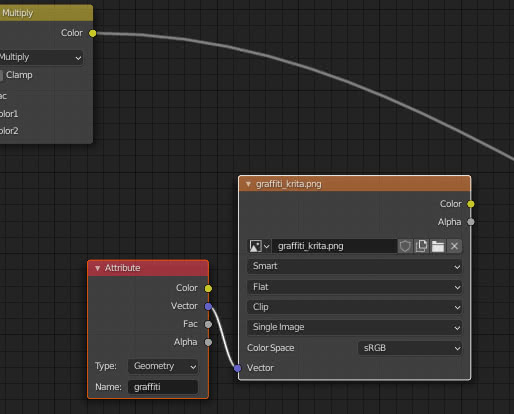
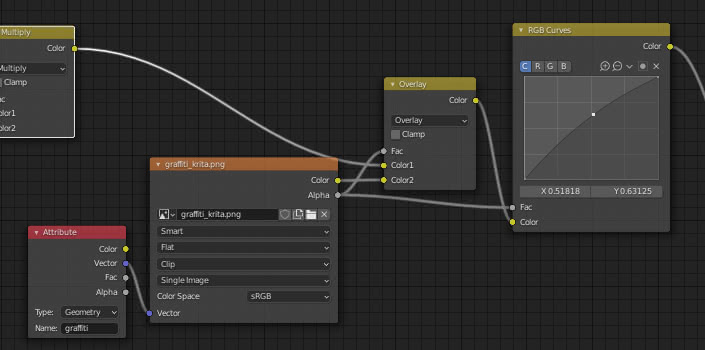
We select an "Attribute" node and an "Image Texture" node of the latest textures inserted in the previous tutorial, duplicate them by pressing the "Shift+D" keys, move them to the right and set the map name "graffiti", in the "Attribute" node, and load the "graffiti_krita.png" image in the "Image Texture" node
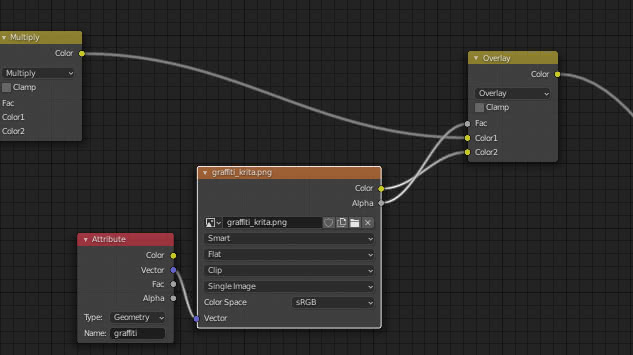
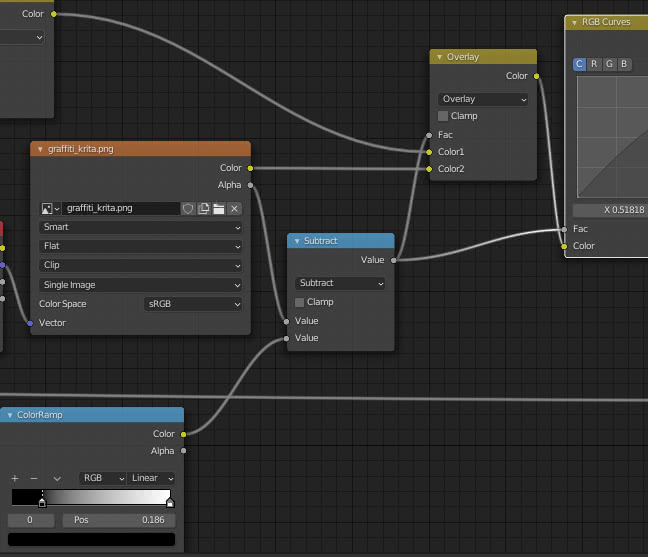
To blend this knot with the effect of the previous textures, we use a knot "MixRGB" ("Add > Color > MixRGB") with "Overlay" option. We use this option because it mixes or discolors the colors according to the base color, so you can see the roughness of the bricks under the paint, while between one brick and the other the paint will not be present, as happens in reality due to the crumbling of the mortar over time. This effect should only be applied to the graffiti texture, so let's use its "alpha" channel as a mask.
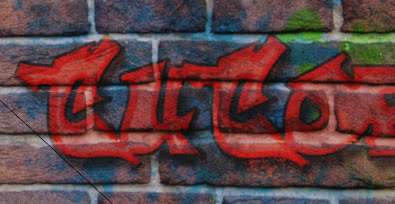
The result is what we were looking for
however, the writing must be better positioned
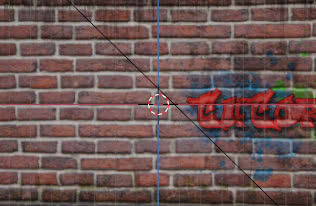
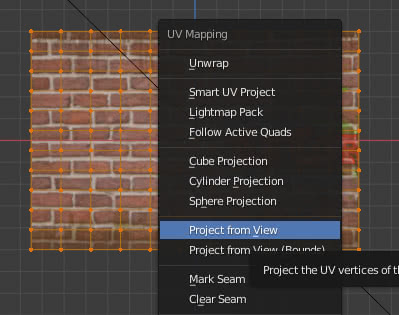
So click on the tab corresponding to the "UV Editing" workspace, in the "3D Viewport" on the right press the "Tab" key to enter "Edit Mode". We select everything by pressing the "A" key then create a new map, pressing the "U" key and choosing "Project from View" in the popup window
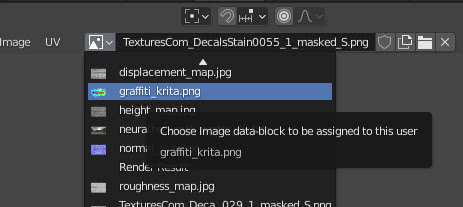
On the left, in the "UV Editor" choose the texture "graffiti_krita.png" at the top (the reference is already present in the drop-down menu because we had loaded it in the "Image Texture" node)
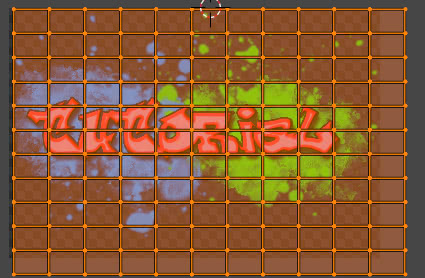
and use the "G" and "S" keys to move and resize the mesh projection until the desired result is reached (also obtained by looking at the window with the preview on the right).
To make the colors of the graffiti more vivid we can possibly add a "RGB Curves" node ("Add > Color > RGB Curves") to be modified at will
Other graffiti changes:
We can eventually try to ruin/blur the graffiti writing by subtracting from its alpha channel a mask generated by a musgrave texture.
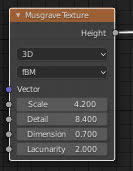
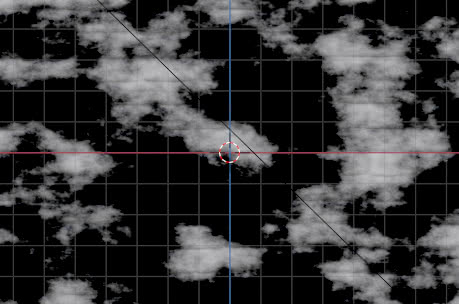
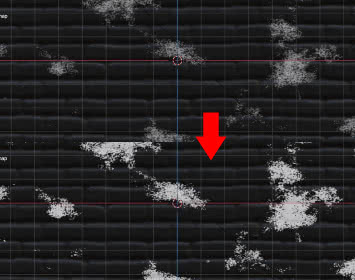
Let's add a "Musgrave Texture" node ("Add > Texture > Musgrave Texture") and set the parameter values in order to obtain small jagged spots:
getting
We also add a "Noise Texture" node ("Add > Texture > Noise Texture"), using it as "Factor" for mixing with a black color
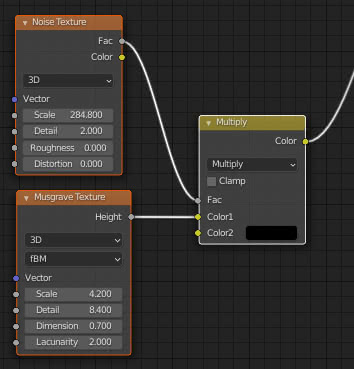
to create "many small holes" in the "clouds" built previously (The holes are used to better simulate the deterioration of the paint over time)
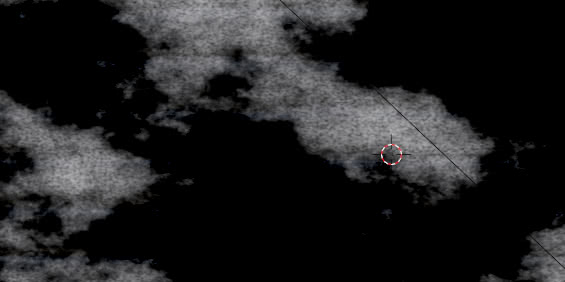
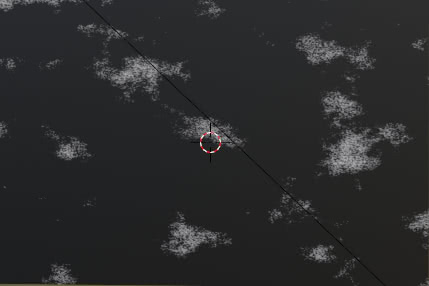
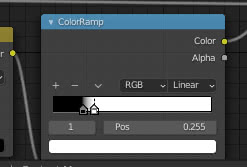
By adding a "ColorRamp" node (Add > Converter > ColorRamp), with a black slider in position 0.186 and a completely white one currently in position 1,
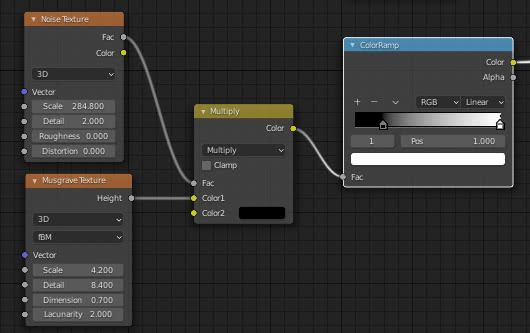
we make the clouds smaller, more spaced and better defined
Now we have to subtract these bubbles from the graffiti, for this we make the difference, using the "Math" node with "Subtract" option ("Add > Converter > Math"), between the mask coming from the "Alpha" port of the graffiti texture
and the result of the "ColorRamp" node just inserted. The result of the subtraction will be used as a new map to be inserted in the "Fac" gates.
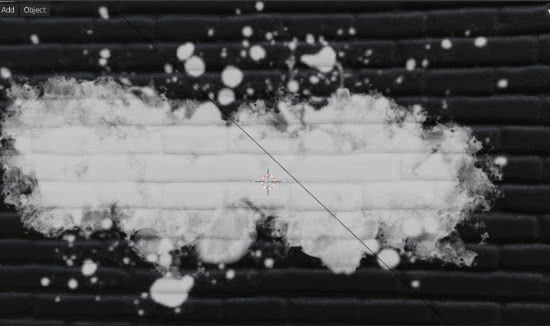
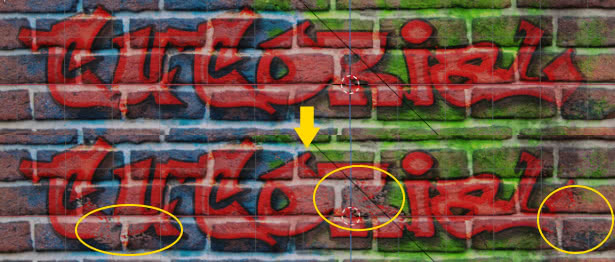
We see in "Material review" mode that the writing in some areas (in correspondence with the "clouds") has already begun to fade and the outlines are less defined

By moving the slider of the white color to the left, for example to a position 0.255
the white of the "clouds" intensifies and becomes clearer,
increasing the intensity of the mask that is subtracted,
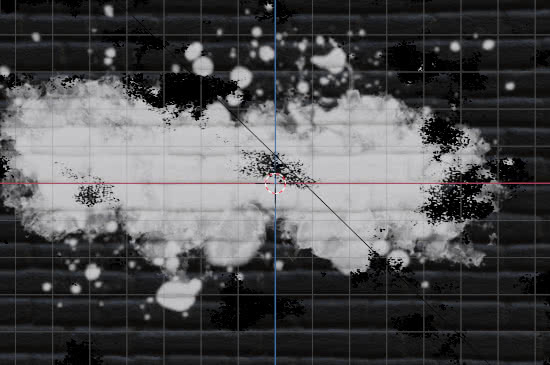
simulating an erosion of the more evident graffiti writing
We sign the graffiti:
Now let's "sign" the graffiti using the "Texture Painting". We enter the "Texture Paint" workspace by clicking on the relative tab at the top, then in the "Image Editor" on the left, by clicking on the "New Image" button at the top, we create a new image to paint on, which we call "Sign"
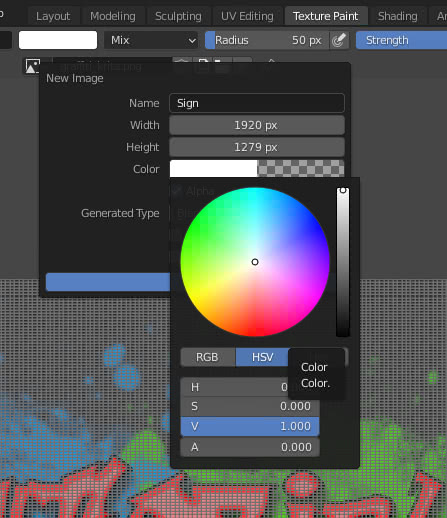
with the same dimensions as the "diffuse_map.jpg", width 1920 pixels and height 1279 pixels, because we want to extend the palette to the entire top for convenience, and transparent (Alpha = 0) because in addition to the writing, the rest will be transparent.
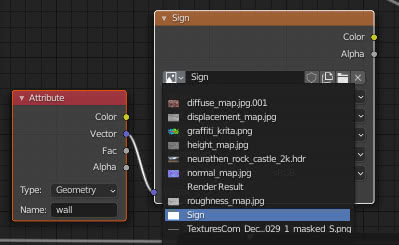
In the "Shading Editor" of the "Shading" workspace we move the "Principled" and "Material Output" nodes even further to the right, selecting them and pressing the "G" and then "X" keys. Duplicate the "Image Texture" and "Attribute" nodes of the graffiti, bring them further to the right, and select the "Sign" texture in the "Image Texture" node from the drop-down menu and write the map name "wall" in the "Attribute" node. This is because we use the "UV Map" "wall" for the signature.
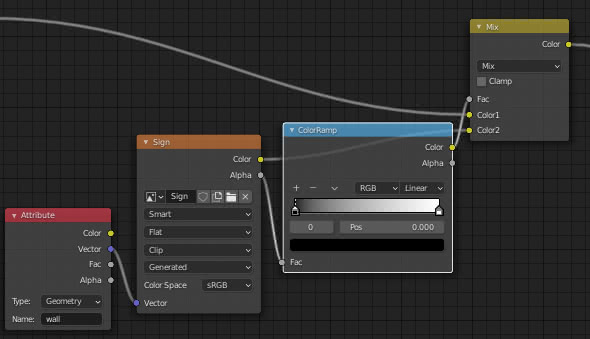
Let's mix with a "MixRGB" node ("Add > Color > MixRGB"), with the option "Multiply" selected, this texture with those already present, using the "Alpha" port of the new texture as a mask, adding a "ColorRamp" node ("Add > Converter > ColorRamp") to accentuate or diminish the effect if necessary.
Since we are referring to the map that includes the whole wall, we select the "UV Map" "wall" in "Object Data Properties > UV Maps".
Let's go back to the "Texture Paint" workspace and select the "Material Preview" display mode (if we were unable to see the rectangle in the "3D View", it will reappear with this display mode)
We therefore press the "1" key on the numeric keypad to set the front orthogonal view. After placing the rectangle well
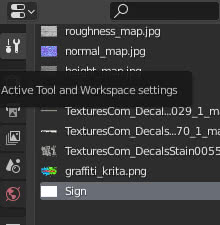
we zoom in with the mouse wheel and in "Active Tool and Workspace settings" select the "Sign" texture
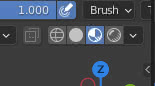
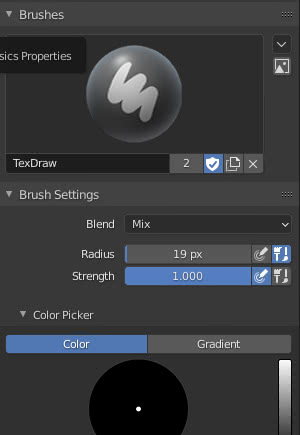
we select a brush with an appropriate radius size and black color
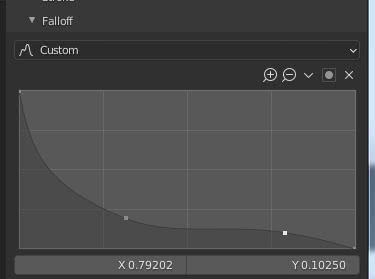
and "Falloff" of the custom brush stroke (add some points and modify the curve to create a softer brush stroke in the outermost part)
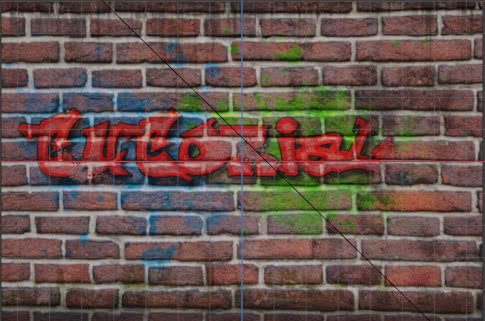
then in the "3D View" we draw with the mouse (or a graphic tablet, or other) a hypothetical signature of the graffiti
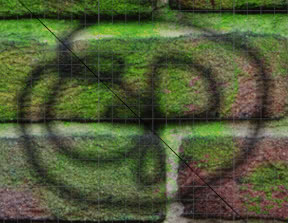
Let's start the rendering by pressing the "F12" key and we'll see

We customized the brush curve that way because we had to create a small signature, because in the example in this tutorial we had to draw a line that was visible, but also showed peripheral shades after zooming out to frame the entire wall.
But it's not very similar to spraying from an airbrush.
A better setup could be
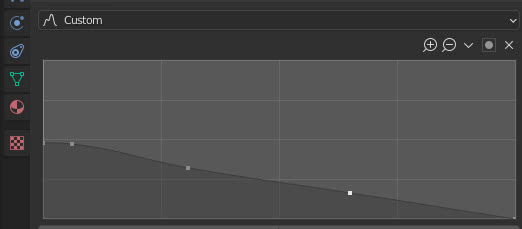
with result
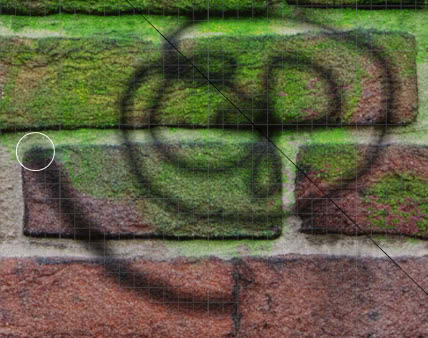
you choose the customization you think is best.
You can download the project files here:
diffuse_map.jpg
displacement_map.jpg
height_map.jpg
normal_map.jpg
roughness_map.jpg
graffiti_krita.png
blender_add_graffiti_wall_adaptive_subdivision.blend
blender_add_graffiti_wall_display_modificator.blend
TexturesCom_DecalsLeaking0270_1_masked_S.png
TexturesCom_DecalBottom0029_1_masked_S.png
TexturesCom_DecalsStain0055_1_masked_S.png
world hdri
That's it for this tutorial on graffitiing a wall with Blender. In the last episode of the course we will try to add some ivy to the wall ("Blender: complete guide to the Ivy Generator add-on"). Happy blending!
Back to "Blender course: from photo to 3D wall" course