Cryptomatte in Blender 2.8 and 2.93, a revolution [ENG]
In this tutorial in English we will talk about Cryptomatte, one of the most interesting news in Blender 2.8, and how it has been updated in Blender 2.93, simplifying and enriching it. This feature, which follows the specifications of an open standard that is now common in many programs, allows to greatly simplify the phase of Compositing, facilitating the creation of fast masks, selecting and quickly removing the objects that you want to change, unlike the previous versions in which an object could be assigned in the Compositing editor through the laborious specification of a specific number in the Object > Relations > Pass Index panel.
With Cryptomatte the elements of a scene can be selected mainly according to three modes: "Object", in which each object is selected individually, "Material" in which the objects are selected by material, "Asset" in which it considers objects related to each other (so just select the parent object to also highlight the child objects).
In this tutorial we will talk about how to select with Cryptomatte in various ways, how to crop objects, export masks and how to use multiple nodes simultaneously. A basic understanding of Blender's compositing editor is assumed.
We then create a scene with cubes, on a plane and gray ambient light, in which the light blue cubes have been related to the blue cube.
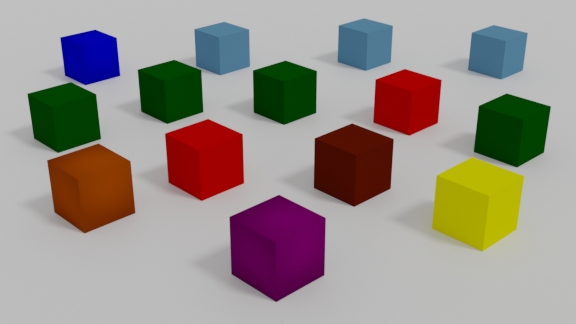
Select with Cryptomatte:
By object:
Now let's select an object with this node, displaying the relative panel located in View Layer > Passes > Cryptomatte where we will check "Object" ("Levels" and "Accurate Mode" we will leave them unchanged as for the case we are considering are not relevant)

In the Compositing workspace we check the "Use Nodes" option, the "Backdrop" option, and add the "Viewer" node to display the results of the operations. Then we start rendering:
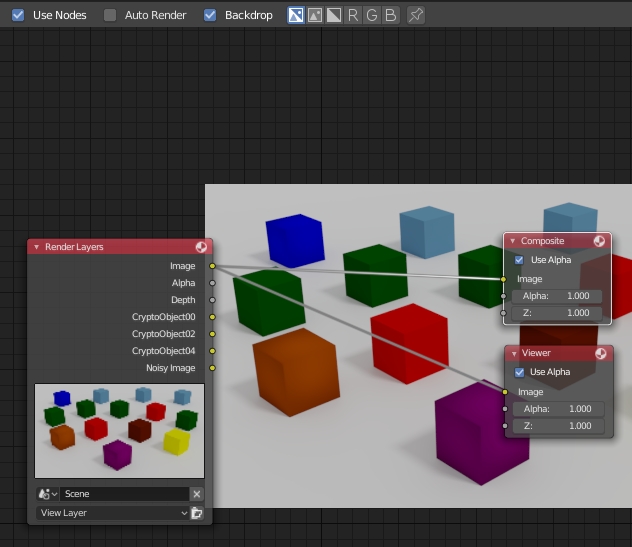
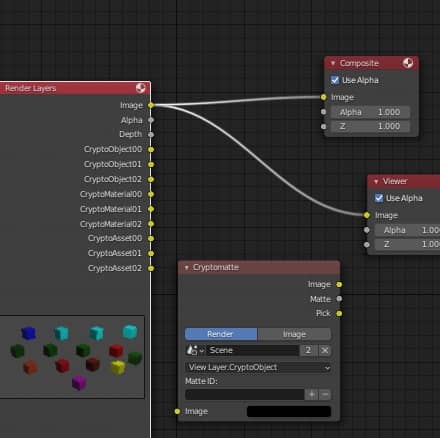
We add the Matte > Cryptomatte node and connect the "CryptoObject" outputs, which had appeared in the "Render Layers" node following the activation of Object (their number will be determined by the value of "Levels"), and Image.
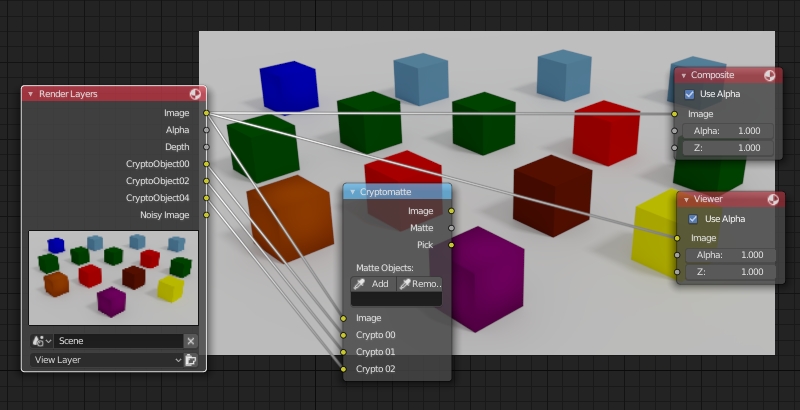
The Pick output of the Cryptomatte node (which we have now connected to the Viewer) will provide the objects already divided among them, distinguished by colors assigned by the software, then we use the dropper of the "Add" tool of the node to select one of the cubes and its code will automatically appear in the text box
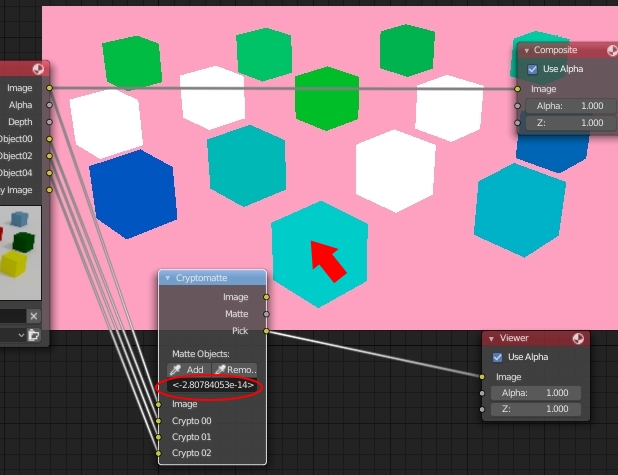
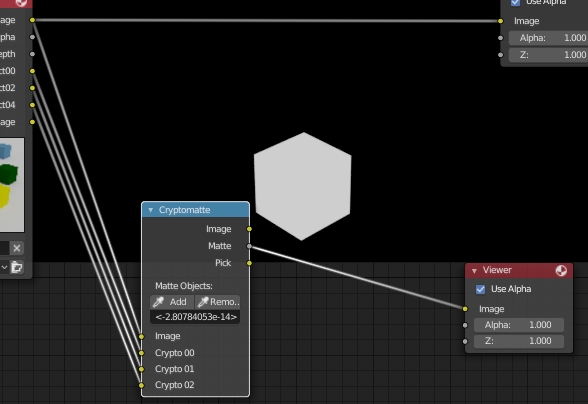
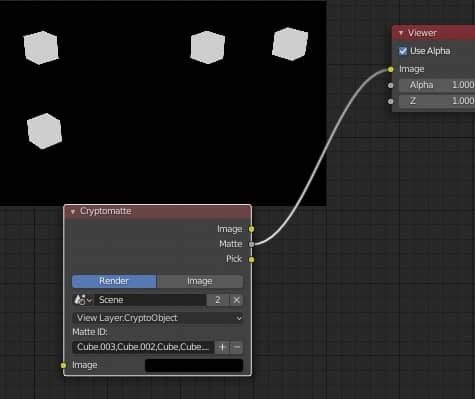
This automatically creates a mask, which we can display by connecting the Matte output with the "Viewer" node, which will show the cube taken into consideration.
By material:
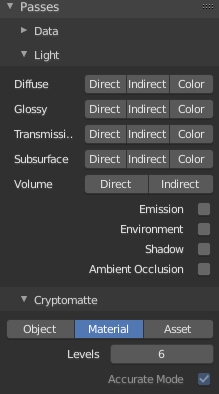
With Cryptomatte we can speed up the work also by selecting through the material; in fact if in his panel we set "Material"
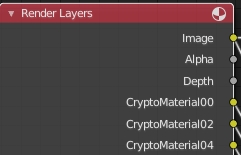
In the Compositing editor we will notice that the "CryptoObject" outputs have been replaced by as many "CryptoMaterial"
We then connect them all to a Cryptomatte node and, by viewing the output of the Pick output, we select with the eyedropper one of the cubes having green material
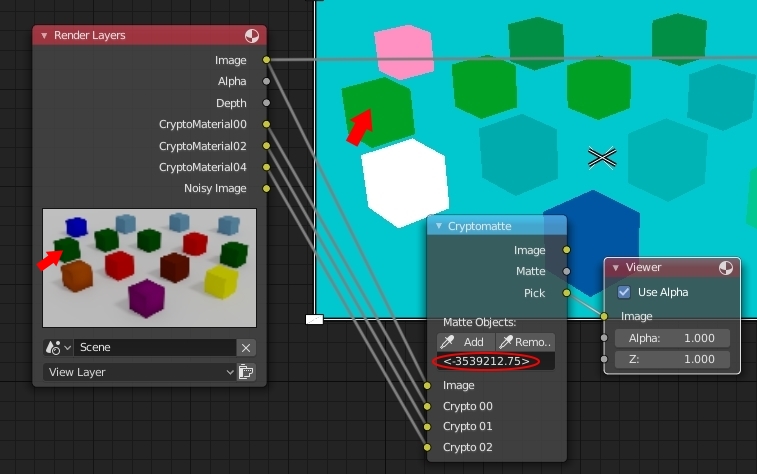
and we can see, by connecting the Matte mask, that all the cubes with that material have been selected
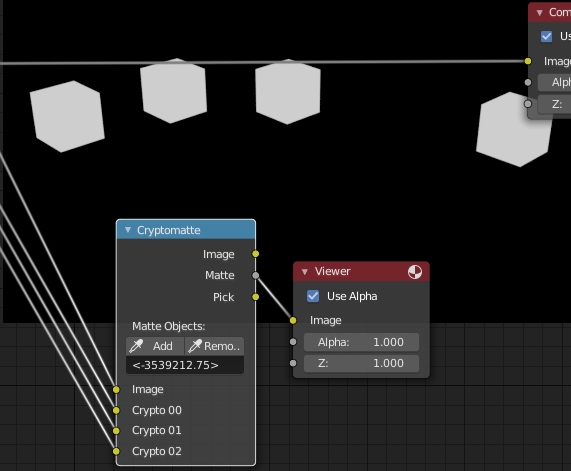
By assets:
When we are working on a complex project, we may need to consider and process with the compositing complex groups of related objects, such as imported resources. Cryptomatte also helps us in this case, through the "asset" option that we can select in the relevant panel
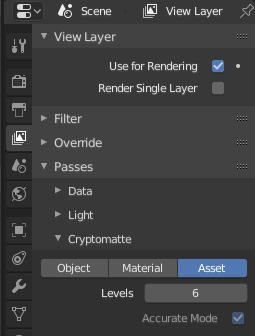
In the compositing editor we can see that once again the outputs of the Render Layers node have changed, as the CryptoAsset outputs have appeared.
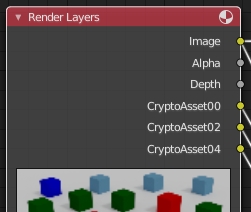
We connect all the nodes as in the previous examples and now select, in the pick view of the node, the cube at the top left corresponding to the blue one, which had the light blue cubes to its right as "sons"
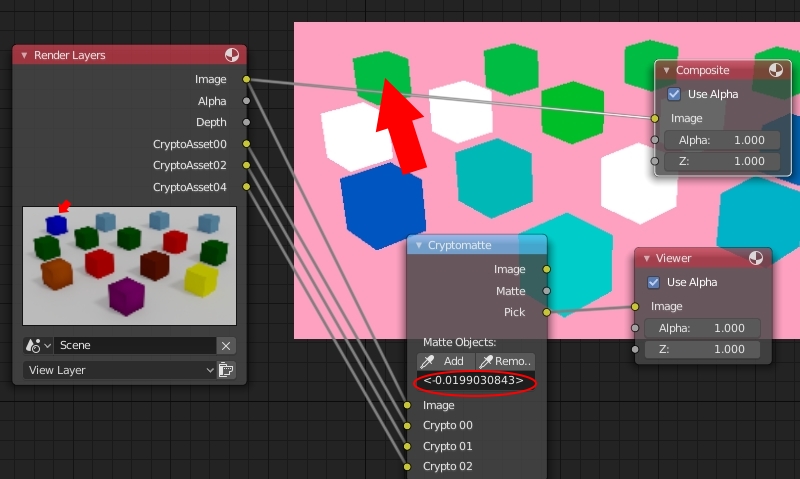
In fact, in the Matte view we will see that having selected only the left cube will instead be considered all four objects on the same row

Change color to an object:
With the object selection mode seen above, we select the cube corresponding to the purple one

and we use the matte mask to mix the cropped image to the original image, so as to show only the selected cube, to which we will change the color: connect a Color > Hue Saturation Value node to the output of the Render Layers node to modify the hue and we combine it with the image itself, through a Mix node set in fac from the mask coming from the Matte output of the Cryptomatte node.
If we now insert 0.8 as the new value of Hue we notice that the purple cube has become green, adapting the colors of its lights and shadows

Cut out objects to be reused later:
Sometimes it may be necessary to crop objects to overlay them with other renderings using compositing, or to reuse them at another time using 2D graphics software.
However, after performing the operation, we note that there remains a white border around the cube.

so we make the background transparent, either by deleting the plane below the cubes, or by setting transparent the output of the rendering in the Properties Window in Scene > Film > by checking the transparency option

and we will obtain our well-cut object without imperfections

Export the masks:
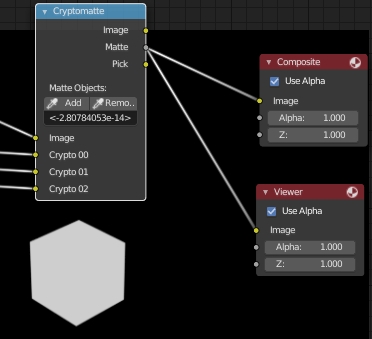
The black and white masks can be exported and reused in 2D graphics programs, to perform other operations on the same image or on other files. To obtain them, just connect the Matte output of the node to the Composite node and then save the result of the rendering
Composition of multiple Cryptomatte nodes:
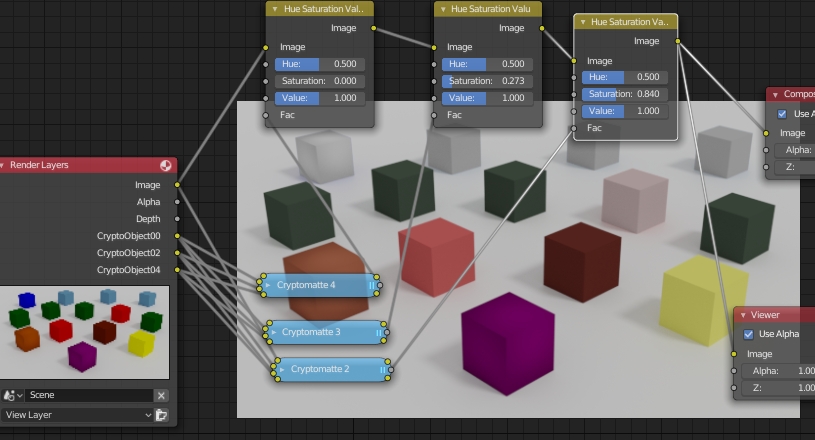
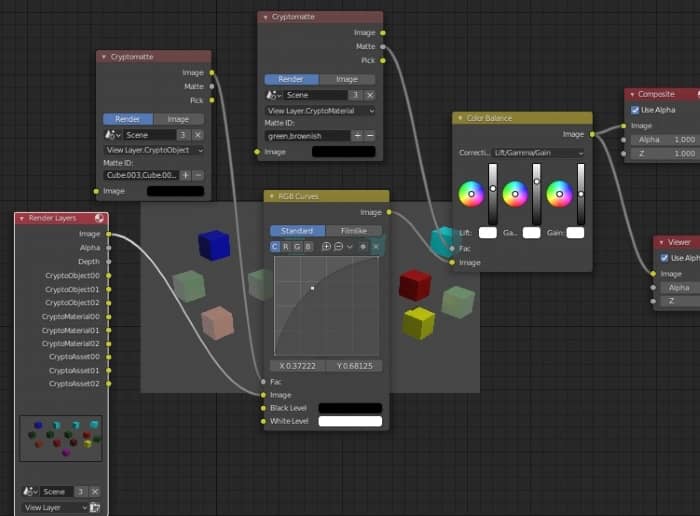
You can use multiple nodes simultaneously, to make multiple selections for different applications in the same Compositing environment; for example we can assign different levels of increasing desaturation to the second, third, fourth row of cubes (corresponding respectively to the "Cryptomatte 2", "Cryptomatte 3", "Cryptomatte 4" nodes here reduced).
The new cryptomatte in Blender 2.93:
In Blender version 2.93 the Cryptomatte node has been redesigned, both to simplify it and to add other features.
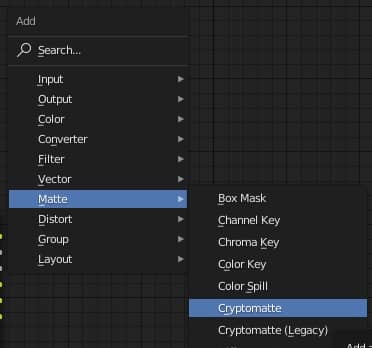
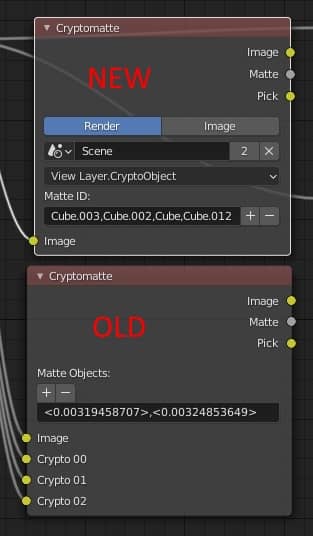
Using the previous scene in Blender 2.93 we can see, opening the drop-down menu in Add > Matte, that there is the new node "Cryptomatte" followed by "Cryptomatte (legacy)", which indicates the previous version
As before, we enable the selection of objects with Cryptomatte, checking the View Layer Properties > Cryptomatte > Object option and then create the two Cryptomatte nodes to compare them
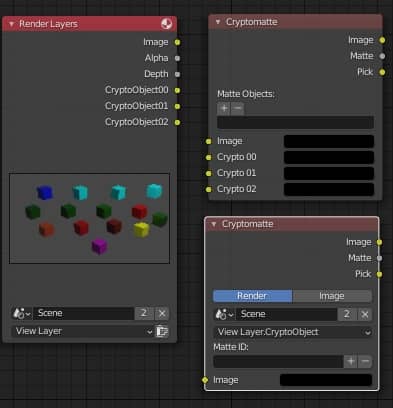
As you can see, in the new node, there are two buttons "Render" and "Image": by selecting "Image" we can load and work directly on .exr images, already created with Blender or coming from other rendering engines or 2D graphic softwares (we will examine this functionality in another tutorial), while the "Render" option allows you to use the new Cryptomatte node as in the previous version, but with interesting additions and improvements:
-
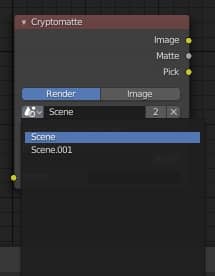
now you can choose which scene to work on; indeed if we create another scene "Scene.001" from the drop-down menu we can decide on which scene to apply the mask created by selecting, for example, a part of a background in "Scene" instead of a main character in "Scene.001", or parts of objects instead of their shadows located in another scene
![]()
-
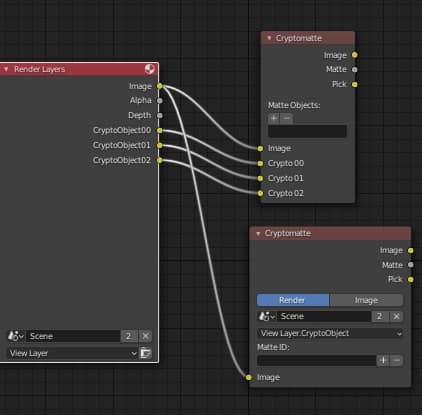
the new node allows to create fewer connections, thus keeping the graph of the nodes cleaner and simpler
![]()
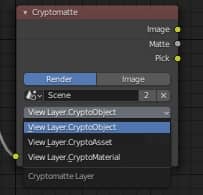
the option that refers to the selection through objects is now specified by "View Layer.CryptoObject" instead of through 3 cumbersome links. If we had also enabled the Material and Asset options in the properties, the menu would have looked like this
![]()
allowing a greater speed in the passage from one type of selection to another
-
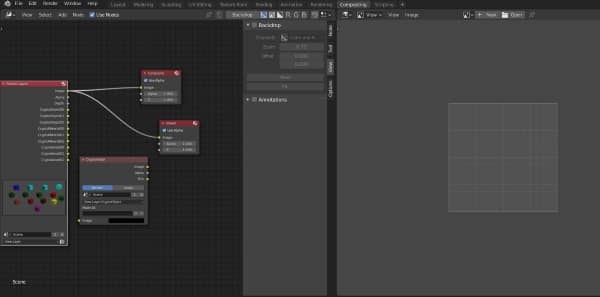
A less cryptic selection of elements; now objects, materials and assets can be more easily selected in the rendered image. We connect the Render Layers node to the Composite node
![]()
create next to it a new window, for which we have selected the Image Editor (by pressing SHIFT + F10 or selecting the Image Editor in the drop-down menu at the top left of the window)
![]()
Instead of opening an image we select "Render Result" from the central drop-down menu at the top
![]()
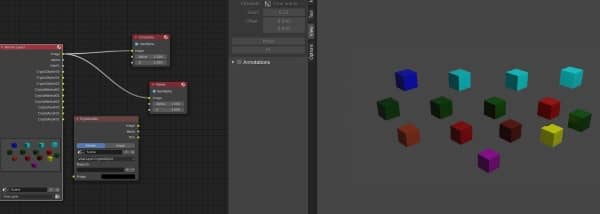
we start the rendering by pressing F12 and we get
![]()
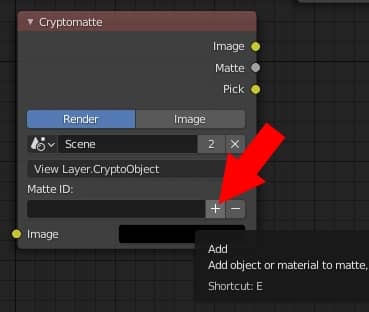
If we now click on "+" in Matte ID in the Cryptomatte node
![]()
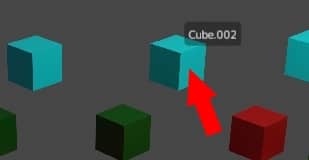
with the dropper we position ourselves on a cube in the newly created window and a pop-up strip will be displayed with the name of the object
![]()
moreover, unlike the old node, the names in Matte ID will show the names of the objects (Cube, Cube.002 etc.), not the incomprehensible anonymous codes as in the old version
![]()
(To delete the selected objects, just use the "-" button and the eyedropper, or change the Matte ID field as if it were a normal text field, deleting the names of the objects we no longer need, leaving the rest separated by commas)
-
All the operations for creating the mask can be carried out without connecting the Cryptomatte node to the Render Layers.
![]()
This allows you to add more Cryptomatte nodes (with different types of selection), without building all the upstream connections, thus helping the readability of the node graph.
![]()
As we saw in this little tutorial, the Cryptomatte standard introduced in Blender 2.8, updated and improved in Blender 2.93, makes it easier, faster (and even fun) to work in the compositing phase, directing even more the functions of this wonderful software to the nodes.

![The new shortcuts in Blender 2.8 [ENG]](../../../../immagini/copertina/cover3_130x130.jpg)
![How to add stars background with Cycles in Blender [ENG]](../../../../immagini/copertina/cycles_stars_cover3_130x130.jpg)
