Blender: Adding reflections to only part of an object
In this tutorial we will see how to add a reflection only to a part of an object/mesh in Blender, using the "View layers" in the Compositor. For example (as we had been asked on social media) if we want to create a building with a metal structure, with an HDRI that enhances the metal structures and the glass that reflects a panel depicting a sky, we don't want the panel with the sky to be also reflected by the metal structures.
For the tutorial let's create a simplified example, using a cube: start Blender, select the default cube by clicking on it, press the "TAB" key to enter "Edit Mode". We select all, pressing the "A" key, and click on the cube with the right mouse button, choosing the "Subdivide" option

then in the lower left window they choose a number of cuts equal to 4

We deselect all by pressing the keys "Alt+A" and in selection mode "Face"

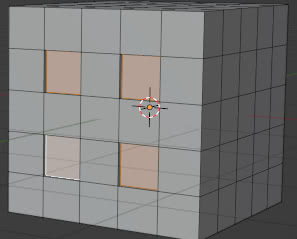
we select the 4 "windows" of the "palace", extruding them inwards after pressing the "E" key
In the "Material Properties" tab we create a simple "metal" material for the cube, composed only of the "Principled BSDF" shader with "Roughness:0" and "Metallic:1"
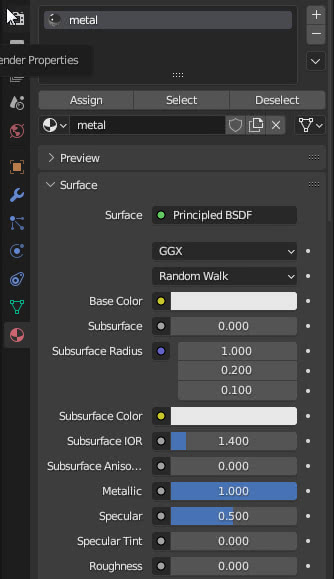
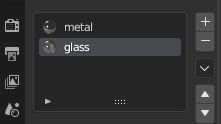
By pressing the "+" button on the right

let's add a new material "glass" for the window panes
relatively simple, just a "Glass" and a "Glossy" shader mixed according to the "facing" mode of the "Layer Weight" node, so if we are facing we see the window as glass, while if we look obliquely we see more and more of the reflected as the viewing angle increases from normal.

In "Edit Mode" we select the windows and press the "Assign" button to assign the glass material to the windows

(You can get a good simulation of the glass material when the window has a thickness, but in this simplified example it is not the main purpose to create a realistic scene)
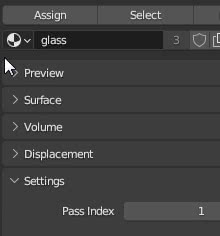
In the "Settings" subpanel of the "glass" material we assign to "Pass Index:1" to later identify the elements to which that material has been assigned
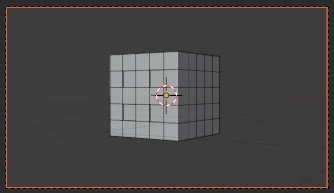
We move the camera so as to frame the cube well
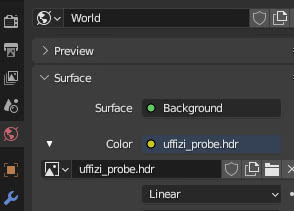
In the "World Properties" tab we use the "uffizi_probe.hdr" HDR image for the ambient lighting (useful for "enlivening" the reflections of the metal) downloaded from the site https://www.pauldebevec.com/Probes/
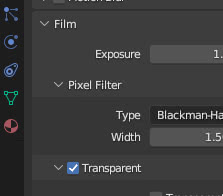
We are only interested in what happens on the cube, so in order not to get distracted by the rest of the scene we choose a transparent background: in the "Render Properties" tab we check the "Transparent" option in the "Film" sub-panel
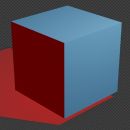
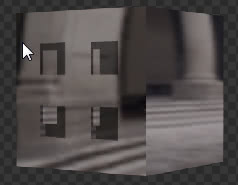
If we press the "F12" key to render we get
Now let's add a reflection of a sky on the windows: let's download a photo of a blue sky from https://pixabay.com/photos/sun-sky-blue-sunlight-sunbeam-3588618/ ,
we import the image with the "Images as Planes" add-on (already present in Blender and active by default and present in "File > Import") in a plane (which we call "sky plane"), which we rotate, zoom and we place in front of the windows so that it is reflected from them.
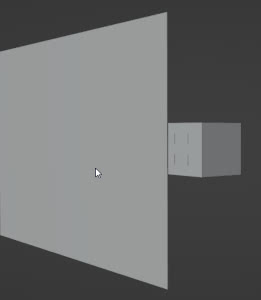
However, the plane partially hides the cube if we try to look at it with the camera
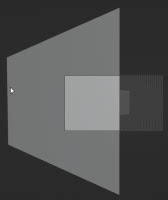
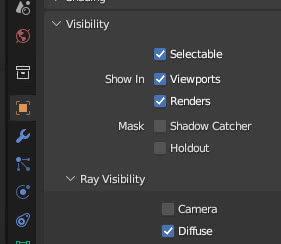
so to avoid hiding it even during rendering, we select the plane and in the "Object Properties" tab we uncheck "Camera" in the "Visibility > Ray Visibility" sub-panel
We press "F12" to start rendering and we get the cube with the reflection of the plane containing the texture of the sky
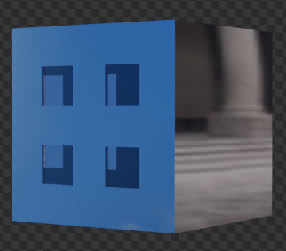
Now we want to separate these two effects (cube with reflections only of the hdr of the "world" and cube that reflects the plane containing the image of the sky), making them available in two "view layers", layers which we can then add and on which we can perform other operations in the "Compositor".
In the "Scene Collection" we create two collections "Collection metal" and "Collection sky". "Collection metal" represents the scene with only the cube, without the plane being reflected, while "Collection sky" represents the scene of the cube ("cube") which reflects the sky, so it contains a copy of the cube and the plane ("sky plane"). The lamp and the camera are external to these two collections, since they are common to both situations (even the cube would be in common, but for simplicity we have created "logical groupings").
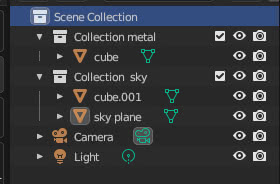
Now let's create the two "View layers":
we rename the current "View Layer" to "view metal" and enable (display) only the collection "Collection metal"
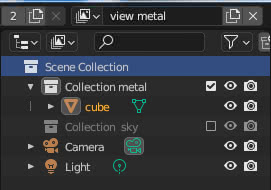
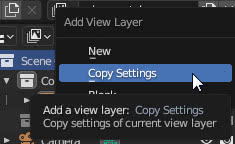
so let's create a new "View layer" by clicking on the small button on the right,

choosing the "Copy settings" option,
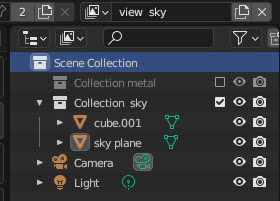
calling it "view sky", where we hide "Collection metal" and display "Collection sky"
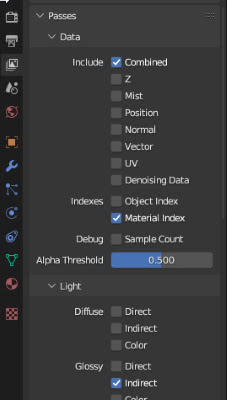
Enable for this "View layer", in "View Layer Properties", the "Passes" "Passes > Data > Indexes > Material Index", which is used to select the parts of a mesh with a certain material, and "Passes > Light > Glossy > Indirect", to display indirect reflections, i.e. mirrored objects, in this case the plane. (They are called indirect reflections because the rays in the Ray Tracing system hit the object first, then the surface that reflects them and then end up in the chamber)
We access the "Compositing" workspace, by clicking on the label at the top,

and enable the "Uses Nodes" option

Let's create two "Render Layers" nodes ("Add > Input > Render Layers") which will correspond to the two layers

in fact on one we will choose in the drop-down menu at the bottom the "View Layer" "view sky"
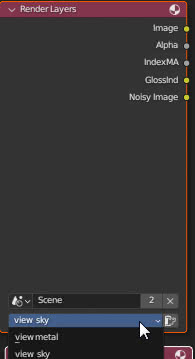
and automatically the ports "IndexMA" (corresponding to the "pass" "Material Index") and "GrossInd" (corresponding to the "pass" "Glossy > Indirect") will appear
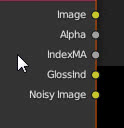
In the other "Render Layers" node we set instead the "view metal" "View layer"
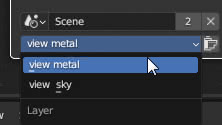
and the node has only the default ports.
To have a preview of the intermediate results of the operations in the "Compositor", check that the "Backdrop" option is activated at the top right

and add the "Viewer" node ("Add > Output > Viewer") to see the preview.
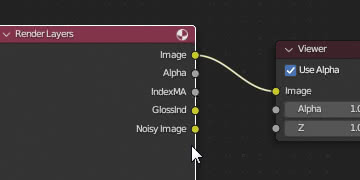
In fact, if we connect the "Render Layers" node corresponding to the "view sky" layer and start the rendering by pressing the "F12" function key, at the end of the two renderings (corresponding to the two layers) appears
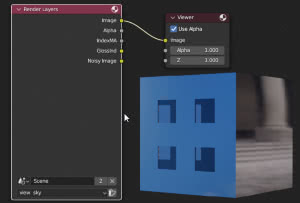
Now let's generate a mask that isolates the windows: we remember that we gave the "glass" material "Pass Index:1", so we add the "ID Mask" node ("Add > Converter > ID Mask") , which selects a mask, using the input index "IndexMA" with the parameter "Index:1", which corresponds to the "Pass Index" with value 1 of the window material (check the "Anti-Aliasing" option to smooth the oblique lines). We connect the "Alpha" output to the "Viewer" node and display the mask that identifies the windows:
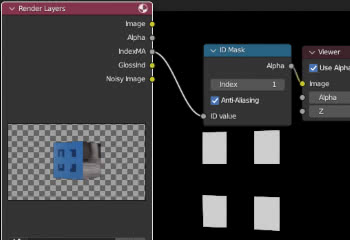
Now we can follow two paths: either we take only the reflection of the sky and apply it to the windows, without taking into account the effect of HDRI on the windows, or on the windows we mix the effect of the reflection of the sky with that of HDRI
Only reflection of the sky on the windows:
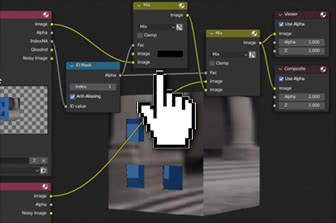
Using the mask just obtained, we extract the image of the windows by adding a "Mix" node ("Add > Color > Mix"), with the "Mix" option selected
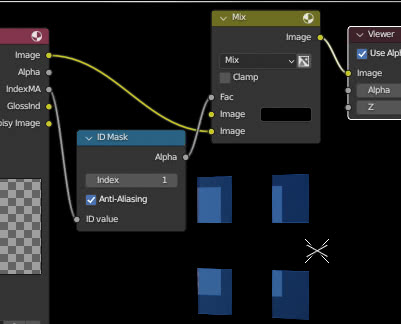
The "Mix" node keeps only the parts of the "Image" which are marked by the white parts of the input mask in "Fac", for the other port we leave a black color (neutral with respect to the "Mix" nodes).
Using another "Mix" node, now we paste this image on the one generated only by the "view metal" layer, thus obtaining what we were looking for
(The result of this "Mix" node will be the image of the "view metal" with only the parts indicated by the mask coming from the "ID Mask" node replaced)
Sky reflection on windows mixed with HDRI reflection:
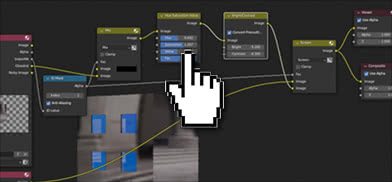
In this case we do not use the final image of the "view sky" layer, which also includes contributions from other sources, but only the indirect reflections, which are generated by the objects that are reflected on the glass (in this case the plane with the texture of the sky), so we will use the output of the "GlossInd" port, instead of the more complete "Image". For mixing with the rest of the building we can still use the "Mix" node ("Add > Color > Mix") to mix the two layers, but it's better to choose a "Screen" option that, even using some node to adjust brightness and colors ("Add > Color > Hue Saturation Value" and "Add > Color > Bright/Contrast"), better simulates the reflections of a window.
After connecting these nodes and restarting rendering, we get
Export to file:
If instead of using the "Compositor" in Blender we want to compose everything in a 2D graphics software, we can use a "File Output" node ("Add > Output > File Output") to export the images and reflections

That's all for this tutorial on how to add an extra reflection to just part of an object in Blender. Happy blending!
