How to use the Knife Project tool in Blender correctly
In this tutorial we will see how to use the "Knife Project" tool in Blender correctly, which allows you to cut out a shape on an object by projecting another object used as a mold. The "Knife Project" tool is used to add details to a mesh in Blender without having to work too hard to modify its topology, also avoiding the use of the "Subdivision Surface" and the "Adaptive Subdivision", thus providing a valid help for modeling especially in anticipation of a future 3D print, or greatly speeding up operations that would have required the knife tool.
Compared to Blender's Boolean modifier, the "Knife Project" function is more suitable for thin surfaces, or if the mesh for the mold is two-dimensional, perhaps obtained from an image or an imported svg logo.
Table of contents of the tutorial:
- How to use the "Knife Project" tool (quick guide)
- The "Knife Project" before Blender version 2.93
- How to cut a hole on both sides
- Why do we have to align objects to the user view?
- How to align the view to have a correct projection
- Project the internal edges with the "Knife Project"
- Which objects can be used for carving (how to solve the error "No other selected objects have wire or boundary edges to use for projection")
- Use multiple meshes, curves, at the same time
- Does the "Knife Project" tool depend on the zoom?
- Remove artifacts (like "smoothing" the mesh when using the "Knife Project" tool in Blender)
- The "Knife Project" tool creates a lot of triangles
- Do you still need to subdivide or not? Better just limit
- Applications of the "Knife Project" tool
In our demonstration example in this tutorial we will initially use a circle as the shape and a cylinder as the target object, as it is always a bit problematic to carve holes on curved surfaces.

How to use the "Knife Project" tool (quick guide):
To use the "Knife Project" tool correctly, the observer's view, the object containing the shape to be projected and the target object to be carved must be well aligned, with the planes of the shape and the target perpendicular to the user's view in the "3D View"
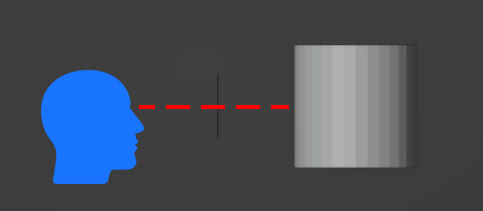
A simple way to use the tool is the following: create the cylinder with "Add > Mesh > Cylinder", using the "3D View" menu (or the "Shift+A" keys), create the circle with "Add > Mesh > Circle", move it along the Y axis by pressing the G keys and then Y, rotate it 90 degrees around the X axis by pressing the R and X keys, writing 90 and confirming with the "ENTER" key, obtaining so
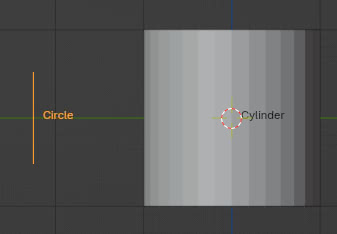
Now let's press the 1 key on the numeric keypad, to go to the front view, then select the cylinder with the left mouse button
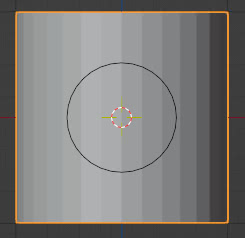
press the "TAB" key to enter "Edit Mode"
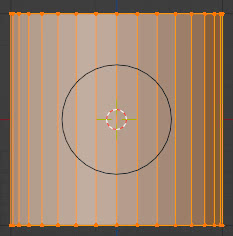
and from here select the circle to project ... we can do it in two ways: either by holding down the "Ctrl" key and selecting the circle with the left mouse button
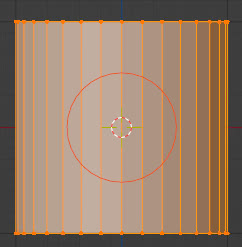
or in the Outliner by also selecting the circle, holding down the "Shift" key or "Ctrl"
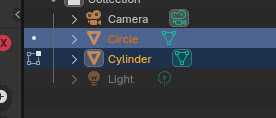
then from the menu we choose "Mesh > Knife Project"
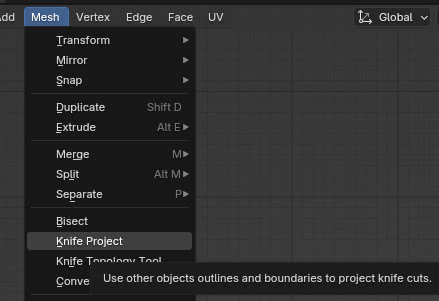
and we get our projection
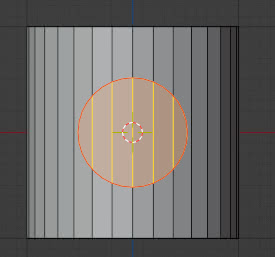
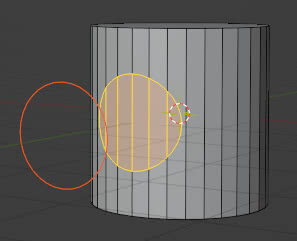
The "Knife Project" before Blender version 2.93:
Before version 2.93 the selection mode, the cutting mesh and the target object, was different.
In our example, holding down the "Shift" key, we would have had to select, in "Object Mode", first the shape of the object to carve (the circle) and then the target object (the cylinder).
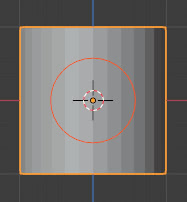
then immediately press the "Tab" key
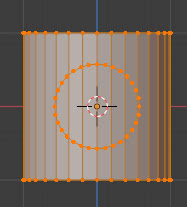
and it is as if both objects were in "Edit Mode". At this point we proceeded as before, activating the tool with "Mesh > Knife Project"
How to cut a hole on both sides:
Using the "Knife Project" tool with the default settings, only the part of the target object visible to the circle is cut, as you can also see in the wireframe of the result
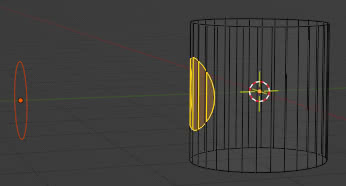
Instead, if we want to cut a hole on both sides of the cylinder, piercing the object from one side to the other, we simply need to enable the "Cut Through" option when applying the "Knife Project" tool.
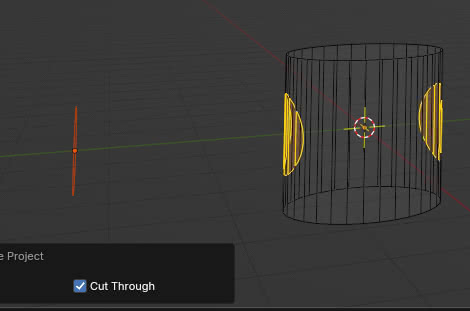
If we wanted to make a hole quickly, while we are still in "Edit Mode", it would be sufficient to press the "Ctrl+E" keys (or click on "Edge" from the top menu) choosing the "Bridge Edge Loops" option in the popup menu
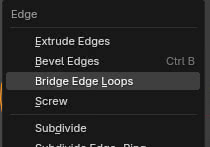
thus eliminating the external faces and connecting the edges of both sides
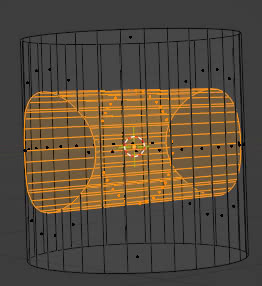
thus creating the hole.
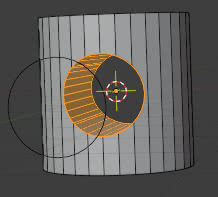
This option allows you to project the carving mesh onto all the meshes, even behind, contained in the target object. For example, if inside the target object there are also the mesh of a cube and a sphere on the projection path, the circle will be projected onto them too. Looking at the final wireframe

If you want to avoid that the cube and sphere (or other meshes) are cut, you can select them and hide them in "Edit Mode" with the command "Mesh > Show/Hide > Hide Selected" (or by pressing the "H" key),

project the circle on the cylinder with the "Knife Project" tool and then make the cube and sphere reappear with "Mesh > Show/Hide > Reveal Hidden" (or by pressing the "Alt+H" keys). Looking at the final wireframe representing this situation

Why do we need to align objects to the user view?
We initially showed how the cutting object and the target object should be aligned with respect to the user's view in the "3D View". But what would happen if we did not align the objects correctly, orthogonally to the view, before using the "Knife Project" tool?
If our view was not orthogonal to the object containing the shape to be carved and to the target object, the projection could fall out
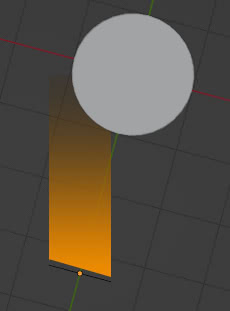
in fact, with the objects aligned in this way
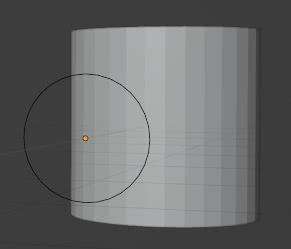
using the "Knife Project" tool

we notice that the projection has partly been "smeared" tangent to the cylinder, and partly has fallen out.
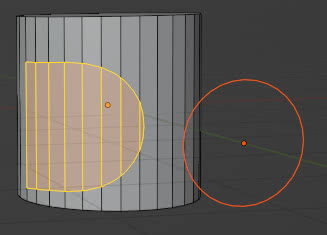
A similar problem can be found if the axis of one of the objects is not parallel to the view. For example, if the circle were tilted it might not be projected in its entire width
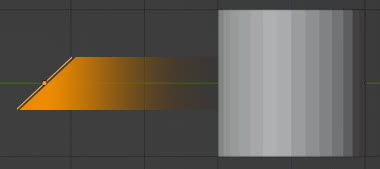
and the result of using the "Knife Project" tool would be a squashed ellipse instead of a circle

it is therefore important to align the view, the shape to carve and the target object, to be able to perform a good projection, as in the case seen at the beginning of this tutorial.
How to align the view to have a correct projection:
What to do if we have to project a shape not positioned correctly orthogonal to the view axis of the observer/target object? How can we use the "Knife Project" tool if the user's view, the mesh to carve and the target object are not aligned along the main axes X, Y, and Z, but differently?
Let's see two cases, in which in the first one the shape to carve will help us in the alignment, in the second one the target object.
Let's orient using the shape to carve (the circle):
If we want to project the circle on the side of the cylinder and instead we find ourselves in the previous configuration
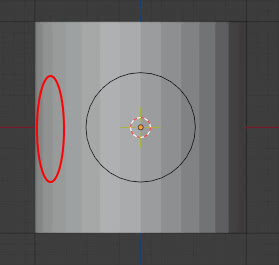
a first suggestion could be to rotate the cylinder, project the circle, rotate the cylinder again with the same value of the angle, but negative. However, if for some reason this procedure cannot be performed, we can rotate the circle around the cylinder, using the "3D Cursor":
If the "3D Cursor" is not centered in the cylinder, select the cylinder in "Object Mode" and press the "Shift+S" keys, choosing the "Cursor to Selected" option.

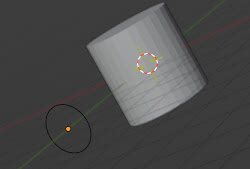
Then we select the circle (the shape we want to project), press the right mouse button and select "Set Origin > Origin to 3D Cursor" in the context menu that appears

bringing the origin of the circle to the center of the cylinder
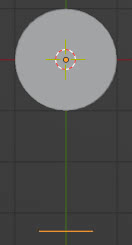
so, by pressing the "R" key to rotate the circle, it will rotate around the cylinder, moving to the correct position

Now that the shape to be projected is aligned with the area to be carved, how can we also position the observer's view well?
If we select the circle in "Object Mode" we can use the command "View > Align > Align View to Active" in the menu, at the top left, with the "Top" view option (or by pressing the "Shift" + "7" keys, on the numeric keypad)

and our objects will be well positioned to use the "Knife Project" tool
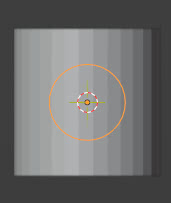
Note: if it seems that the view is still out of phase, it probably happens because you are in the Perspective view; just press the "5" key on the numeric keypad to access the Orthographic view.
Let's orient ourselves by helping ourselves with the target object:
If we have a rotated cube and we want to project a circle on one of its faces
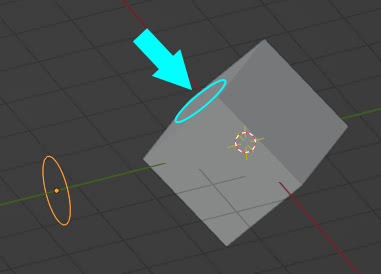
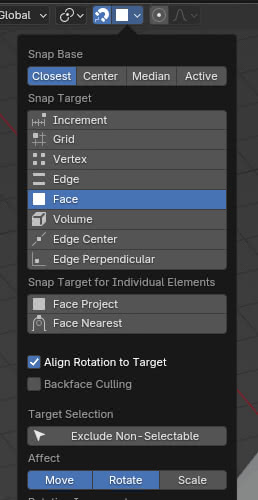
for align the circle to the face of the cube we can use the "Snap" tool on the rotation/translation, aligning the object we need to move to the face of the target (the cube)
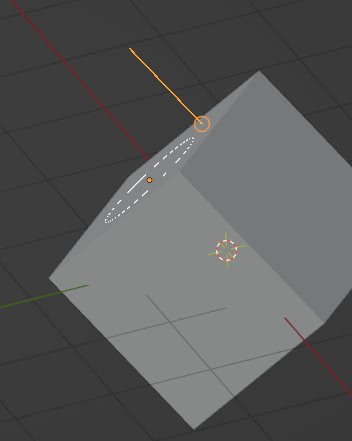
in fact, if we drag the circle on the face of the cube it will align correctly. (Let's move it to position it where we want on the face)
Now let's distance the circle a bit from the cube: let's choose "Normal" as the orientation type for the transformers
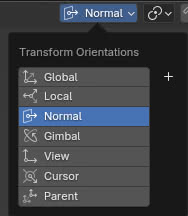
and, by pressing the "G" key, let's move the circle along the Z axis
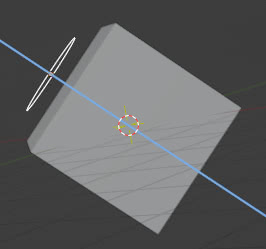
then, to also orient the view, keeping the circle selected, press the "Shift" + "7" keys (number on the numeric keypad) or from the menu select "View > Align View > Align View to Active > Top", thus obtaining the correct alignment from which to start to use the "Knife Project"
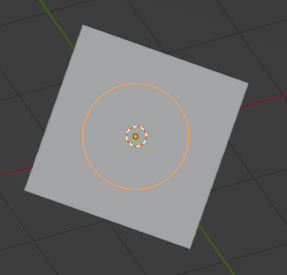
Projecting the internal edges with the "Knife Project" :
So far we have seen how to project the profile, the external contours, of a shape onto a target object, but what if we also need to project the internal edges using the "Knife project"?
Let's take the case of the circle on the cube and create internal faces by executing the extrusion command, immediately pressing the "Esc" key and scaling towards the inside,
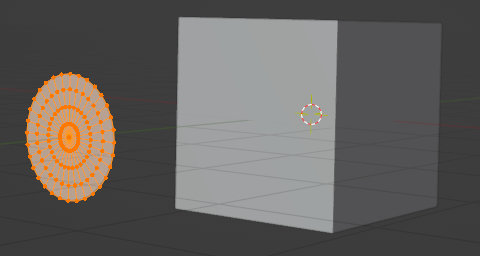
However, if we project this circle full of edges onto the cylinder, we obtain the same outline of the circle, as if the inside were still empty
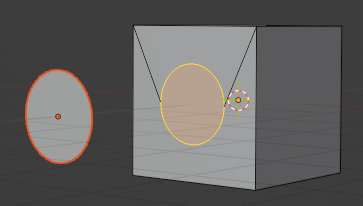
How to solve the problem?
To project the internal edges with the "Knife Project" tool, simply delete the faces inside the edges.
In fact, if in "Object Mode" we select the circle and then press the "TAB" key to enter "Edit Mode", we can select the entire mesh by pressing the "A" key
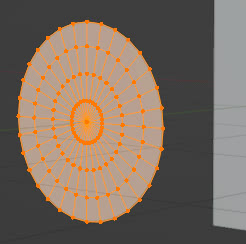
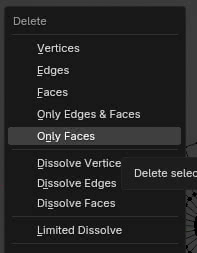
then we press the "X" key, as if we wanted to delete everything, but with the "Only Faces" option to delete only the faces
thus obtaining only an "empty mesh"
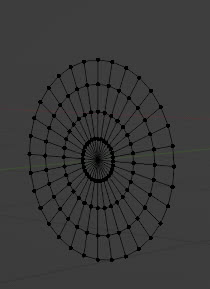
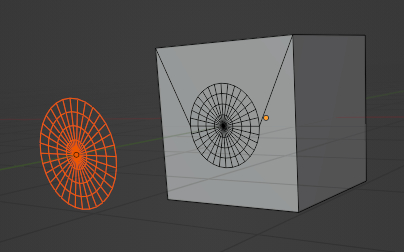
With this structure, by executing the "Knife Project" function we will also be able to project the internal edges
Which objects can be used for carving (how to solve the error "No other selected objects have wire or boundary edges to use for projection"):
To carve we can use meshes, curves, texts, but they must be "Non-Manifold".
We have seen that with the "Knife Project" tool it is possible to use meshes to carve, but these must be "Non-Manifold", a non-closed volume, of which an edge can be identified. For example, we have seen before that the circle is fine, because it has the circle itself as its profile, but the internal edges are not seen until we eliminate the faces that they enclose, so we must show the edges of everything we want to project.
If instead of projecting a circle, we try to carve an object using a sphere

the error "No other selected objects have wire or boundary edges to use for projection" appears

this is because since the sphere is a closed volume, "Manifold", Blender cannot find an isolated edge to project.
How can we then project a solid object onto a surface? We use the same method seen in the case of the circle with internal edges: we select the sphere, enter "Edit Mode", select everything by pressing the "A" key, press the "X" key to delete, choosing the "Only Faces" option and we obtain the lattice
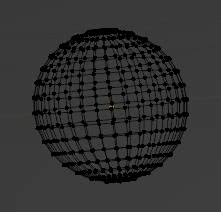
if now in the cube, in "Edit Mode", we select the sphere (holding down the "Ctrl" key and clicking with the left mouse button) and use the "Knife Project" tool ("Mesh > Knife Project") we can project it
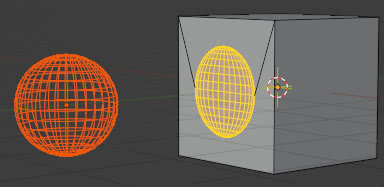
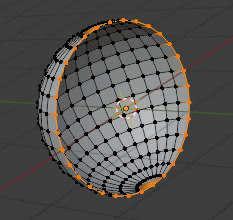
However, if we have any object of which we want to know if it is "Manifold" or not, or an object of which we want to know in advance what its projectable profile/edge is, the "Select > Select All by Trait > Non-Manifold" function can be helpful, which selects the parts of the mesh that make an object not "Manifold", that is, the boundary profile where the volume is not closed: if we activate it on a sphere, it does not select anything, if we apply it to a hemisphere it selects the edge that makes the volume not closed
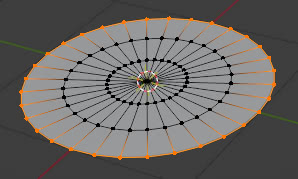
if we use it on an empty circle, it selects the entire circle, if we use it on a circle with edges inside, it selects the external profile and not the edges interiors
As we said before, with the "Knife Project" tool you can use curves to carve
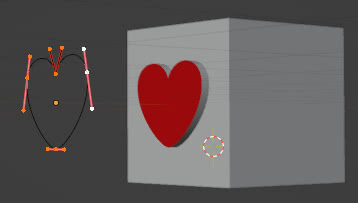
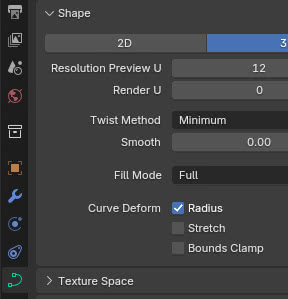
and the quality will also be determined by how many segments the curve is formed, so in the "Data" tab of the curve (in the "Properties Window" on the right) we will have to set a higher or lower value in "Shape > Resolution Preview U"
We can also use the text object to carve a target object, but be careful that the letters are well spaced and do not overlap, otherwise problems could also arise in the target object
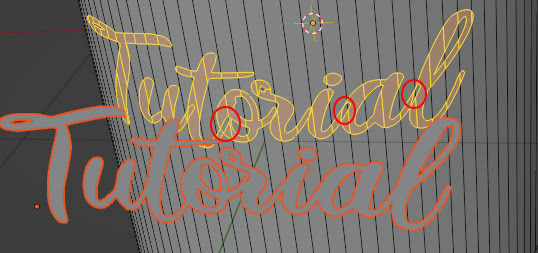
So in the project try to choose a font that avoids overlaps and possibly change, in the "Data" tab of the text, the value of "Space > Character Spacing" to correctly space the letters.
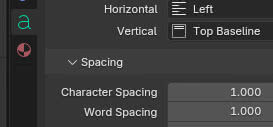
For a better resolution of the projected text, change, in the same tab, the value of "Shape > Resolution Preview"
Using multiple meshes, curves, at the same time:
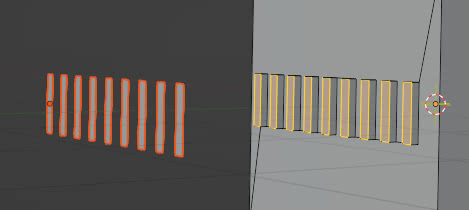
Inside the object to be used for carving, you can insert multiple meshes or curves.
For example, we can insert multiple polygons as a mesh
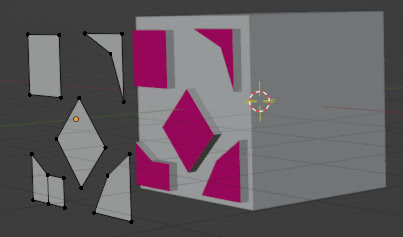
or multiple curves until we form the design we want

Or we can use modifiers, such as the "Array" modifier
Does the "Knife Project" tool depend on the zoom?
As we have already seen, the "Knife Project" tool depends on how the user sees the object that he carves and the target object in the "3D View". However, this may not only affect the projection angle but also the precision. In fact, when the shape used to carve or the mesh of the target object are too complex, there is a risk that the resulting projection contains errors.
Sometimes some edges are forgotten, or confused; for example if we consider the projection of a circle with internal edges (without faces) on a cylinder we can notice some errors

Or we can generate some artifacts on the external edges; as in the case of the projection of a sphere on a cube
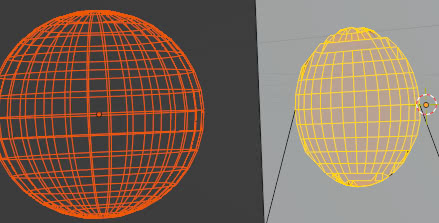
In these cases it can sometimes be useful to zoom in, enlarging the carving mesh and the target object as much as possible,
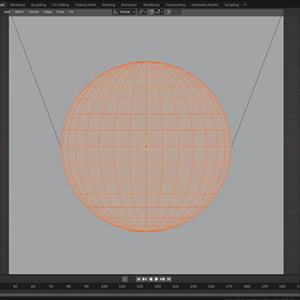
to try to improve the projection
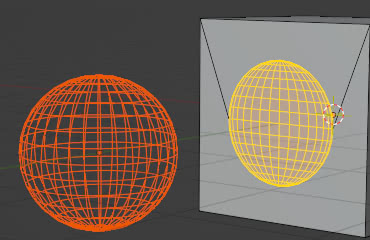
(also to select the mesh to use for the carving, when you are in the "Edit Mode" of the target object, it can be useful to zoom in so as not to mistakenly select the vertices of the target object)
As we have seen, sometimes increasing the zoom can improve the projection, but it does not always solve the problem, which can also depend on the complexity of the mesh used for the carving and that of the target surface.
Remove artifacts (how to "smooth" the mesh when using the "Knife Project" tool in Blender):
When we projected a mesh on a curved surface (for example a sphere with the "Cut Through" option to cut also on the other side and then using the "Bridge Edge Loops" function)

and in "Object Mode" we applied the smoothing on the target object (right mouse button on the target object and "Shade Smooth" function) artifacts may appear

There are various methods to solve this problem:
Use the "Auto Smooth": always in "Object Mode", right-click on the target object and in the popup menu that appears choose the "Shade Auto Smooth" option
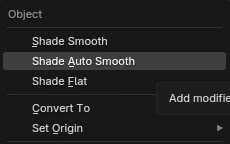
Using the "Edge Split" modifier: we associate the "Generate > Edge Split" modifier to the target object, which, unlike "Auto Smooth", does not act on the material shaders but directly on the mesh.
Creating an edge "by hand": before using the "Bridge Edge Loops" function, create an additional edge by extruding the hole edge, activating the extrusion function but immediately pressing the "Esc" key, then resize by pressing the "S" key
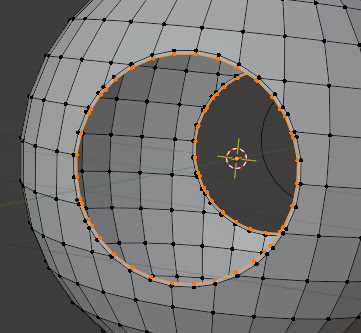
then we can join the two holes as before

and using the simple "Smooth" function there will be no more artifacts

The "Knife Project" tool creates many triangles:
The "Knife Project" when used creates many triangles so, especially if we project on curved surfaces, it would be better to use it only when we have already applied (by selecting from the "Apply" drop-down menu) the "Subdivision Surface" modifier, otherwise very obvious artifacts will be created.
Do we still need to subdivide or not? Better just to limit:
We have seen, in the case of zoom, that sometimes using the "Knife project" tool can create problems with the projection, with artifacts on the edges or confusion between the edges. In older versions it was recommended to appropriately subdivide the mesh of the target object to obtain a better result, but in later versions of Blender good results are obtained even with simple target meshes, such as a flat object.
Despite this, it can be useful to limit with loops the area on which you want to project the shape, especially if we want to use the rest of the mesh for other purposes.
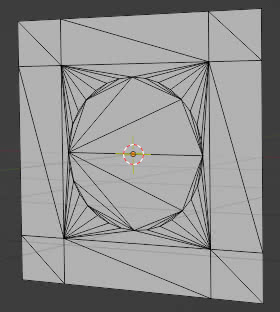
For example, if we project a circle onto a plane and then apply the "Face > Triangulate Faces" function to it, we see that the projection has affected the entire mesh of the square
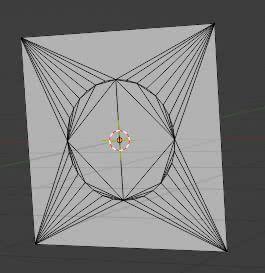
while if we first create loops that surround the future projection
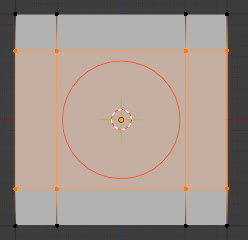
this will only affect a part of the mesh
Applications of the "Knife Project" tool:
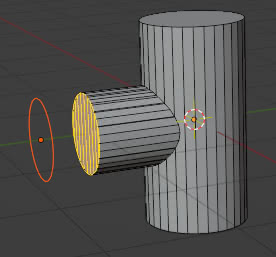
The applications of the "Knife Project" tool are many: we have seen how it is possible to create holes, but these projections can also be used to create "T-tubes"
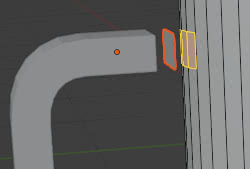
or when we need to attach a handle to an object, we can duplicate the last face of the handle and use it to carve a "contact point" to then use to join the vertices of the handle to the rest
or we can duplicate some elements imprinted in a mesh: by duplicating them and taking them out of the target object, we have a new object to use to carve new copies.
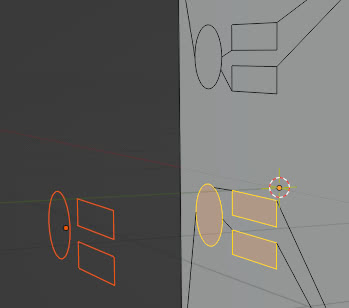
Another use can be to create basic objects (possibly reusable) with which to then build Sci-fi panels, extruding later

We can create grids without faces to project onto any objects and then curve them better with the modifiers.
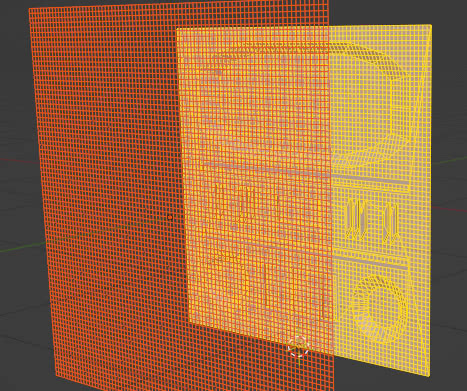
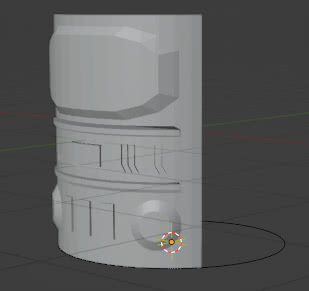
We can cut out an object obtained with photogrammetry or with another type of modeling (also sculpting)
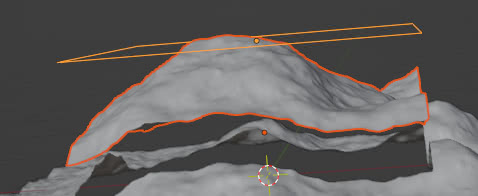
or create decorations, logos, brands on objects

quickly create pendants, coins and gadgets (projecting symbols, writings and circles to make holes if you want to print a keychain)
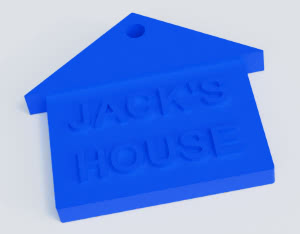
or even, in Archviz, the creation of windows, the union of multiple architectural elements.
This is the end of this guide on the "Knife Project" tool, the applications are endless but also the pitfalls; always try to simplify the carving meshes and create the best conditions on the target object before applying it. Happy blending!
