Grease Pencil in Blender 2.8: how to draw a manga
In this tutorial about the Grease Pencil for Blender 2.8 we will show you how to draw a manga; in fact the 2D drawing tool of this software has recently been enriched with many features (see also Grease Pencil in Blender 2.8 - Introduction, try to practice with the various tools) and therefore its use may have become interesting also for the mangaka.
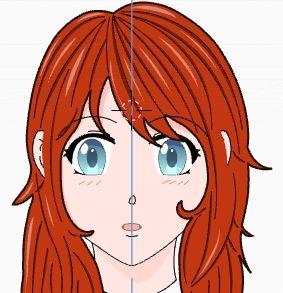
Traditionally the drawing of a manga is first done freehand (here in Blender you could use the interesting Draw tool of Grease Pencil) then traced and inked; in this tutorial we will try instead to realize it directly in its final version, as if it were a vector drawing, until reaching a result similar to
Due to its length the tutorial has been divided into two parts, thus also facilitating the loading operations.
Let's start by drawing the reference lines, which will help us to position the various elements of the face well.
We build the reference structure:
So let's start Blender and create a "2D Animation" file

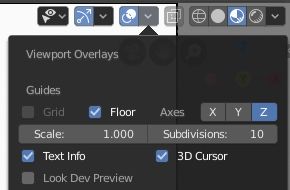
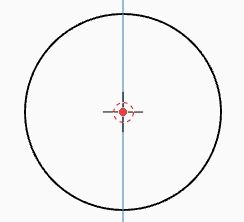
We activate the display of the Z axis and the 3D Cursor (which we will use as references) in Viewport Overlays
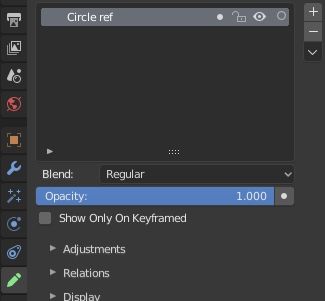
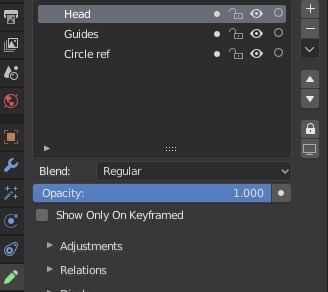
In the Properties Window, in the Object Data tab, we create a "Circle ref" layer where we will draw the reference circle for the head
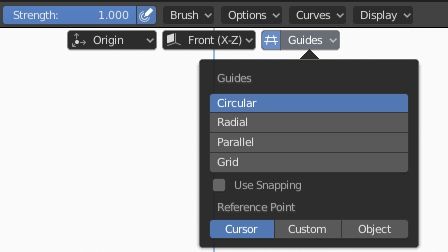
and we activate the Guides (Circular) by setting the hardness of the section to 1
then we draw a circle around the origin, which will represent the skull of the manga character
Now we draw some reference lines, which we will use as a basis to create all elements of the face, therefore, always in Properties Window > Object Data, we create a new "Guides" layer (by pressing the "+" key and moving it below with the arrows located at right)

Then we select the Red color, present by default, and "Grid" in Guides
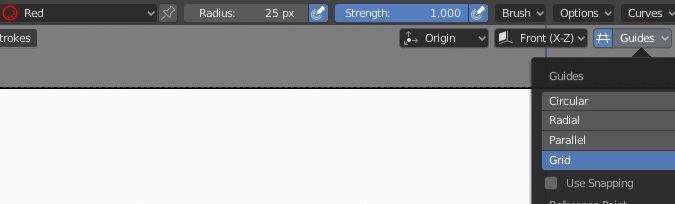
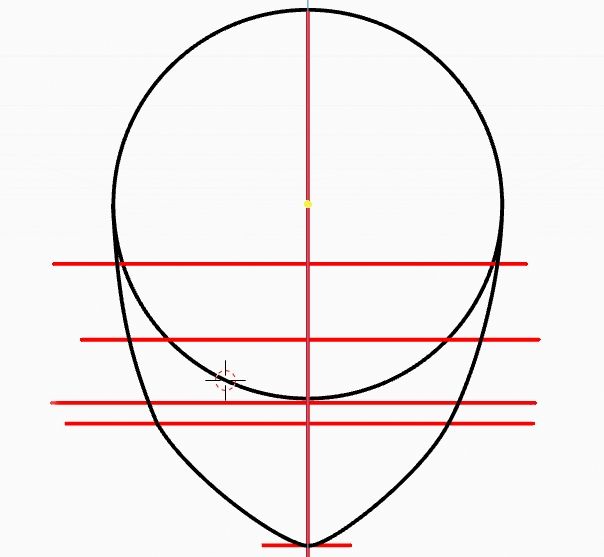
and we design the reference lines

- We draw a line that delimits the lower part of the circle, which will then be used as a reference to draw the nose
- Here we mark where the chin will end (the distance 1-2 is about 70% of the diameter of the circle)
- A little below the end-of-circle line is the line at the level of which the jaw will be marked.
- Below the center of the circle is the upper eye line
- Between the upper eye line and the lower end of the circle (more or less halfway) is the lower line of the eyes
We create a new layer, which we will call "Head", where we will insert the profile of the head
and in it we then draw the chin using the Curve tool, in two steps for each side, starting from the middle of the circle and reaching the jaw line, but not confirming with the Enter key,
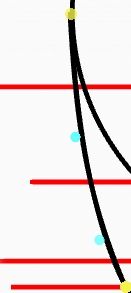
but by pressing the E key, so as to extrude creating a new curve
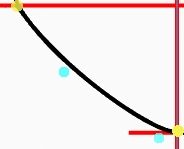
If there is any defect, you can fix it later in Edit Mode (by moving the vertices with the Proportional Editing) or with the sculpting (with the Grab or Push tools and then with Smooth). In the end we made the chin
Let's create the eyes
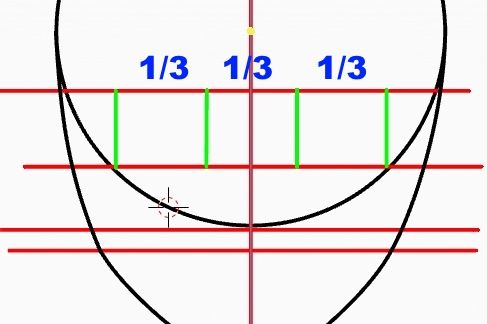
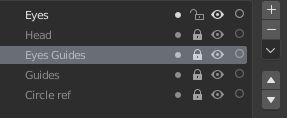
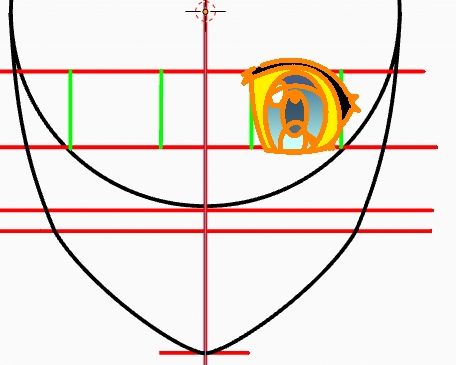
Let's now divide the eye area into 3 equal parts, creating a green colored material and drawing boundaries in a new "Eyes Guides" layer, so that between one eye and another there is a distance equal to the size of an eye
We create a "Eyes base" layer and block the others
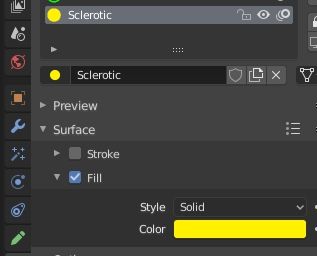
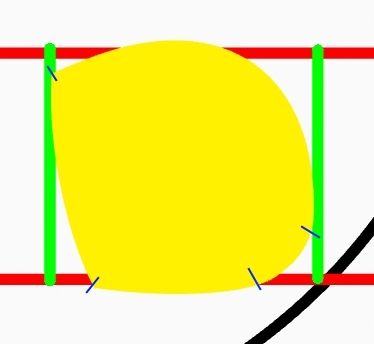
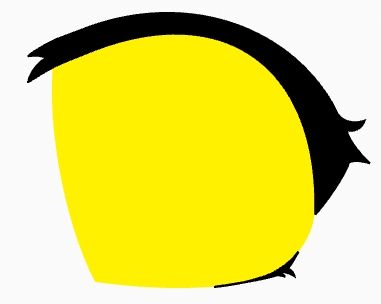
and a "Sclerotic" material (Fill only) to which at the moment we will give a yellow color, which we will transform into white after having colored the face
With the Arc tool we therefore draw approximately the base of the eye (the somewhat strange shape must not frighten, afterwards it will seem more normal after drawing the rest). The blue lines, added later, serve only to illustrate the borders between an arc and another.
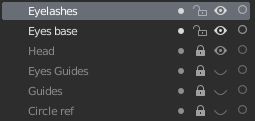
Let's create eyelashes now, so let's hide the guidelines by clicking on the eye check, block "Eyes base" and create the "Eyelashes" layer
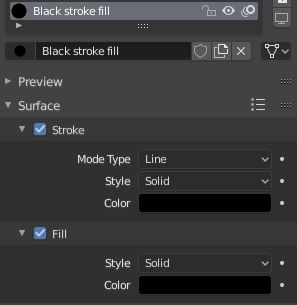
We create a material "Black stroke fill", with visible Stroke and Fill and blacks, setting the radius of the stroke to 5px
then, using the Arc tool, we draw the upper and lower eyebrows, extruding by pressing the E key to create a consecutive arcs
Still blocking the previous layers (we block and unlock the layer that we need from time to time), we now create a "Eyes iris" layer and a new "Iris" material, with 3D5279 hexadecimal color Stroke and Fill 445C88

Now let's create the base for the iris using the Arc tool, in red the boundary lines between the curves

We create an "Iris grad" layer only Fill for an additional gradient color to the iris, to give it thickness and shine, associating a new "Iris grad fill" material with primary color 396788 and secondary color 83BCC6, changing both the values of Location and Scale and Angle, because we are making a polygon different from a simple rectangle, so we need to adapt the values until we find the desired combination
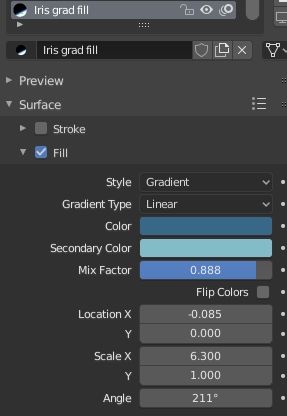
which will serve as a material to draw the concerned shade with the Arc tool, extruding it several times (in the figure the red lines still delimit the various Arc used)

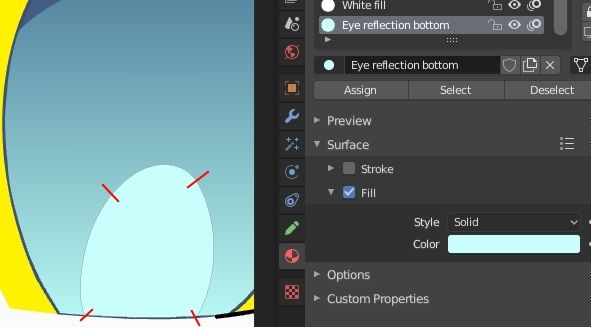
In a new "Bottom Reflections" layer we insert a reflex created with "Eye reflection bottom" material with Fill hexadecimal color C8FEFB
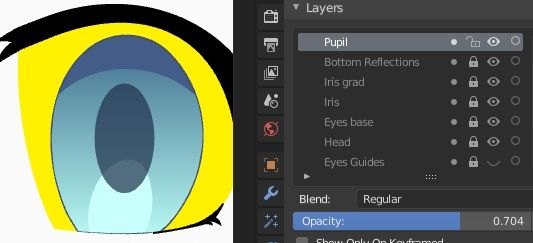
We create a layer and a material "Pupil" for the pupil, with color 20304B
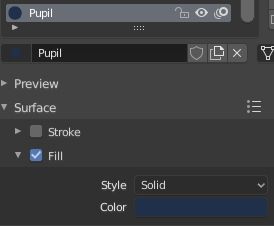
Drawing a simple ellipse, but with the Opacity of the layer set to 0.704 to simulate the presence of the lens
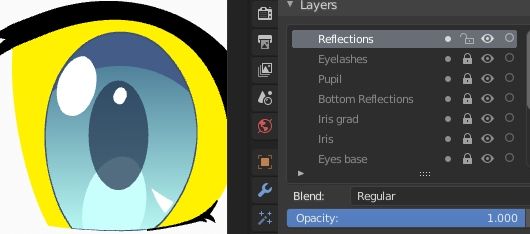
For reflections we create a white material "White fill" only Fill and, in a new layer "Reflections", we draw two circles, which we then rotate in Edit Mode and modify with the Push tool in Sculpting mode, and with the Arc tool a triangle bottom right.
We reactivate all the guides, unlock all the layers of the eye, go into Edit Mode and select the whole eye
With SHIFT + D we duplicate it, without pressing the ENTER key, and holding down the X key we move it to the left
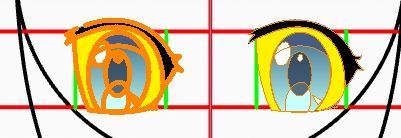
We press CTRL + M and X to mirror the eye along the X axis, so let's position it better on the guides
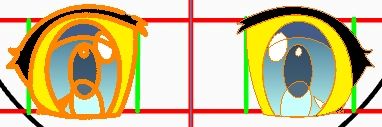
we select the reflections one by one and try to make them consistent with the direction of the light, mirroring them with CTRL + M and X and moving them, until obtaining
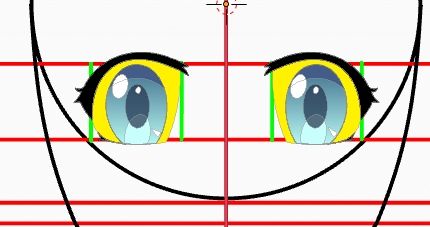
Therefore, with Arc, using the Black material present by default, we draw in the layer "Eyelids" a hint of eyelid, which we will duplicate as we did with the eye

Here ends this first part of the tutorial to draw a manga in Blender, but it continues at the page Grease Pencil Blender 2.8: how to draw a manga - part 2
![How to rigging a male character low poly with Blender 3D [ENG]](../../../../immagini/copertina/rigging-male-character-with-blender-3d-cover8_130x130.jpg)
![Resize particles by blend textures in Blender [ENG]](../../../../immagini/copertina/cover2_130x130.jpg)