How to rigging a male character low poly with Blender 3D [ENG]
In this tutorial in english we will see how to rig a character with Blender 3D starting from a mesh representing a man. The basic knowledge of the Blender program, the structure of a single bone and the operations on it is assumed

We will carry out the rigging of a man's mesh, represented in a low poly style, starting from the front view:
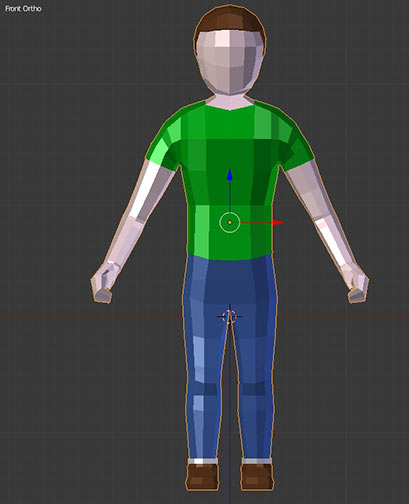
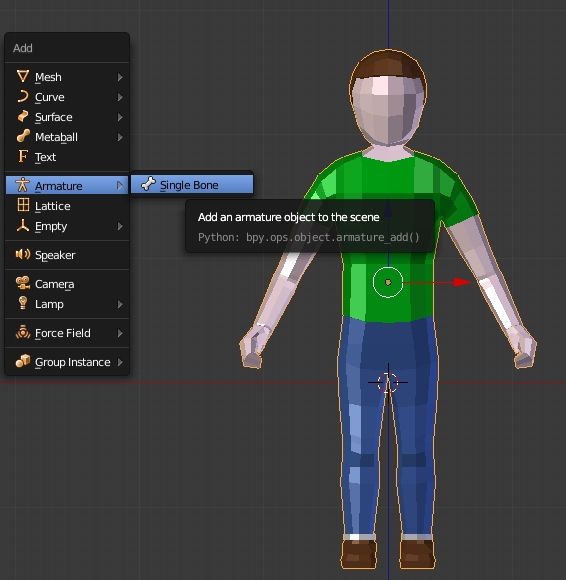
position the 3D cursor in the middle and create the first bone of the armature by pressing SHIFT + A
but the created element can not be seen, then in the "Armature" tab (which appears when the bone is selected) of the Properties Window we set the X-Ray option in the Display section
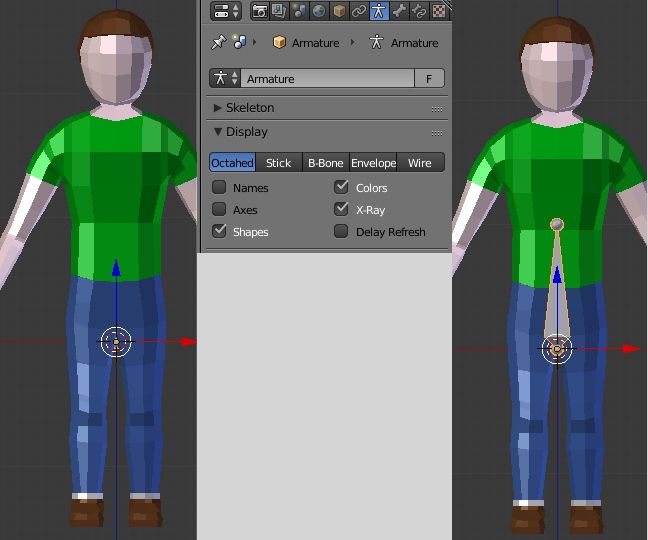
pressing G and then Z we position the bone in correspondence with the pelvis, then in edit mode we drag the tip to improve the precision

starting from the tip of the pelvis bone, pressing E (and then Z) we extrude and obtain another 5 bones for the stomach, chest, neck and head
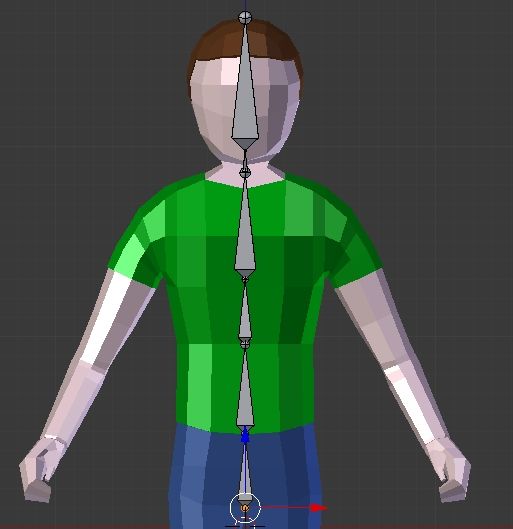
by pressing 3 on the numpad we access the right side view and position the bones better
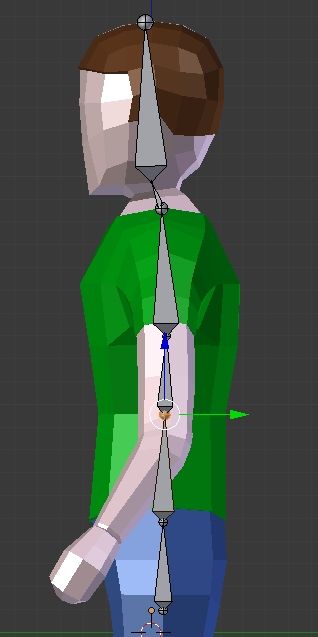
selecting 1 on the numpad we return to the front view. We have to create the bones for the legs and the arms, so for not doing double work we use the mirror for the bones, selecting "X-Axis-Mirror" in the Tool Shelf panel on the left
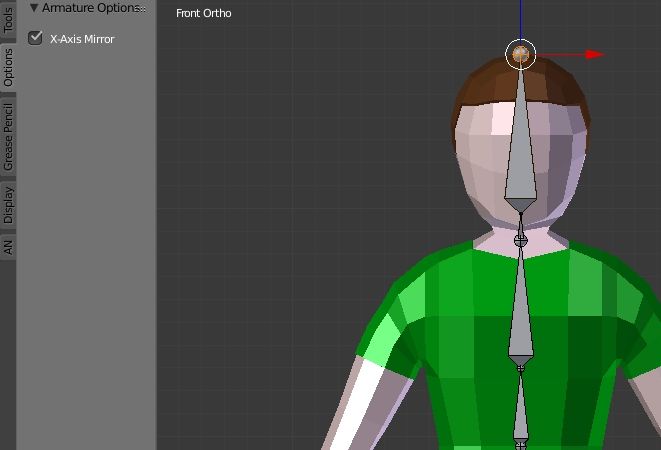
Let's sit on the tip of the pelvis bone and press SHIFT + E let's extrude outwards on both sides and get the bones for the legs
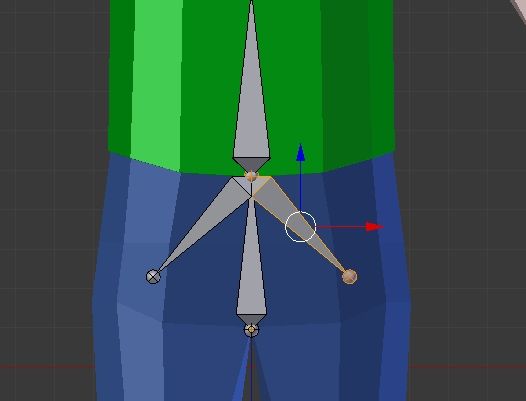
however, the bones thus positioned would deform the pelvis, then decouple them: select each bone and in the Properties Window > tab "Bone" > Section Relations we remove the check to "Connected"
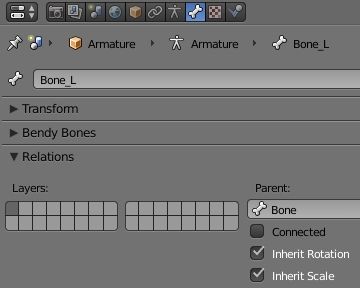
we do it both for the left bone and for the right bone so we can move them more freely and we can insert them where the femurs are positioned
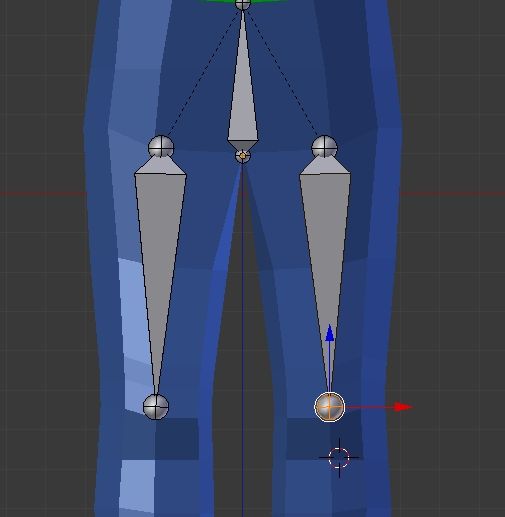
we extrude and resize to obtain the bones of the calves
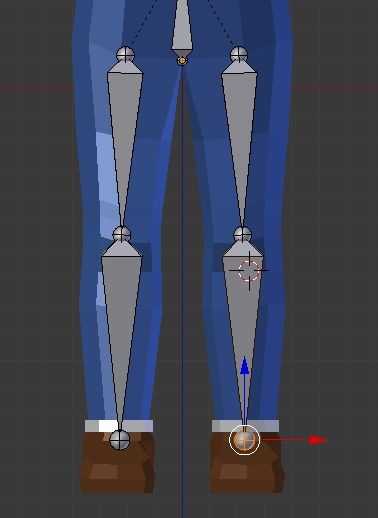
let's move on to the right view, position the created bones well and extrude those for the ankles and feet
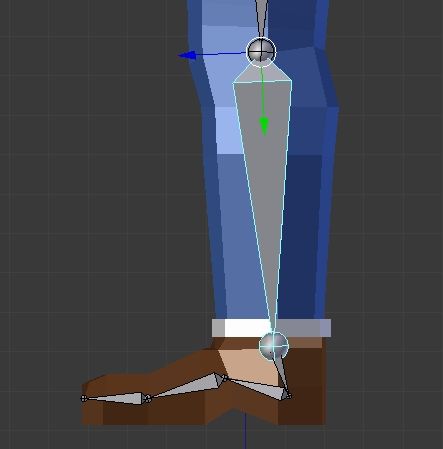
let's position ourselves on the root of the neck node and extrude outwards with the SHIFT + E command
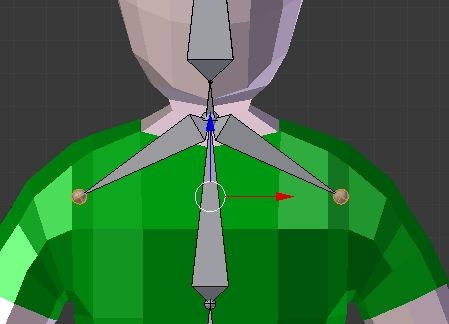
decouple the bones as before by removing the check to "Connected" in the "Bone" tab for both, then place them at the shoulders
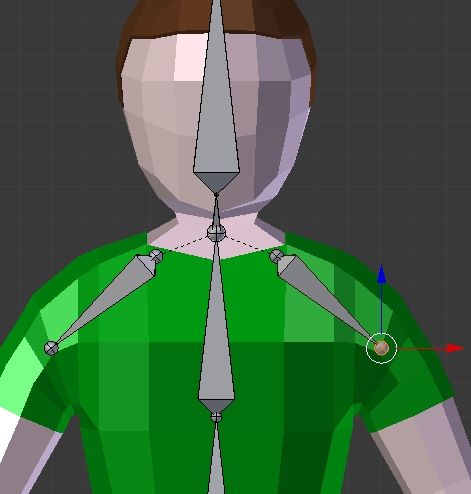
we extrude the bones for the arm and forearm

let's go into the right view and position them better

so we continue also for the bones of the hand
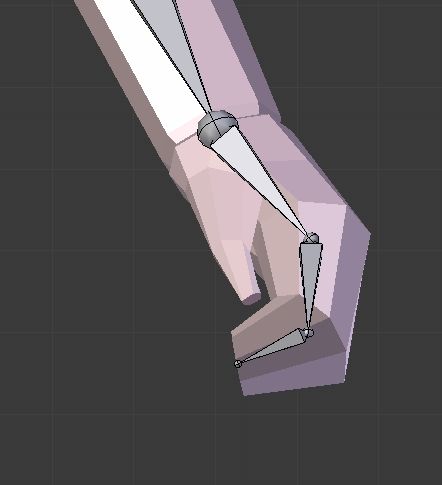
for the thumb we extrude from the bones of the hand and then uncouple as for the other times
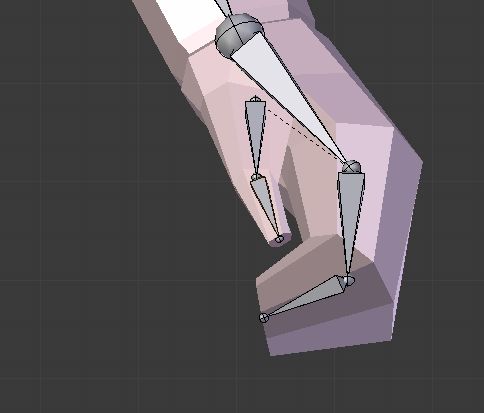
considering that the arm and the hand are oblique, it will be necessary to go from one view to the other to check the correct alignment.
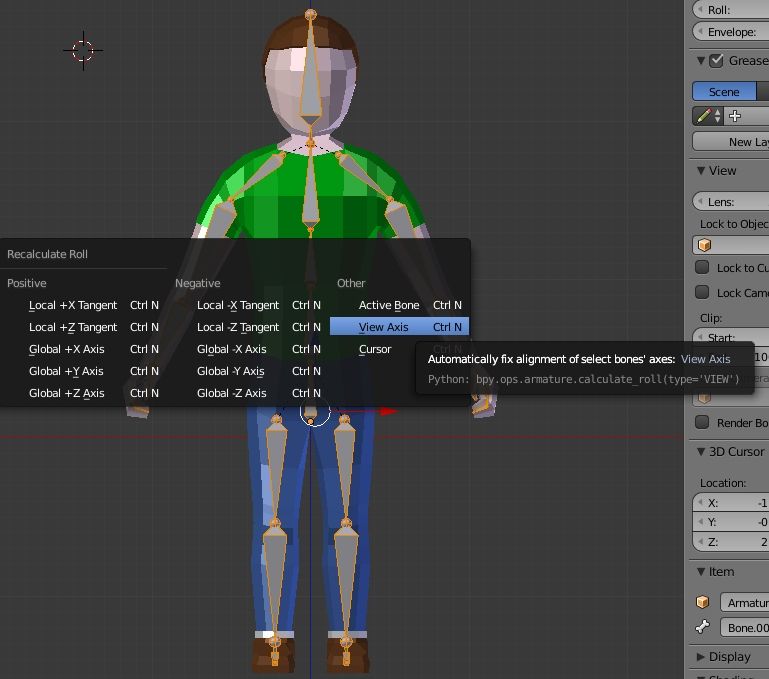
Let's take us now in the front view, select all the bones and press CTRL + N and then select "View Axis" to recalculate the correct alignment of the bones
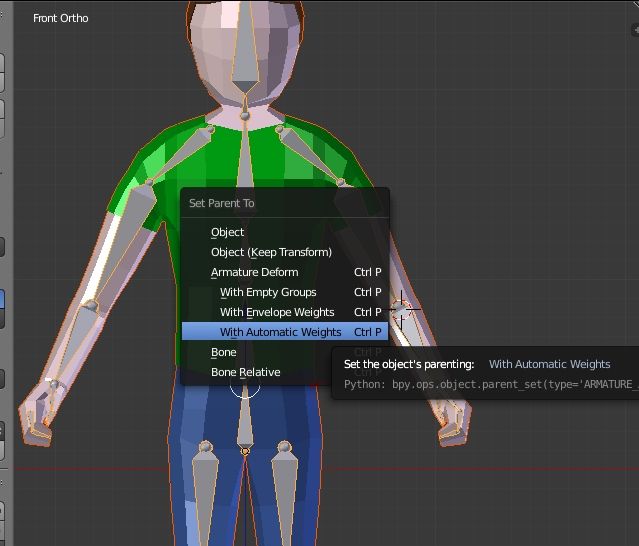
Let's go in object mode, select the man's mesh and then the armature, then press CTRL + P, to impart the mesh to the armature, and select "With Automatics Weights", thus automatically creating weights for each bone of the armature associated with a portion of mesh
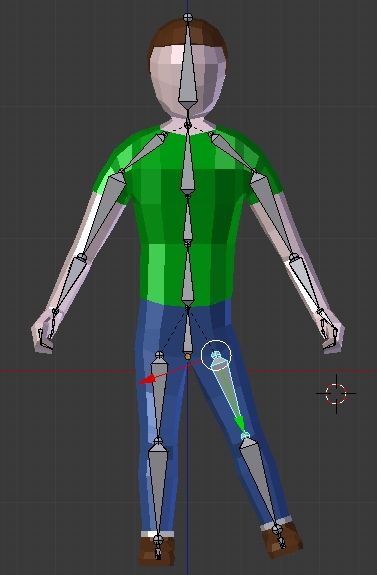
Our rigging is so finished, in fact if we keep the selected armature and go into Pose Mode, we can see that by moving the leg bone the part of the relative mesh will follow it
Sometimes adjustments may be necessary, repainting the weights in "Weight Paint" mode, but a well-formed mesh, with 3 loops for each critical joint (for example the shoulders), should not have many problems
With a little patience and effort, you will be able to achieve more complex results during the pose

![How to add stars background with Cycles in Blender [ENG]](../../../../immagini/copertina/cycles_stars_cover3_130x130.jpg)
![How to use chroma key with a green screen in Blender [ENG]](../../../../immagini/copertina/cover_130x130.jpg)