Resize particles by blend textures in Blender [ENG]
In this tutorial in english for Blender [updated to Blender 2.8] we will see how to resize the particles with the textures blend associated with them. This method can be useful to have some control, not so much in time but in space, of the objects emitted, thus giving the possibility to recreate both real situations and particular effects.
In our example we will try to roughly depict the bubbles (such as those in a glass of sparkling wine, champagne, or with an aspirin, or those emitted by the pump of an aquarium), which at first are small but then expand first to reach the surface.
So let's start Blender and create a "Plane" plan, not very large in this example (about 50 centimeters) to visually control the flow that will be generated

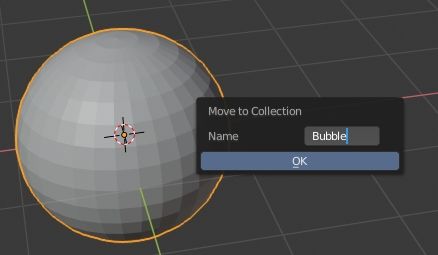
Then we create a sphere "Sphere", which will represent the bubble, we press the "M" key and we place it in a new collection (Move to Collection > New Collection) that we will call "Bubble"
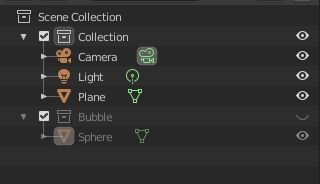
in the outliner we make the "Bubble" collection invisible by checking the eye option to its right [resize_particles_by_blend_textures_in_blender_2_B.jpg]
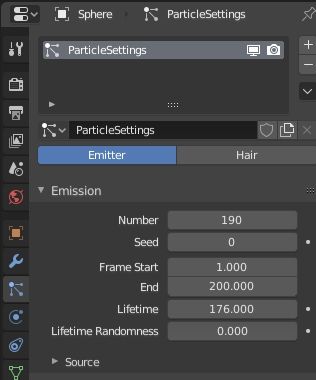
Now select the plane and in the Properties Window on the right select the "Particles" tab and create a particle system by pressing the "New" button, "Emitter" type, with a "Number" number equal to 190 and life time "Lifetime" of 176 frames
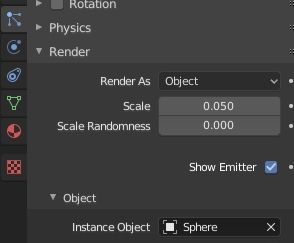
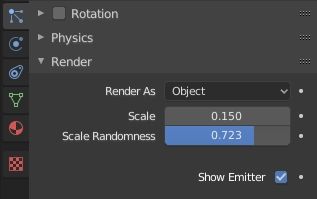
In the "Render" sub-panel, in the options on how the particles are to be rendered, we select Render > Render As:"Object" and insert the sphere "Sphere" as object
if we start the animation by pressing the key SPACE, however, we notice that our "bubbles" are moving downwards
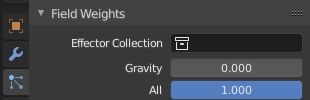
We then set the influence of gravity "Gravity" to zero in the sub-panel "Particles"> "Field Weights"
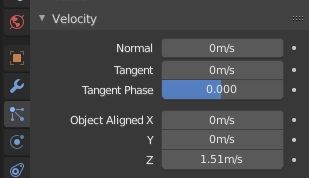
and in the "Particles"> "Velocity" sub-panel we modify both the "Normal" velocity, bringing it to zero, and that along the Z axis, giving it a value of 1.51
Let's start the simulation and, for example, at frame 95 we'll see
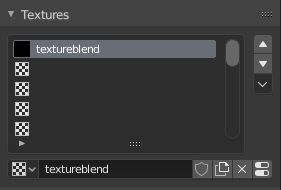
In the "Particles"> "Textures" sub-panel, at the bottom, we press the "New" button and create a texture, which we will call "textureblend"
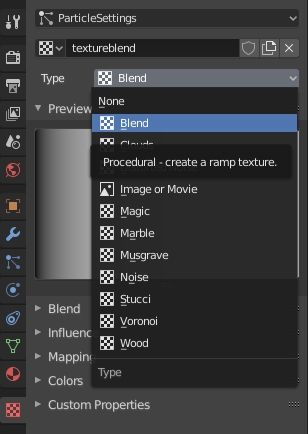
Let's position ourselves in the "Texture" panel and in the "Type" of our texture select "Blend"
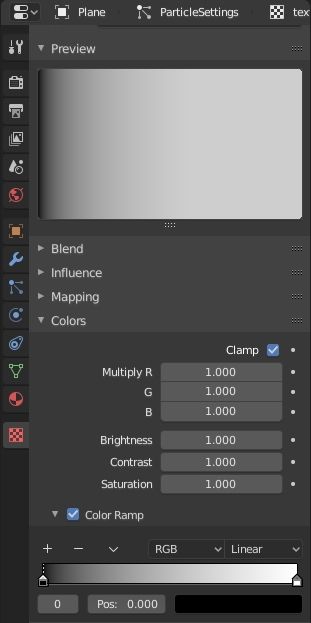
A texture blend will allow us to create a kind of mask, usually in black / white and gray, which will indicate how we want to influence a certain aspect of the emission of particles, for example density, life time, speed or, as in our case, the dimensions; all this through the use of a Color Ramp, in fact if in the panel "Texture" > "Colors" we check the option "Ramp" there appears the widget with gradient which can vary both color and transparency (in the example in the figure the alpha of black has been set to 1)
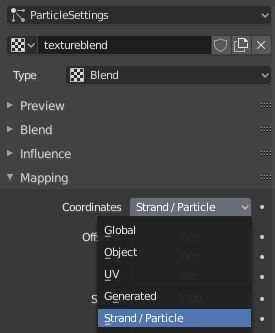
the coordinates of the texture mapping, which can be set in the "Texture" > "Mapping" panel, must be of the "Strand / Particle" type
and of course we will influence the particle size with our mask by checking the "Size" option in the "Texture" > "Influence" sub-panel

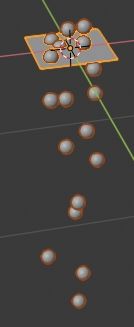
start the animation, always pressing the key SPACE, and always in our frame 95 we can see

As you can see, the texture has actually influenced the dimensions of the spheres of the particles, which when they start from the plane are small and then increase in size as they move away.
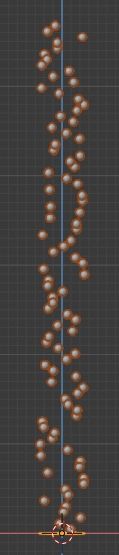
We can try to improve what we have achieved, in fact the bubbles are not all born with the same dimensions. So let's go back to the "Particles" panel and in the "Render" sub-panel we give "Random Size" value 0.723 and "Scale" value 0.150 (to improve the display)
let's start the simulation and we will display

which is more or less what you wanted to get.
In this tutorial for Blender we have seen how to get the issue of particles driven by textures, but the topic can have more developments than it appears at first; in fact, moving the Color Ramp cursors, or adding new ones, we can eventually create other effects, like particles that start small, then increase in size, then shrink, useful to simulate an approach and then a move away; or you can eventually improve the fading after the end of the life of the particle. Already just looking at the list of variables we can influence, we find that there are several possibilities to demonstrate the power of this tool.
![The Collections in Blender 2.8 [ENG]](../../../../immagini/copertina/cover1_130x130.jpg)
![The new shortcuts in Blender 2.8 [ENG]](../../../../immagini/copertina/cover3_130x130.jpg)