The Collections in Blender 2.8 [ENG]
In this little tutorial in english we will talk about the Collections introduced in Blender 2.8, apparently a mysterious object, but actually very useful.
The Collections in Blender 2.8 have been one of the most interesting novelties of this new version, as they have revolutionized the way to group objects and organize them in the Outliner.
In previous versions of Blender the modalities to organizing the elements of a scene were mainly groups and layers, 20 anonymous boxes in which to insert houses, cars, streets or planes, without any particular meaning; it was then difficult to remember what had been put and where in complex projects.

With version 2.8 of Blender, the situation has improved because with the Collections it is possible to create groups that are clearly visible in the Outliner, which can be given a name, of which it is possible to set visibility and modifiability, and with which hierarchies can be created.
If we create a new file in Blender 2.8 we notice that the usual elements, the camera, the lamp and the cube are already contained in a default collection called "Collection 1".

If we click with the right mouse button on a Collection we can immediately notice all the management operations that we can carry out on it, including the creation of sub-collections

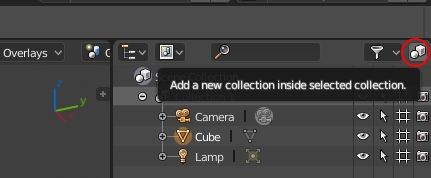
another way to create a new collection is to click on the button at the top right
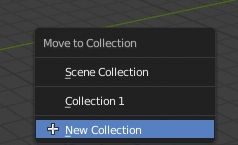
another possibility is to press the "M" key, which was previously reserved for the layers, which will bring up the popup window from which to create the new collection, starting from the selected one
Let's now look at an example of a very simple scene, consisting of two cubes and two spheres with camera and lamp, and how to organize it.
Each element is created within the active collection, so it can be a good strategy to first plan and create collections, then create the various objects, if we have in mind from the beginning how our project will evolve.
In our case the cubes and the spheres have been created outside, in the collection of the scene, and we will therefore have to reorganize them.

We will create a collection that we will call "Objects" which will contain two other collections that we will call "Cubes" and "Spheres".
So let's position ourselves in the "Scene Collection", create a new collection with the tools seen before and will appear "Collection 2"
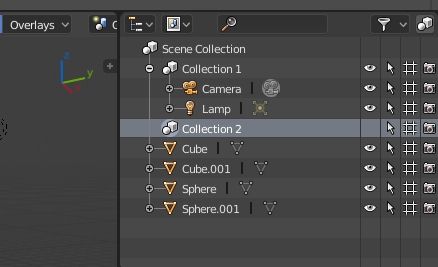
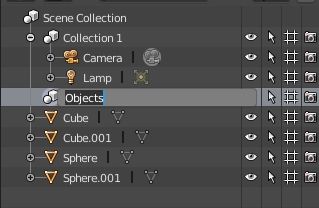
click twice on the name "Collection 2" and rename it with "Objects"
Let's position ourselves in "Objects" and create with "new" also the sub collections "Cubes" and "Spheres"
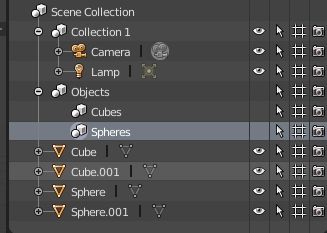
To insert the cubes in "Cubes" just select them in the Outliner, holding down the SHIFT key, and drag them into the appropriate collection
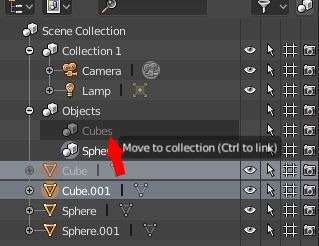
and we will have
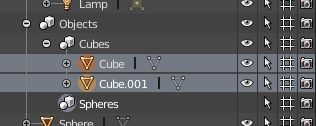
we perform the same operation for the spheres in "Spheres", thus inserting them into their group
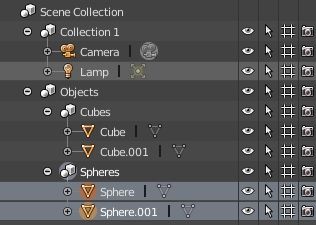
Alternatively we could select them in the 3D view and then press the "M" key and, using the popup window that appears, enter them in the respective collection
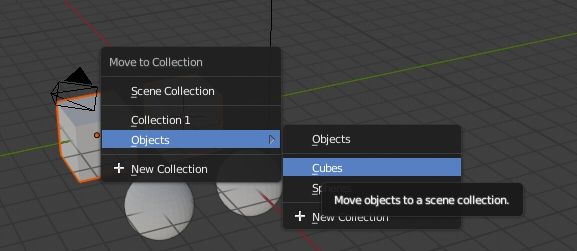
So we have seen how to create collections and how to insert elements, by clicking with the right mouse button we can also select the function to delete them, or we can move them by dragging them, or we can also create instances.
Like the other objects in the Outliner, the Collections also have their buttons to set the display or other

The first (1), the eye, controls the display of the collection in the viewport, in fact if we remove the check to "Spheres", the spheres will disappear

The second (2) arrow will enable or disable group selection in the viewport
The fourth (4), represented by a camera, will show or hide the collection during rendering. For example, by removing the tick at "Cubes" we will hide the cubes

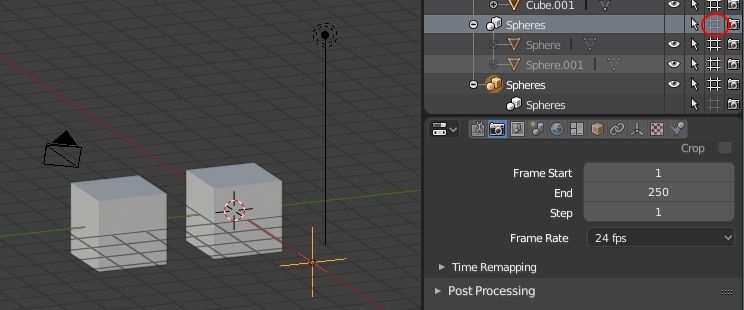
The third button (3), in the form of a grid, instead is less intuitive and is useful when creating instances of a collection and we want to hide the original one together with its derivatives
For example, we create an instance of "Sphere" by right clicking on "Sphere" and selecting "Instance to Scene"
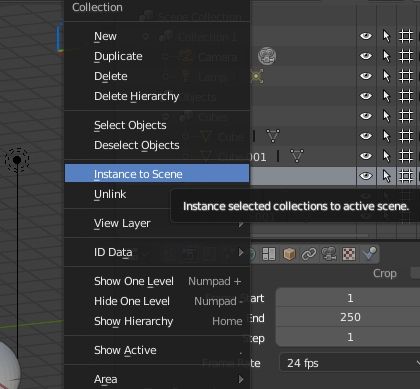
and we will get (after moving them along the X axis)
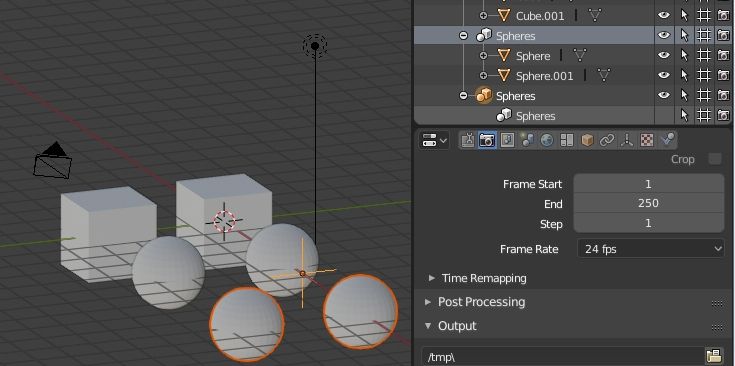
if we now remove the check from the first option, the eye will not show only the original collection
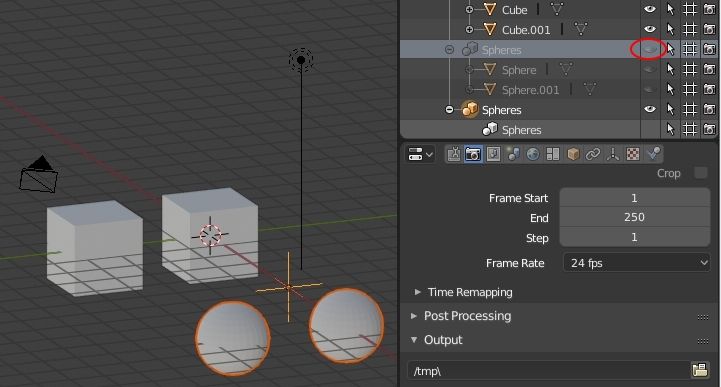
while if it is removed from the third option, neither the original collection nor the derived instance will be displayed.
We have concluded this small introduction to the Collections in Blender 2.8; keeping the various elements of a project in order is also important to speed up the development, because if you can find an object immediately you will lose less time looking for it, and this new tool will certainly help the Blendeheads in this sense.
![How to use chroma key with a green screen in Blender [ENG]](../../../../immagini/copertina/cover_130x130.jpg)
![Resize particles by blend textures in Blender [ENG]](../../../../immagini/copertina/cover2_130x130.jpg)