How to use chroma key with a green screen in Blender [ENG]
In this tutorial in English for Blender 3D, we will look at some basic concepts on how to crop an image or a movie, made with green screen, to overlay it on another image or movie.
Through the technique of the chroma key a color is isolated (in our case the green of the green screen), or a particular luminance, it is removed and the area that was occupied by it becomes transparent, thus becoming part of the alpha channel. The transparent parts will thus show the video or the image below, which will thus define the environment in which the subject of the first movie will act.
This tutorial assumes a basic understanding of using Blender, node editor and compositing.
For the tutorial we will use one of the movies released for free a few years ago by the well-known actor Jean Claude Van Damme, to which a wall has been added on the sides (because if you are not in a professional studio the green screen will probably be just a green cloth hanging on the wall or of metal supports).

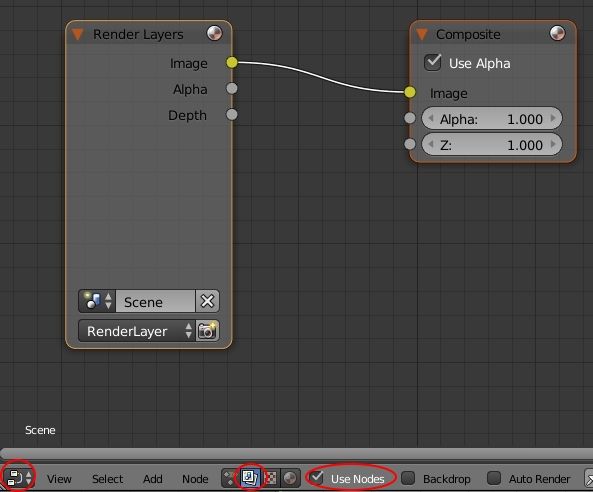
Then open Blender and select the node editor, clicking on "Compositing" and "Use Nodes" in the menu below
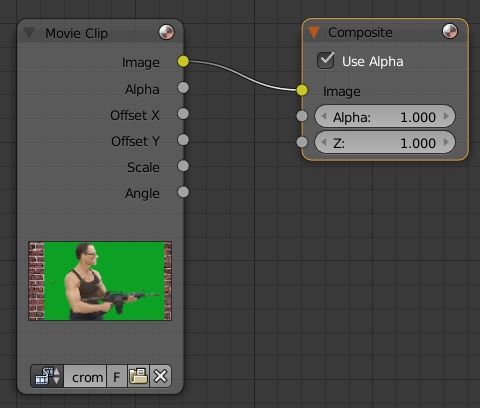
Since our input will not be a render but a movie, we replace the Render Layers node with the Input > Movie Clip node. So we load our movie by pressing the Open button.
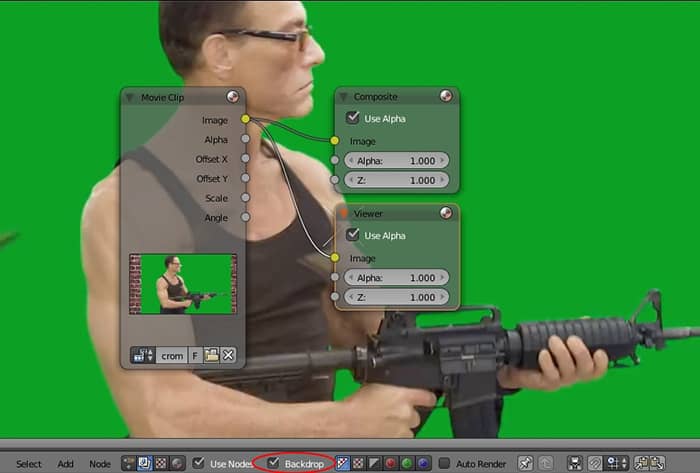
To have a preview of the results of our work in real time, we also add an Output > Viewer node, checking the "Backdrop" option below to display the result in the background
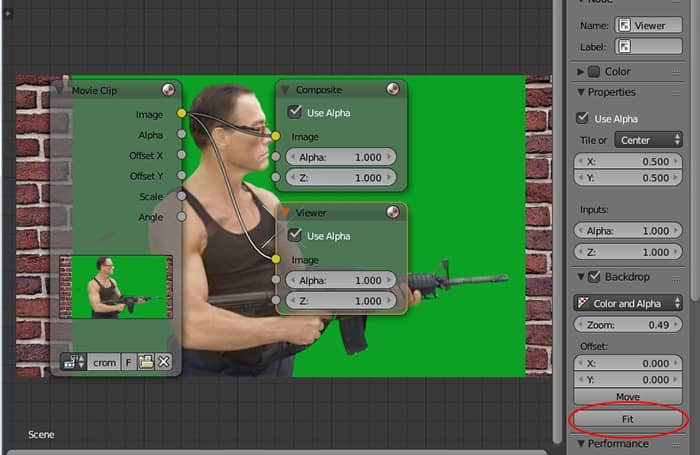
to center the movie we press the "Fit" button in the right panel, which can be recalled by pressing the N key
If we want our final movie to be the same size as the default one
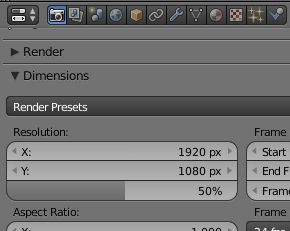
ie 960x540, we have to resize the original movie, whose dimensions were 1280x720, adding the Distort > Scale node, with the "Render Size" option set (in this case the "Stretch" option is fine because the movie has dimensions proportional to the desired ones )
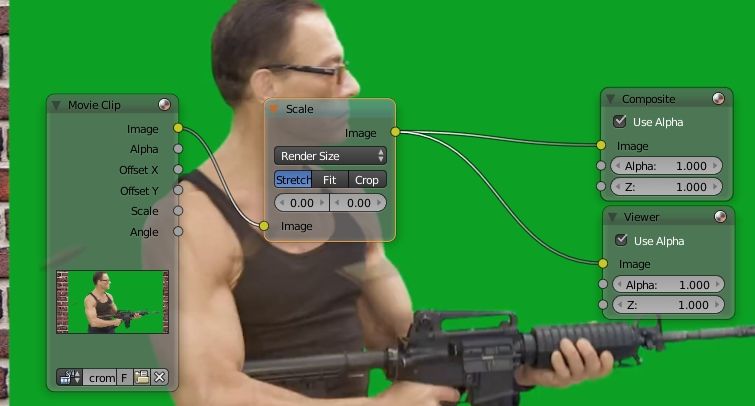
to eliminate the green background we use the Matte > Keying node, clicking with the eyedropper on the green of the green screen (in case there are shadows we try to select a green that is an average of the light and dark green present, to eliminate as much as possible. Possibly drag the cursor on the color selector to find the most appropriate value)
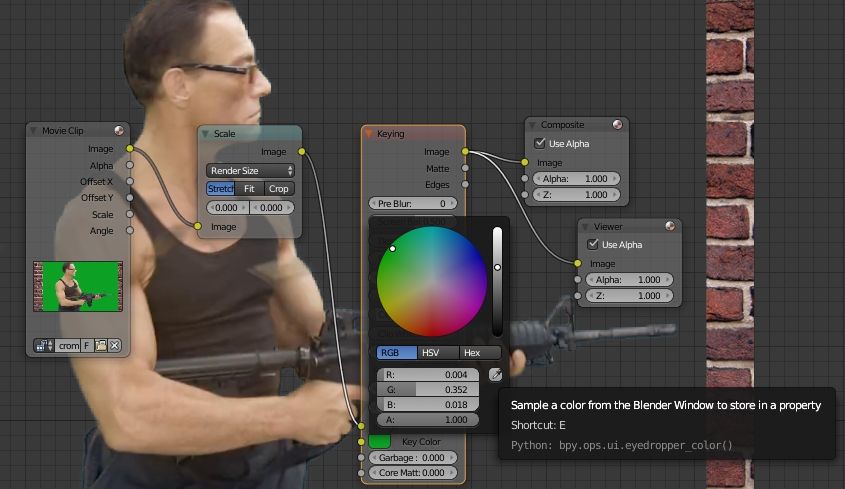
however, we note that the wall that was around the green screen is still present
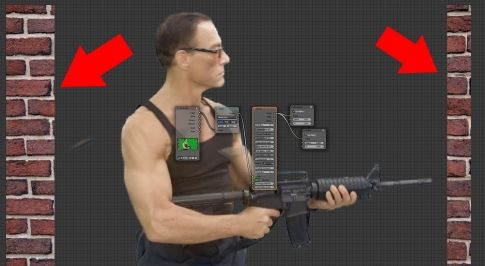
How to hide it? We have to create a mask that eliminates everything that does not interest as trash.
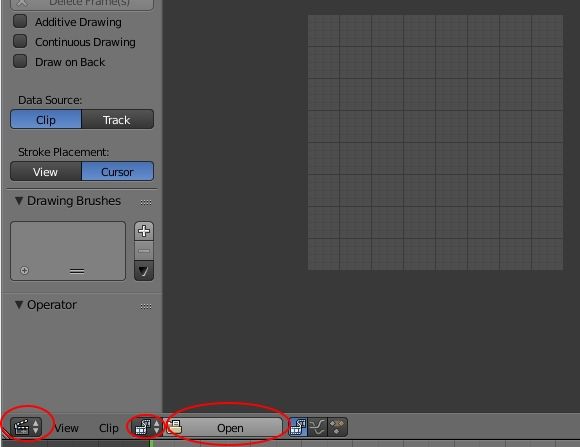
To achieve it, select the Movie Clip Editor, then press the "Open" button (or use the drop down menu near the left) to load the movie
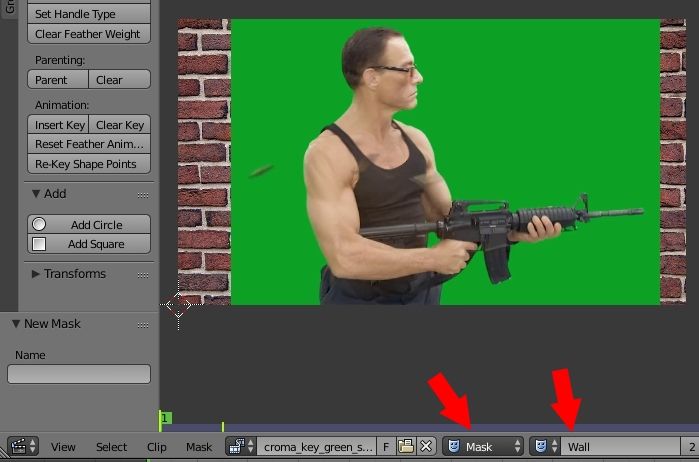
We then select the "Mask" mode and create a new mask, which we will call "Wall" (wall)
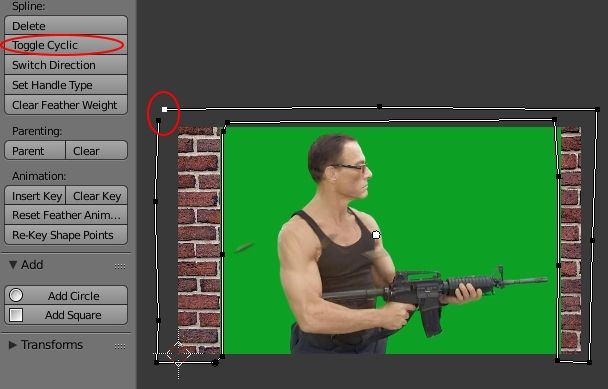
Holding down the CTRL key, we create the mask by clicking with the left mouse button to select the area to be deleted. To close the curve, press the "Toggle Cyclic" button on the left (or on the ALT + C keys)
Save the file and return to the node editor, where we will insert the mask, through the Input > Mask node, to the "Garbage Matte" input of the Keying node, thus eliminating the wall that did not interest us.

To preserve instead of the elements that could be erased by the elimination of the green (or particularly eroded, as some parts a bit 'thin of the machine gun), we could also create an additional mask and insert it as an entry to "Core Matte".
Now we add the background, in our case an image, then create an Input > Image node, load the background image, we also scale with the Distort > Scale node and join it to the movie through the Color > Alpha Node node, ticking the option "Convert Premul" also to eliminate the halos on the edges

finally we render and get our movie with the desired background
At this point we can try to improve our work; in fact, if we visualize the black and white mask of the keying node, connecting the matte output with the viewer node, we notice that there is still a lot of dirt around the character
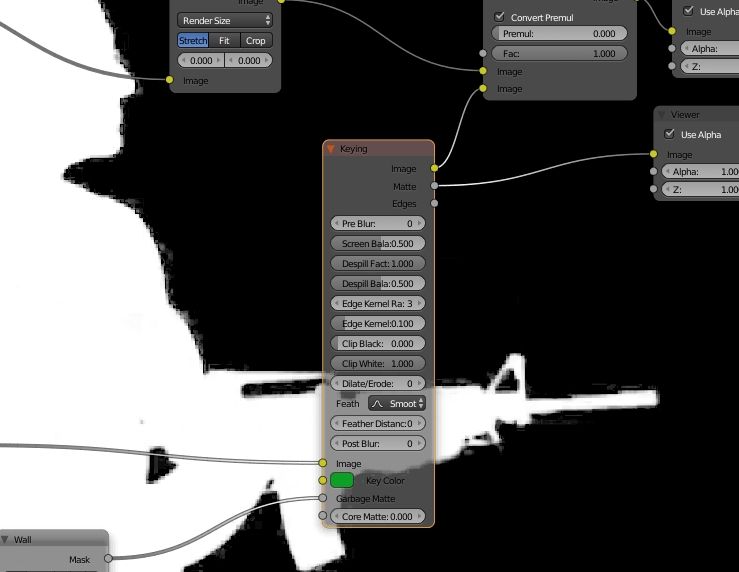
So we increase the value of Clip black, which sets the threshold for what must become completely transparent in the output (black in the mask) and we already notice some improvement
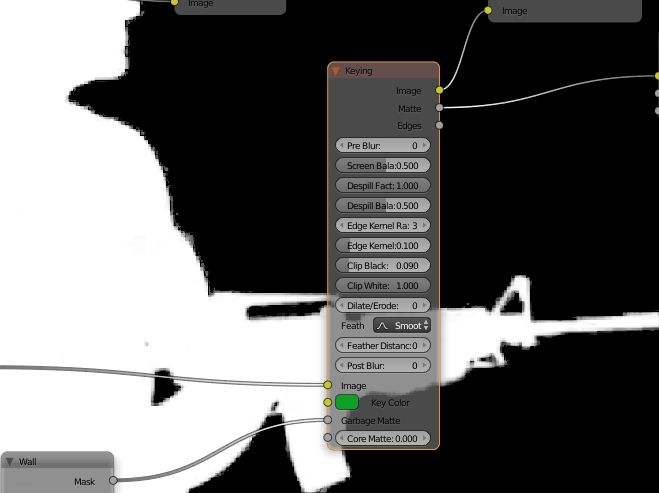
then we notice aliasing, a serration, around the profile of the character
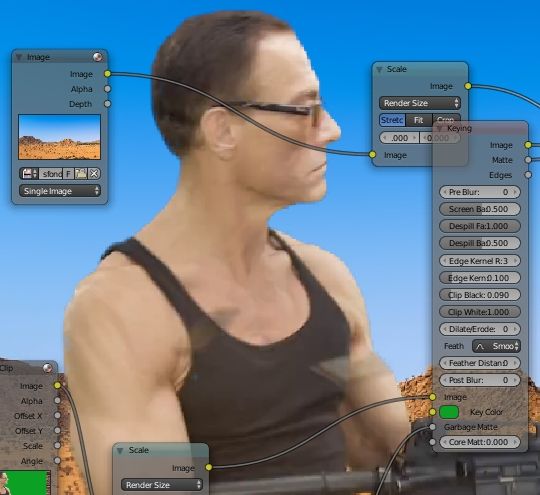
we can then blur the mask, increasing the value of Pre Blur
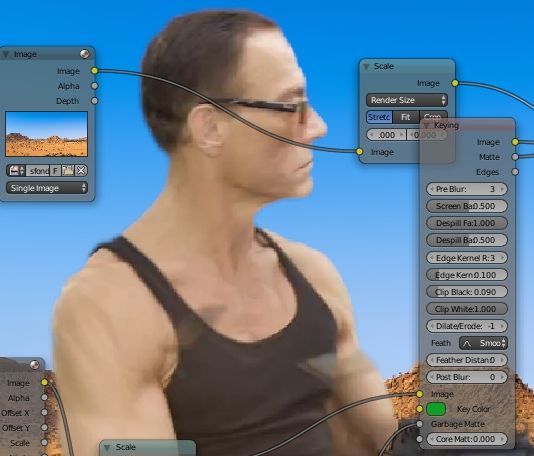
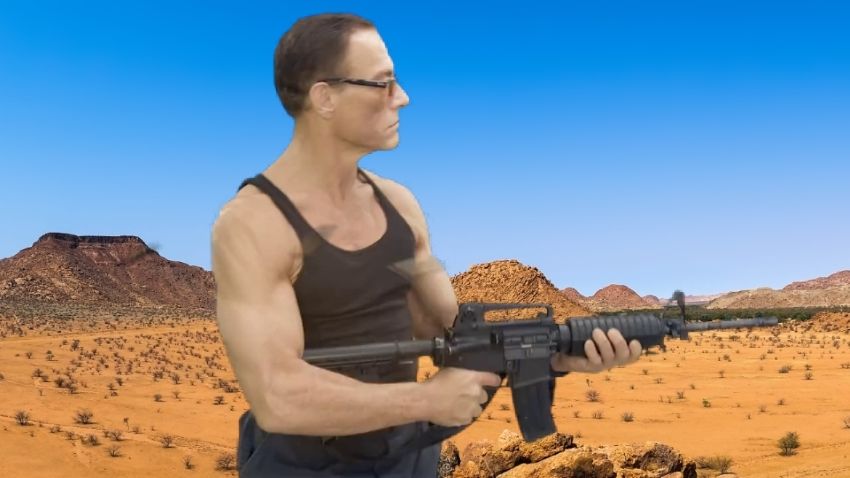
to mix more the background with the film we can perhaps, always in the keying node, decrease the value of "Dilate / Erode" to remove the halo around the character, we can blur the background in the distance with the node Filter> Bokeh Blur, remove contrast to the character with the node Color> Bright / Contrast (choice that could be considered questionable, but that takes away from the subject a bit 'of that effect from "internal photo studio") and give him a little' desert yellow with the knot Color> Color Correction
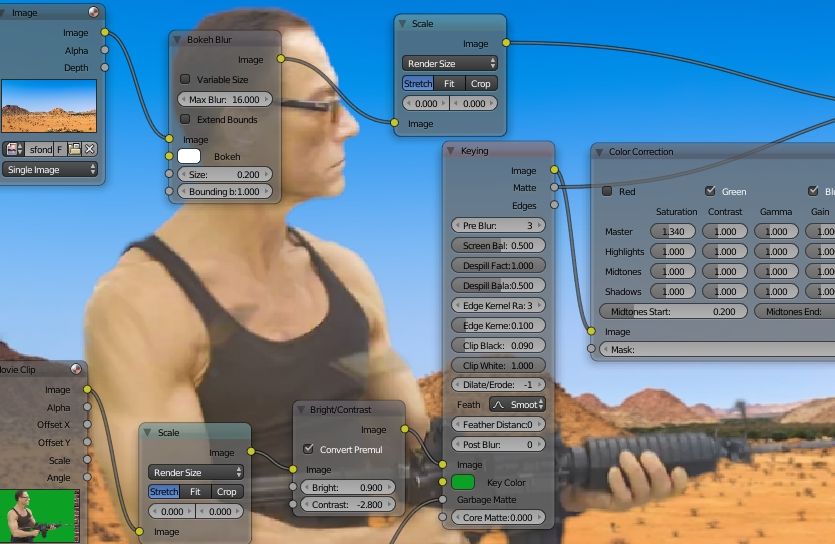
and in the end we will get
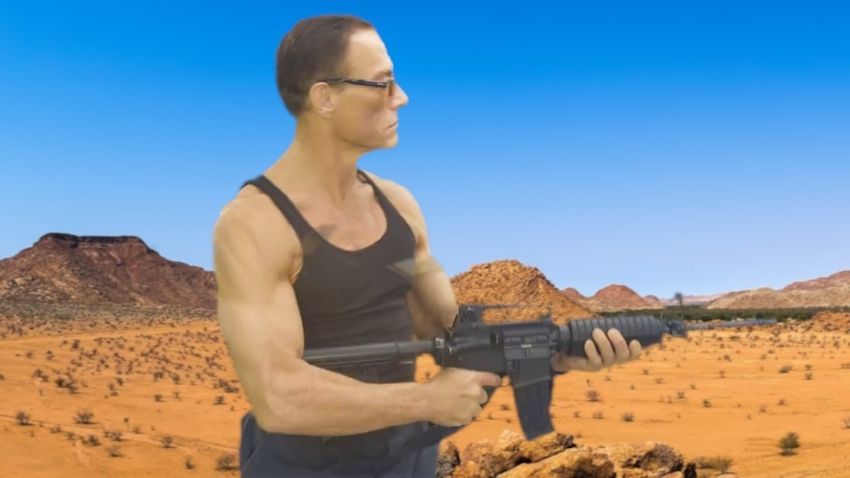
In this short simple introductory tutorial we tried to illustrate some aspects of the Chroma Key technique in Blender, but it is not to be considered exhaustive, both for the complexity of the topic and for the case studies, given that every combination film / background could require a different treatment.
![How to rigging a male character low poly with Blender 3D [ENG]](../../../../immagini/copertina/rigging-male-character-with-blender-3d-cover8_130x130.jpg)
![The Collections in Blender 2.8 [ENG]](../../../../immagini/copertina/cover1_130x130.jpg)