Blender orbit a Camera following a spiral path
In this tutorial in english for Blender (made in Blender 2.93) we explain how to orbit a Camera around an object following a spiral path, what problems can arise and the possible solutions.
Usually to present a product or an artifact it may be enough to turn the Camera around the object following a circular orbit, but at times it may also be necessary to show its upper and lower part; moreover, a well-made spiral path can give the illusion that the object is bigger and more majestic, adding "epicness" to the animation.
We provide two solutions to simulate a spiral behavior: the first using a real spiral, also examining the problematic case of a tall and narrow object, the second trying to use only an Empty object to move the Camera.
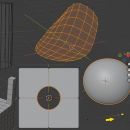
Spiral path of a Camera along a spiral-shaped curve:
We create a new project, delete the present cube (by selecting it with the left mouse button and pressing the "X" key), and create the Suzanne object in its place, by pressing the SHIFT+A keys (or starting from the "Add" submenu ) and choosing "Mesh > Monkey".

In Edit > Preferences, in the "Add-ons" tab we activate the add-on "Add Curve: Extra Objects"

Always with the SHIFT+A keys we add the spiral curve with "Curve > Curve Spirals > Archemedian" (the spiral of Archimedes)

in the dialog box at the bottom left
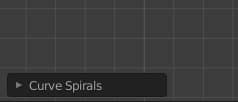
we enter the parameters for our spiral
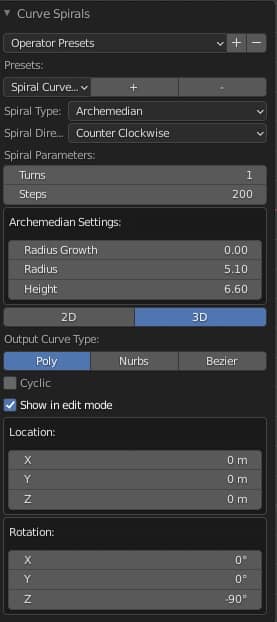
"Spiral Parameters":
"Turn": 1, we make a single turn of the Camera around the object
"Steps": 200, we choose a number of segments large enough to create the smoothest possible curve
"Archemedian Settings":
"Radius": 5.1, it must be wide enough to be able to see the object from a certain distance, but we have chosen the radius also small enough to be able to see the details
"Height": 6.6, the spiral must develop along a much greater height of the object, in order to see its upper and lower part clearly
Rotation:
Z: -90°, let's start the spiral in front of "Suzanne" and let it end in front of it
Press the TAB key to switch to Object Mode, press the G and then Z keys, write -3.403 and press the ENTER key to move the selected spiral down. We get it like this

The Camera must start from the lowest point of the spiral, so let's position it on it with the help of the 3D cursor; first move the 3D cursor to this point: select the spiral curve, press the TAB key to return to "Edit Mode" and select the first point of the spiral by clicking it with the left button,
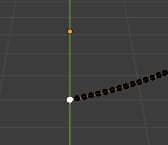
we move the 3D Cursor on it, pressing the SHIFT+S keys and choosing the option "Cursor to Selected"
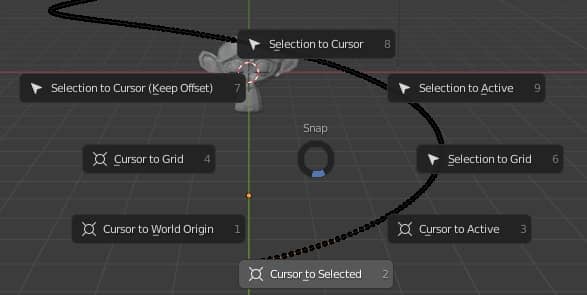
getting
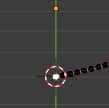
Now let's move the Camera to the 3D cursor: press the TAB key and go back to Object Mode, select the Camera, press SHIFT+S but this time select the "Selection to Cursor" option
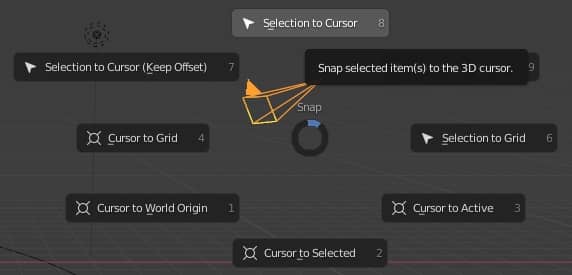
and we get

To make the Camera travel the path of the spiral, first select the Camera, then the spiral and press CTRL+P, choosing the "Follow Path" option

Now the Camera follows the path of the spiral however, if we start the animation by pressing the SPACEBAR, we notice that the Camera does not look at the monkey's head.
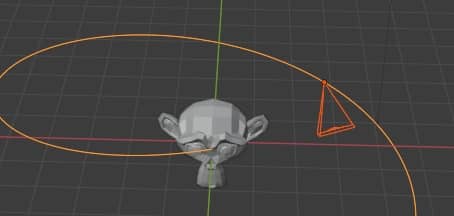
We could use the Suzanne object as the Camera target, but instead let's create an Empty object, because it could possibly help us better position the shot during the animation.
In Object Mode we press the SHIFT+C keys, to bring the 3D Cursor back to the center of the axes, where the origin of the Suzanne object is also found, and create the Empty object with Add > Empty > Plain Axes
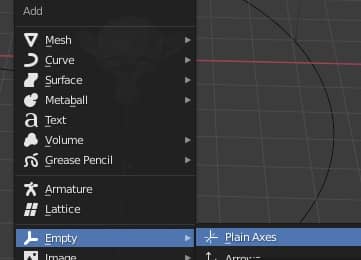
We select the Camera and in the "Object Constraint Properties", of the "Properties Window" on the right, we create a "Track To" constraint, with the Empty object as target; the House will now point towards it.
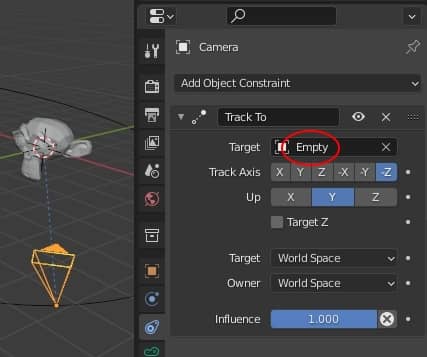
The total animation is 250 frames long, to make sure that the path of the Camera along the spiral coincides with the total duration of the animation, select the spiral and click on the "Object Data Properties" tab by inserting in "Path Animation > Frames" the value 250.

At the end we can create the animation, in our case we just need a simple preview, then we press 0 on the numeric keypad, bringing us to Camera view
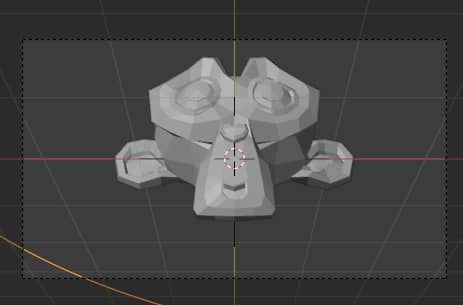
and select View > Viewport Render Animation
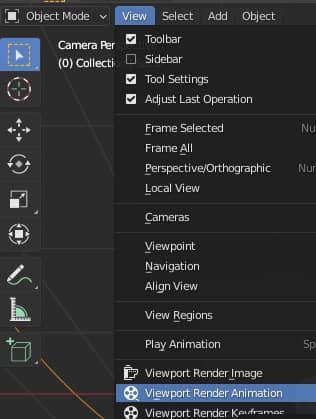
and at the end of the fast processing we get
Spiral path of a Camera around a tall and narrow object:
A problem can arise when you want to film tall and narrow objects, such as a skyscraper (about 23 meters high and 2 wide, measures not corresponding to reality, but it is only an example)
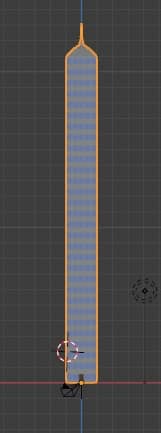
(the colors of the door and windows we can see them because the "Material Preview" mode was set)
once again we create a spiral curve with "Add > Curve > Curve Spirals > Archemedian", with values such as to adapt it to the new object:
Turns: 2
Steps: 300
Radius: 5.1
Height: 14.0
Rotation Z: -90°
since buildings are usually seen from the base, and not from below, we do not move the spiral down.
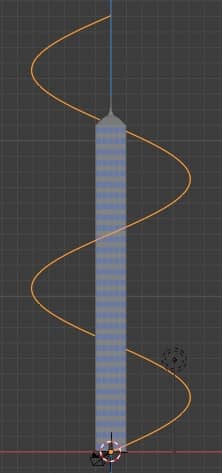
We proceed as before: we move the Camera to the first point of the spiral, helping us as before with the 3D Cursor, we relate the Camera to the spiral so that it follows the path with CTRL+P, we move the 3D Cursor to the origin of the axes (the base of the 'building) with SHIFT+C and create an Empty object, select the Camera and turn it towards the Empty with a TrackTo constraint, in the curve properties in Path Animation> Frames we write 250 frames (in number equal to that of the total animation ).
However, the position of the Empty at the base of the target object is not satisfactory, as towards the end of the animation we can no longer see the top of the building
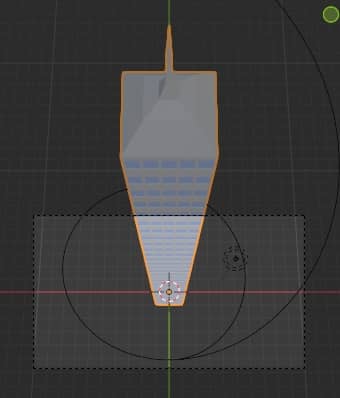
In addition, the Camera is too inclined
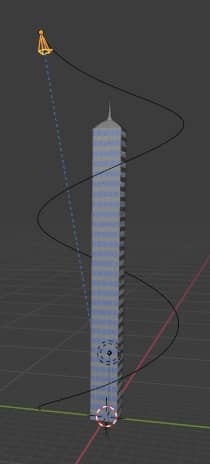
If we instead move the Empty object in the middle of the skyscraper
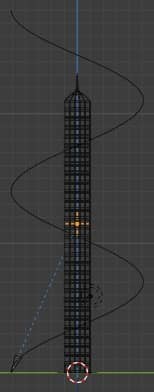
The view at the end of the animation has improved (not by much)
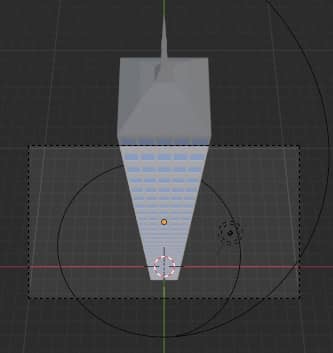
while the view at the beginning of the animation is much worse
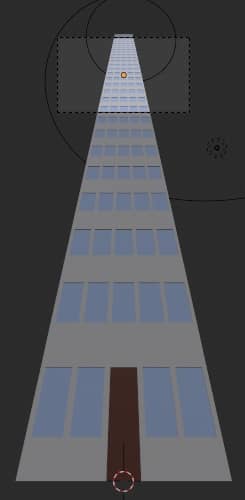
One solution could be to make the Camera and the Empty object go up at the same time
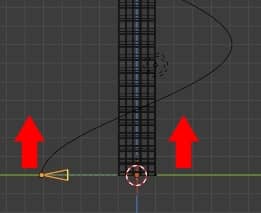
Then select the Empty object and press the "I" key to create a keyframe at frame 0 (or 1) on the Timeline, selecting the "Location" option
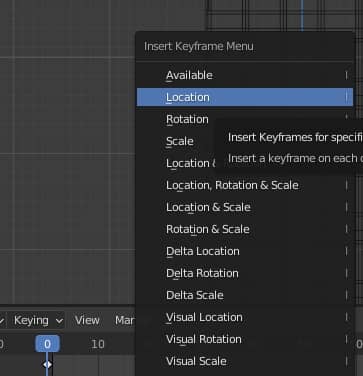
(to move on the Timeline, just drag the blue cursor, or write the frame number in the appropriate input box)
when the Camera is above the roof, more or less at frame 193, we move the Empty object to the beginning of the roof (which corresponds to 21 meters, the measurements are not the real ones of a building, but those of the model created as an example) and create another keyframe with "Location" option

we press the zero key on the numeric keypad, to bring us to Camera view, start the Viewport animation again with View > Viewport Render Animation and we view
in which it can be seen that the Camera is followed by the Empty object up to the top, then this stops allowing the Camera to take it from above and make an overview of the roof
Spiral path of a Camera, but using only an Empty object:
Let's try to simplify the procedure by using only an Empty object, eliminating the spiral curve; in fact a spiral path is nothing more than a circular path that develops in height over time.
If we re-examine the example above with the Suzanne object, we observe that the Camera has rotated upwards by a total angle of 66 degrees, from -33° to +33°, while making a complete 360° path around the object.
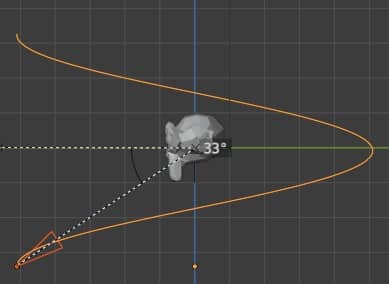
So let's start from scratch with the new procedure.
Let's start with a scene containing only the Suzanne object and the Camera.
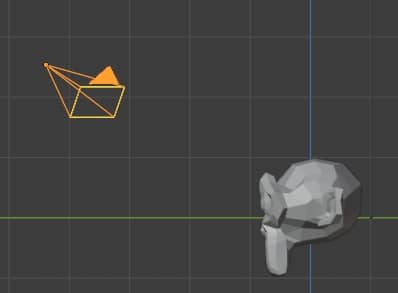
using the panel on the right (called up by pressing the "N" key) we move the Camera in front of the object

by pressing the SHIFT+C keys we move the 3D Cursor to the center, create an Empty object with Add > Empty > Plain Axes, select Camera and Empty object (holding down the SHIFT key), press CTRL+P (to make the Camera child of the Empty object) selecting the "Object" option (thus, moving and rotating the Empty object, the Camera will orbit around the Suzanne object)
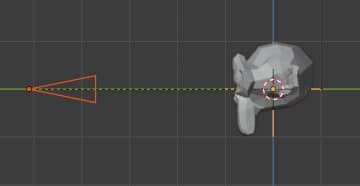
we select only the Empty object and tilt it by -33°

we move the Camera closer or further away to obtain an initial shot similar to that of the previous example
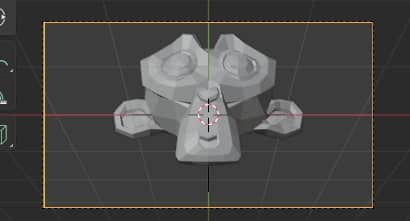
let's move to frame zero on the Timeline, select only the Empty object and press the "I" key to add a "Rotation" type keyframe.
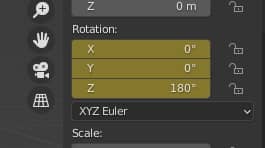
Let's move to frame 125 on the Timeline and, writing on "Rotation" in the panel on the right, rotate the Empty around the X axis by 33°, until Rotation X is brought to 0°, and around the Z axis by 180° ( Rotation Z: 180°); pressing the "I" key we add another keyframe with "Rotation" option.
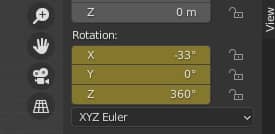
let's move to the final frame 250, rotate around the X axis by another 33° (Rotation X: -33°) and around the Z axis by another 180° (Rotation Z: 360°); press the "I" key and add another keyframe with the "Rotation" option.
if we go to Camera view, pressing the zero key on the numeric keypad, and start the animation in the Viewport with View > Viewport Render Animation, we will get an animation similar to the one created using the spiral curve.
Spiral path of a Camera around a tall and narrow object, using only an Empty object:
A similar procedure is used with a tall, narrow object, such as the skyscraper above.
Let's create a scene with the skyscraper and the Camera, place the Camera in front of the building, writing the relative values in the panel on the right as in the other methods
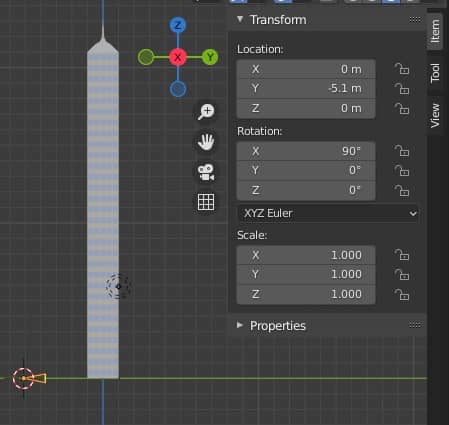
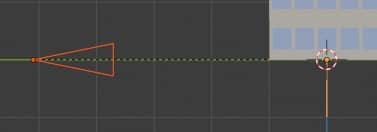
as before, we press the SHIFT+C keys to place the 3D Cursor in the origin, we create an Empty object (Plain Axes), we first select the Camera and then the Empty, then we relate them by pressing the CTRL+P and option "Object"
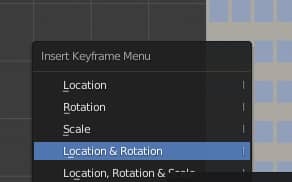
We select only the Empty object. In frame 0 we create a keyframe for the rotation and for the position, pressing the "I" key with the "Location & Rotation" option
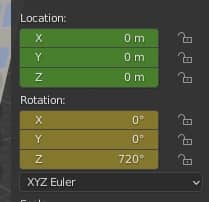
Since the spiral enveloped the object with two turns, we have to rotate the Empty object by 720° around the Z axis; moreover, the Empty must move from the base to the roof and, a little before being reached, it must begin to rotate around its X axis (the one perpendicular to the straight line joining the Camera), in order for the Camera to create a panoramic shot of the roof.
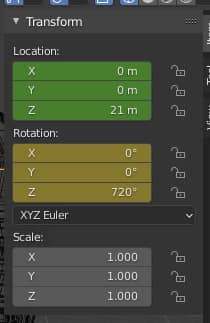
We therefore select the Empty object, position ourselves at frame 250, write 720° in Rotation > Z in the panel on the right and create a keyframe for the rotation ("I" key and "Rotation" option)
Before, using the spiral, the Empty object moved up to 21 meters vertically, stopping at frame 193. We repeat this operation: we position ourselves on frame 193 of the Timeline, we write 21 in "Location > Z", we press the "I" key to create a keyframe with "Location" option
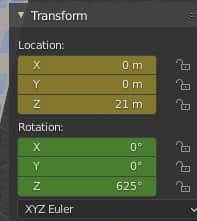
We begin to rotate the Empty a little before reaching the roof, to give more continuity to the animation, from frame 187. At this point the degrees of rotation around the X axis must be equal to zero (and the interpolation of the its animation must start at this point, while it continues the one around the Z axis and the movement along the Z axis), then we set another keyframe for rotation (we press the "I" key to create a keyframe with "Rotation" option )
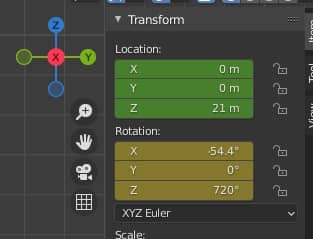
at the end let's move to frame 250, last frame of our animation, and insert a value for Rotation X: - 54.4°, which corresponds more or less to the angle with which the Empty object saw the Camera, when this was at the most top of the spiral
In the other example the spiral continued far beyond the roof, thus moving the Camera away from the Empty object, due to this we have to increase the distance between Empty and Camera in the last part.
We select the Camera and fix 2 keyframes, one at frame 183, with y: -5.1 m
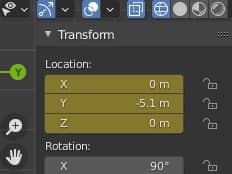
and one at frame 250 with y: -8.6

press the 0 key on the numeric keypad to switch to Camera view, start the Viewport animation with View > Viewport Render Animation and obtain a result similar to the example with the spiral
Using just the Empty object, doing more calculations instead of creating the spiral, may seem simpler, but we could also find ourselves in a more complicated case than those presented. One solution can therefore be used instead of another depending on the situation we are facing.
Eventually the animations can be improved, acting on the handles of the curves in the Graph Editor, to make the movement more uniform or to change its acceleration.
That's all for this tutorial, a wish for a good presentation of your works using a Camera that follows a spiral path. Happy blending!
