Blender useful 3d modeling tools
In this tutorial (updated to Blender 2.93) we mention some useful tools and functions for modeling, which can be useful for both beginners and the more forgetful experts. They allow both to save time and effort and to solve some problems, sometimes not easy to solve.
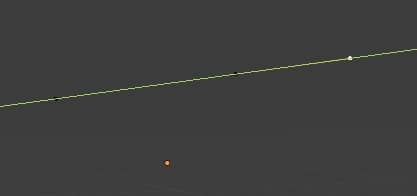
Moving a vertex along an edge and beyond:
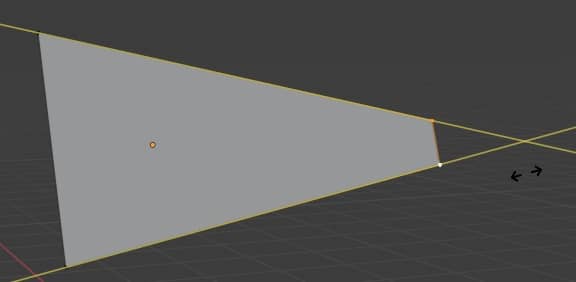
Given any polygon, positioned and skewed in any way

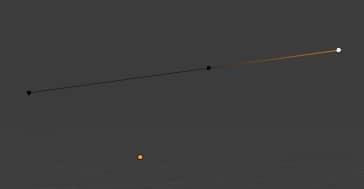
to move a vertex inside the side it belongs to, just press the "G" key twice

pressing immediately after the "ALT" key, however, we are also given the possibility to move the vertex outside the edge, along the line to which it belongs

as with a normal displacement we can also write the displacement value and press ENTER to confirm it.
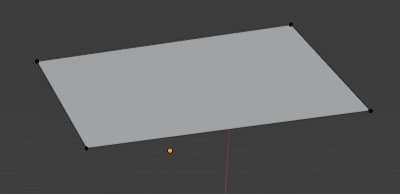
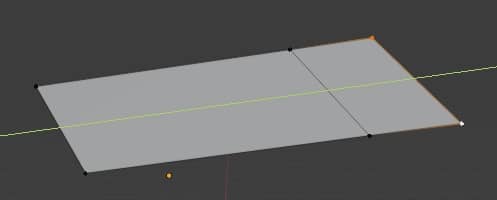
We can use the same procedure with a plane: by selecting two consecutive vertices we can move an entire segment, thus "compressing" and "stretching" the polygon according to a certain direction, following the two lines on which the two opposite segments lie.

Extrude a vertex along the direction of an edge and beyond:
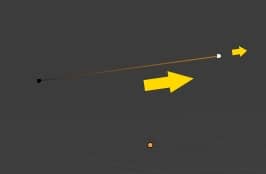
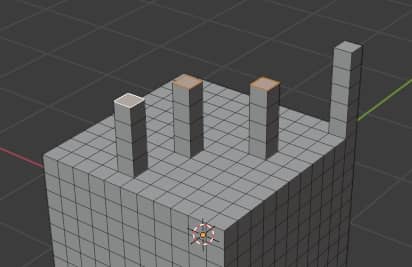
Given any segment (edge), oriented in any way, we want to extrude its vertex along the direction of the edge
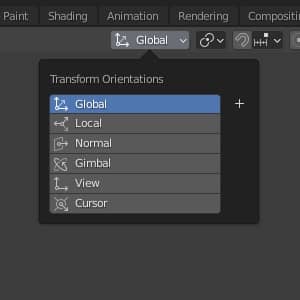
A first idea could be to change the type of orientation, changing the reference system from "Global" to "Local", according to the normals or other
but even so, and choosing the various axes, we are unable to obtain the desired result
One solution is to take the edge for axis orientation as a reference: click in "Edit Mode" on the "A" key to select the entire segment

and clicking on "+" we create a new orientation based on the selected vertices (in our case we have selected a segment and Blender will call it "Edge" by default, but it can possibly be renamed)

Now by extruding the vertex, pressing the "E" key and then (in our case) "Y", we can extrude in the desired direction
if desired, we can also write a numerical value and press the "ENTER" key to extrude a desired quantity. In any case we will get a result similar to this, as we wanted.
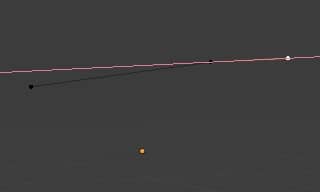
We can also apply the same procedure to extrude a plane: given a plane of any shape and orientation
let's select it all by pressing the "A" key, then create a new orientation, always clicking on "+" as before, which will now be of type "Face" because we have selected all a face (all the plane)

keeping this type of orientation, we select the edge from which to start the extrusion, press the "E" and then "Y" key, thus obtaining the extrusion in the desired direction
also in this case we can write a numerical value and press the "ENTER" key to extrude a desired quantity
Repeat the last operation in Blender:
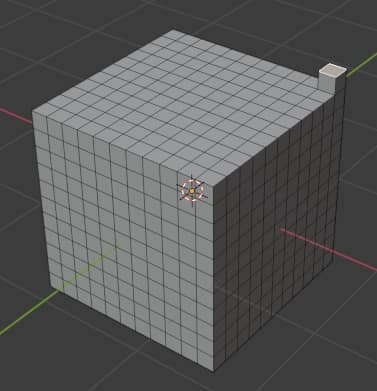
Repeating the same action several times can be boring, but Blender offers the possibility of repeating some operations, facilitating and speeding up the work. For example, if in Edit Mode we split the cube and extrude a face along the Z axis
pressing the Shift+R keys several times, or from the Edit > Repeat Last menu
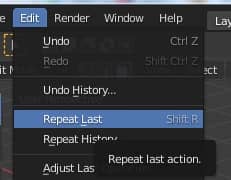
the extrusion operation will be repeated
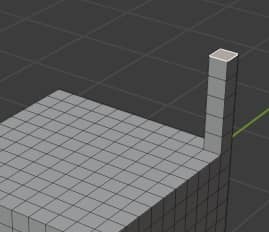
This works not only on the face on which the operation was first performed; in fact if we select other faces
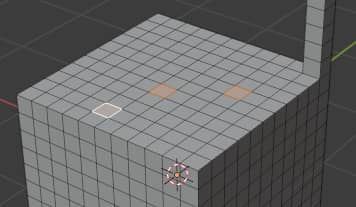
pressing the Shift+R key combination again
the same extrusion operation will be performed, with the same pitch, for all selected faces.
The repetition of actions can also be used for other operations, such as duplicating an object or, useful for animations, movement and rotation.
However, you must be careful not to perform any other actions in the meantime, otherwise the interesting action you want to repeat will be lost.
To Sphere:
"To Sphere" is a very interesting function, which allows both to transform objects into spherical objects, in 3D, and to round groups of vertices in "2D".
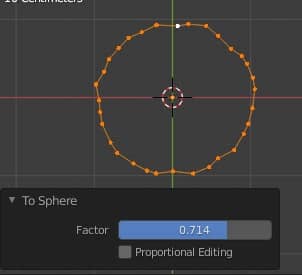
As for the 3D objects, if we create with "Shift+A" ("Add > Mesh > Monkey") the object "Suzanne" and then switch to "Edit Mode" by pressing the "TAB" key, if we select everything by pressing the "A" key, we can use the "To Sphere" function by selecting it in the menu ("Mesh > Transform > To Sphere" or with keys "Shift+Alt+S") and we see that the object "swells".
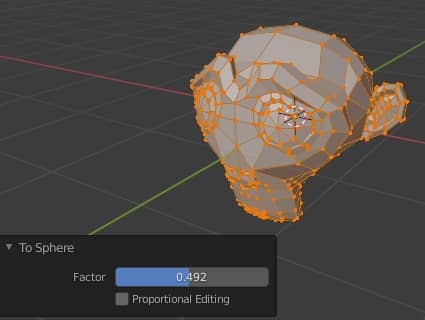
In the popup window at the bottom left we can modify the "Factor" parameter, which goes from 0 to indicate no influence up to 1 which transforms the object into a sphere.
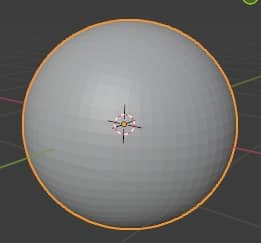
The "To Sphere" function can also be used to "correct" some imperfections: for example when we associate a "Subdvision Surface" modifier to a cube, however you increase the subdivision it will never turn into a perfect sphere, but some imperfections will remain (the sphere is flattened and still slightly cubic in shape)
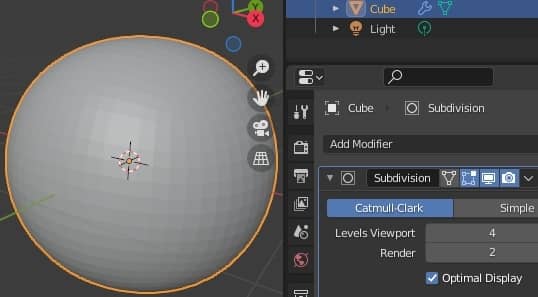
To improve the object you can first apply the modifier and then, in "Edit Mode", use "To Sphere", thus rounding the object
"To Sphere" can also be used to build circular holes, for example we create a plane and in "Edit Mode" we divide it once with the "Subdivide" function (activated by pressing the right mouse button). We select the central point and activate the bevel function with the "Affect:Vertices" option
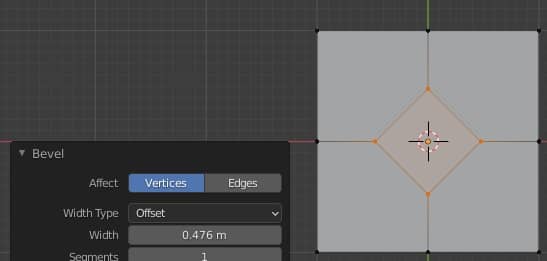
we delete the face inside, pressing the "X" key with "Only Faces" option

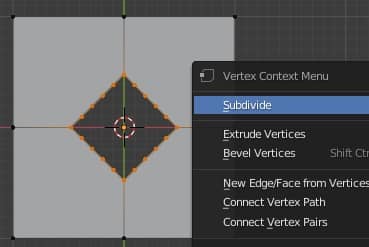
keeping the diamond inside selected, click on the right mouse button and divide it several times with the "Subdivide" function (increasing the number of subdivisions in the popup window that appears at the bottom left)
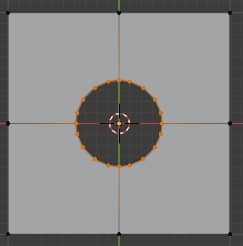
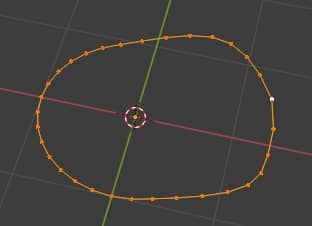
now we activate the "To Sphere" function by pressing the "SHIFT+ALT+S" keys and moving the mouse we can transform the divided diamond into a circle
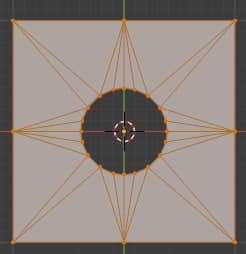
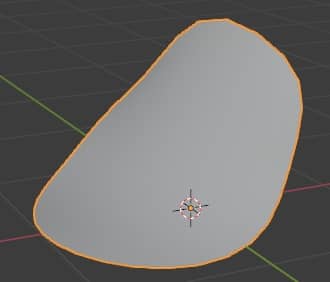
As you can see, however, faces with more than four vertices have formed, but this does not create any problem if all the faces are on the same plane. To better see the current topology of the object, we select the whole object in "Edit Mode" by pressing the "A" key and press the "CTRL+T" keys to highlight the triangles (or in the menu select "Face > Triangulate Faces ")
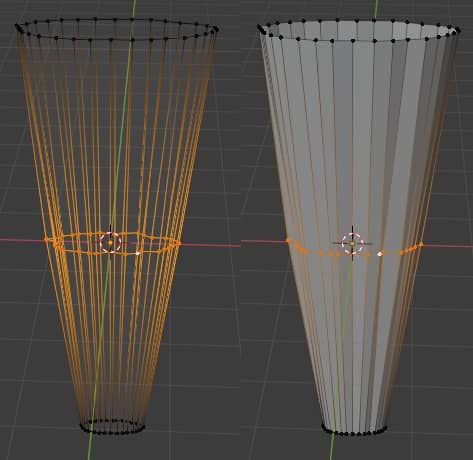
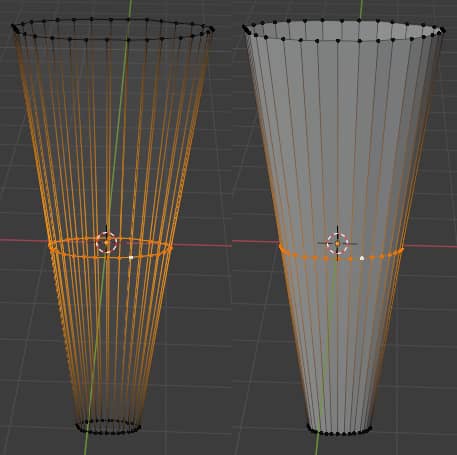
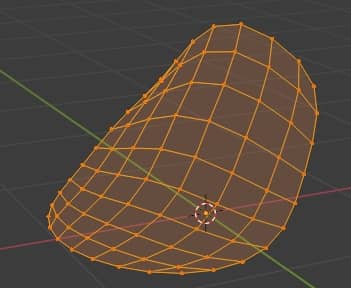
Another use of "To Sphere" is to improve meshes and mesh sections that have a geometry similar to that of the circle
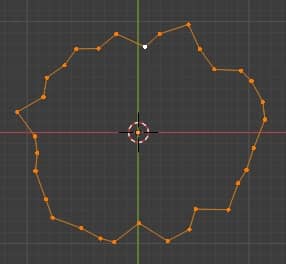
that we can improve in this way (with the help of the tool options contained in the usual popup window that appears at the bottom left)
however, considering that it deforms the overall geometry making it resemble that of a circle, usually for a generic mesh the "Smooth Vertices" function is used
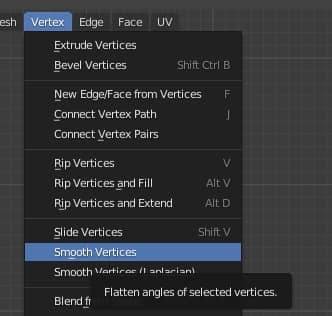
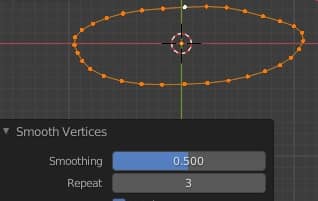
Smooth Vertices:
With the "Smooth Vertices" function, unlike "To Sphere" the overall geometry of the mesh will remain unchanged. For example if we have a jagged mesh of this type

Activating "Smooth Vertices" (Vertex > Smooth Vertices)
it will not deform the mesh into a circle, but smooth the asperities and discontinuities in the vertex positions
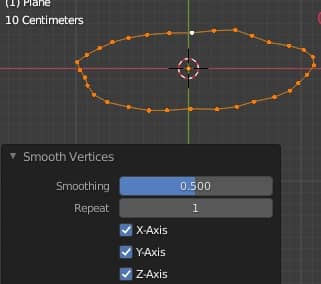
increasing the repetitions, changing the value of "Repeat", the curve will be more and more smoothed
The "Smooth Vertices" function is very useful during organic modeling; if for example we create an arm, or a leg, sometimes it can happen to move some vertices much more than all the others,
so "Smooth Vertices" helps build a smoother mesh by smoothing it out
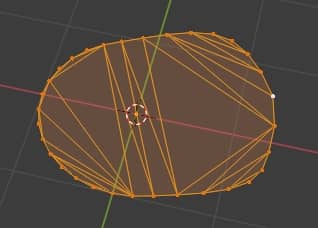
Grid Fill:
Given a mesh formed by a closed curve composed of segments
if we want to create a surface, the first idea that comes to mind is to press the "F" or "ALT+F" keys (which corresponds to the "Face > Fill" function) to create a face, but the result is messy and not topologically interesting
an alternative is to use the "Grid Fill" function ("Face > Grid Fill")
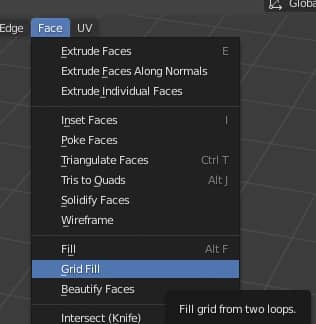
which, as its name implies, fills the space inside the curve with a grid of segments
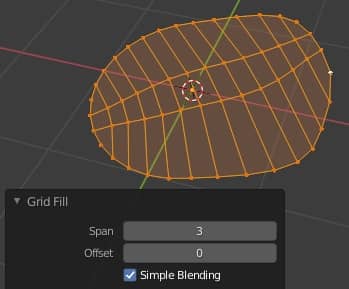
The function is regulated by two parameters: "Span" which contains the number of columns in the grid and "Offset" which allows you to rotate the grid. In our case, setting Span:9 and Offset:4 gives a better result
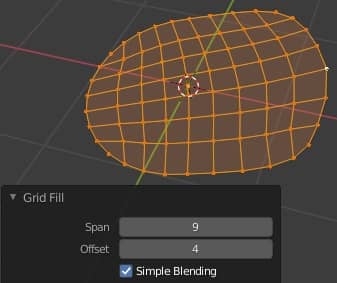
"Grid Fill" is very efficient especially with the three-dimensional curves, because it allows you to automatically create soft surfaces without roughness
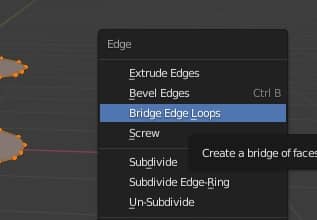
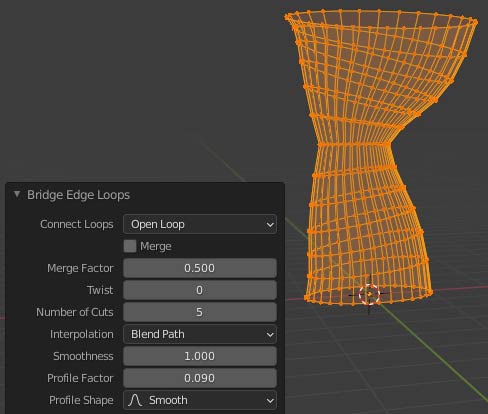
Bridge Edge Loops:
Many times the need arises to connect two surfaces to create a closed mesh
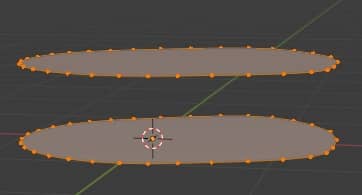
to do this we can use the "Bridge Edge Loops" function, which can be called up in the menu with "Edge > Bridge Edge Loops",
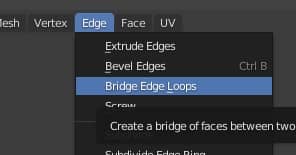
or in the popup window which can be activated by pressing the "CTRL+E" keys
and we get
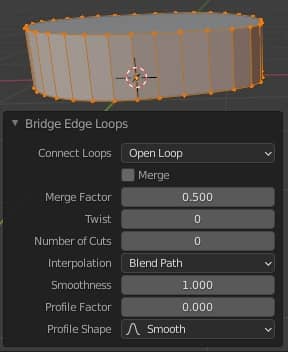
thus saving time and effort, instead of selecting a pair of segments and building one face at a time, creating a very clean side surface.
"Bridge Edge Loops" works even if the two meshes at the ends have a different number of points, but the result is not optimal

or even if the meshes have a different shape
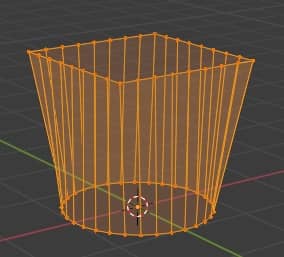
or if you need to connect several meshes at the same time
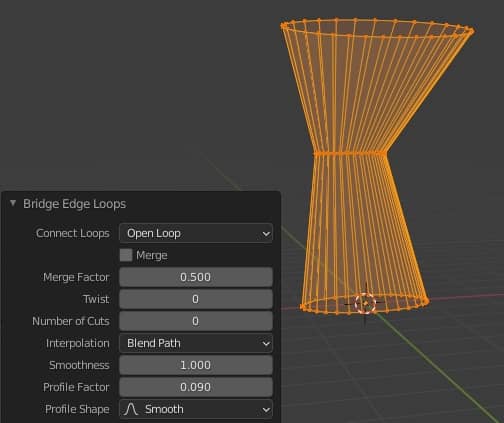
especially in these cases we can make the transitions smoother, for example by increasing "Number of Cuts" to 5, which will automatically add loops to the newly formed mesh, and modifying the smoothing by varying the "Smoothness", "Profile Factor" and "Profile Shape" parameters
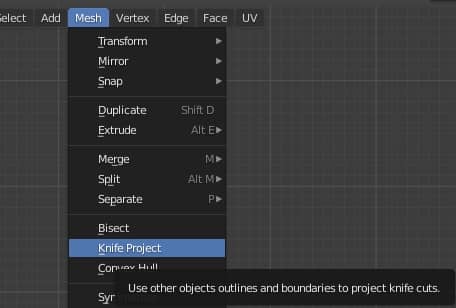
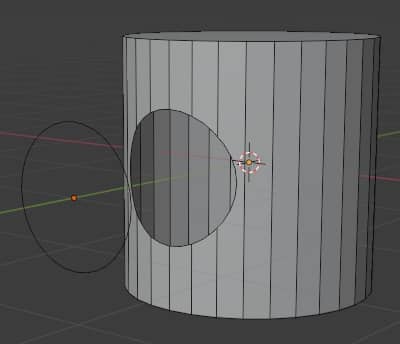
Knife Project:
if you need to carve a mesh to create a hole with a certain shape, or to lay the groundwork for extruding another mesh, the "Knife Project" function will help you do this by projecting the contours of one object onto another.
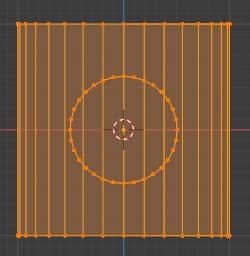
For example, if we want to carve a hole in the shape of a circle on a cylinder we only need to create, in addition to the cylinder object, a circle object and place them opposite each other.
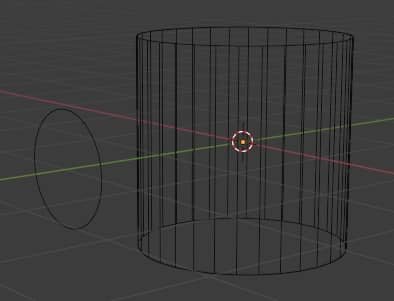
first select the object to be projected then, holding down the SHIFT key, the object to be carved
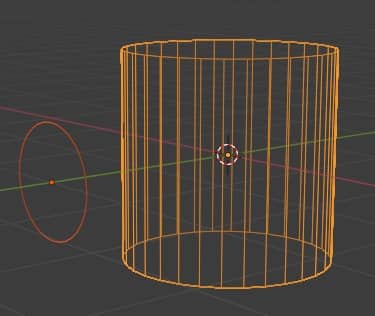
if we activated the projection now, the trace of the circle would go outside the cylinder, so we position the view so that the circle is between us and the cylinder (in our case we press 1 on the Numpad).
We therefore press the "TAB" key to enter "Edit Mode"
and in the menu we select "Mesh > Knife Project"
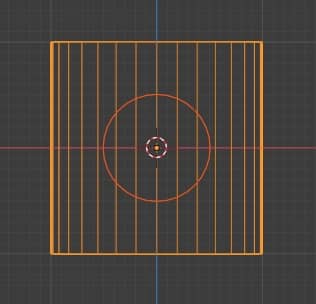
thus obtaining the projection of the circle on the cylinder.
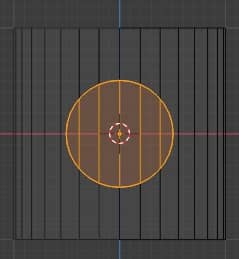
if we rotate the view again, we can see it more clearly
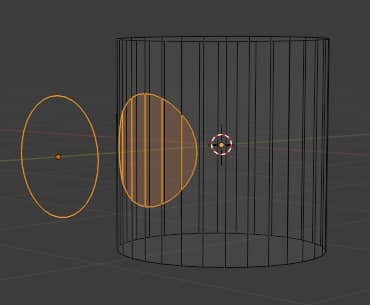
and by eliminating the internal faces we created the hole
That's all for this tutorial, hoping to have given you some more information to facilitate your modeling work, or to have reminded you of some previously studied tools. Happy blending!