Blender: complete guide to the Ivy Generator add-on
In this complete guide to the Ivy Generator add-on for Blender we will see how to use it to easily add ivy to an object, we will analyze its parameters by presenting various examples, and finally, since this tutorial is part of the course "Blender course: from photo to 3D wall", we will use it to add ivy to the "wall" that we updated in the previous tutorial (Blender: how to add graffiti to a wall).
Even though there are now many interesting alternatives (such as the Ivypen add-on, or plants generated with Geometry Nodes) the Ivy Generator add-on is still a valuable tool and therefore comes standard in Blender, so for make it available just activate it.
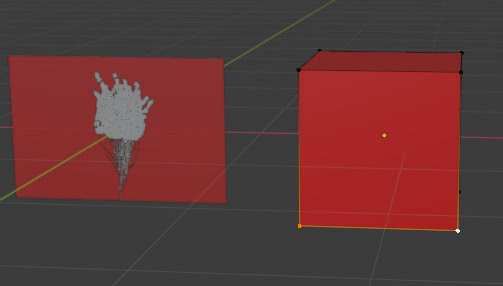
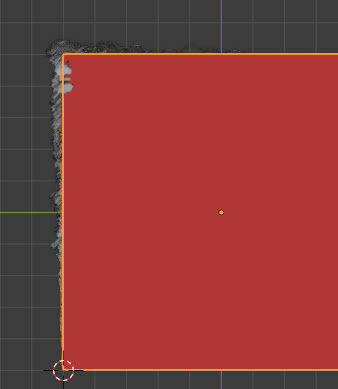
Let's start Blender, delete the cube and create a plane 1.5 meters wide and 1 meters high (press the "Ctrl+A" keys to confirm the resizing). We press the "1" key on the numeric keypad to look at the piano from the front

to better view the results of our tests in the "3D View", add a generic material to the plane (select the plane and click on the relative "New" button in the "Material Properties") and set a red color in the "Viewport Display" tab

How to activate and use the Ivy Generator add-on:
From the menu click on "Edit > Preferences" and in the "Blender Preferences" popup window click on the "Add-ons" tab.
Search for "ivy" and check the add-on "Add Curve:IvyGen"

consequently in the panel on the right in the "3D View" (the one we can view by pressing the "N" key) we now find the "Create" tab with the "Ivy generator" tab (which we can expand by clicking on the small triangle on the left)

To use the Ivy Generator we have to select an object, on which the ivy will "climb", and a starting point which is represented by the "3D Cursor".
Since the starting point should usually be on or near the object, we will place the "3D Cursor" on it; we can do this in various ways, either by positioning it by hand (with Shift+Right mouse button) or by moving it so as to overlap a vertex of the object (entering "Edit Mode", selecting the vertex and pressing the "Shift+S", then selecting the "Cursor to Selected" option). In our case we only need to position it at the base of the rectangle so, knowing its measurements, it is sufficient that we set the value Z=-0.5 to the "3D Cursor" in the "View" tab of the panel on the right

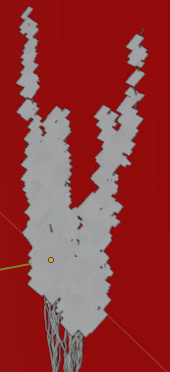
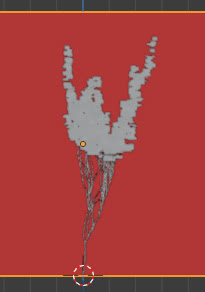
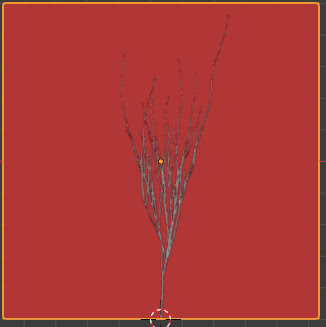
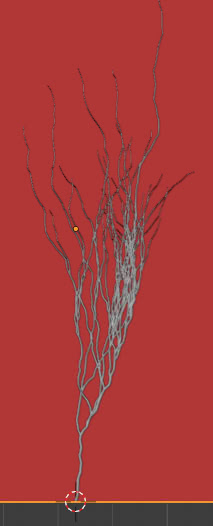
We select the plan, click on the right panel on the "Add New Ivy" button, in the add-on tab just seen

and the ivy plant will appear, climbing on the level we had created,

composed of a set of branches and a group of planes in which we will later have to insert the leaves as textures.
If we look at the bottom left we notice that a contextual window has appeared, with an "Update Ivy" button inside
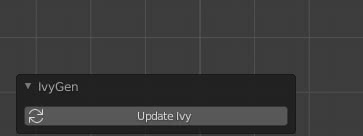
this is used by the user to modify/update the plant every time he will modify a value in the parameters of the window on the right.
Attention! The structure created by the Ivy Generator add-on is considered like any other primitive created in Blender (cube, cylinder, etc.) so when you select another object, or perform another operation, it will no longer be possible to modify its parameters. Therefore it is always better to move on to another job only when you have definitively completed the configuration of the ivy plant.
Configure Ivy Generator parameters:
As we have already seen before, the plant generated by the add-on is regulated by several parameters that you find in the panel on the right, which we review in detail here
First of all we note two buttons for generating the ivy plant: "Add New Ivy" allows you to create a plant by processing the parameters that we have modified, while "Add New Default Ivy" instead creates a plant with the default parameters of the add-on, with the values present before we changed them.
Let's see the other variables, which are grouped into sections
Generation Settings:
Contains general parameters for generating the plant
- "Random Seed": the branches are generated randomly and each random generation depends on a parameter called "seed", on which the set of generated values depends. So for a seed "Random Seed:0" a plant of a certain shape will be generated

for "Random Seed:1" another of another form

for "Random Seed:2" another one
and so on
- "Maximum Time": indicates the maximum time available for the generation of the ivy plant (measured in seconds). In fact when, for various reasons, we increase the number of branches and leaves, the number of vertices also increases and the system could take a long time to complete the operation, therefore setting a maximum time limit could avoid blockages and slowdowns unwanted.
If we leave the value 0.00 , no limitation will be applied and the operation will end only when it is completed.
Size Settings:
- "Max ivy length": this parameter indicates how long (in meters) the ivy plant must be at most. In our case, for example, the plane is 1 meter high, so if we set "Max Ivy Length: 0.5m" the ivy will reach halfway up the plane
while if we use 1 meter as a value with "Max Ivy Length: 1m" the ivy will almost reach the end of the plane
however, the ivy generated by the Ivy Generator will try to always adhere to the geometry of the object to which it has been applied, so if we give a value greater than the height of the plane, for example "Max ivy length:2m", the ivy will not it will continue up, but will stop at the upper edge of the rectangle and then fall back down (as it would also do in reality)
- "Ivy Size": each branch generated by the add-on is composed of several segments, of which this parameter represents the length
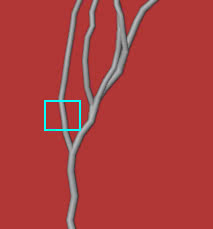
if we double the value (from 0.02 to 0.04) the length of the segment will double and also the branching will be less intense for the same length of the plant

- "Max Float Length": represents the maximum floating distance a branch can have, the bigger it is, the more ivy branches will be free in the air.
- "Max Adhesion Length": indicates how much the branches of the ivy, which climbs on the object, will be affected by the effects of adhesion to the reference object.
To better explain the meaning of these two parameters, let's create a simple example with a cube, with the same material as the plane, press the "TAB" key to enter "Edit Mode" and select the two vertices of the bottom front corner
We press the "Shift + S" keys selecting the "Cursor to Selected" option
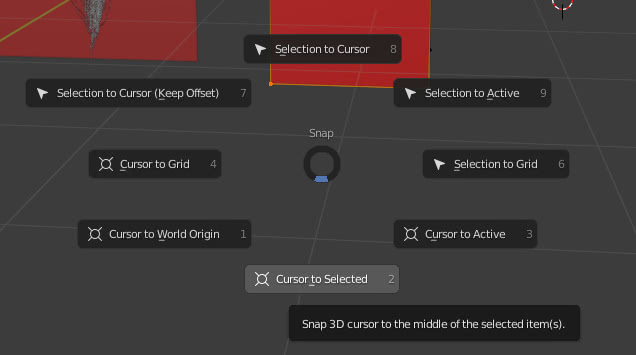
thus moving the "3D Cursor" to the center of gravity of the selection, i.e. the midpoint of the selected edge

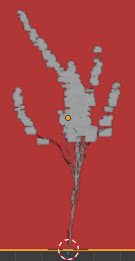
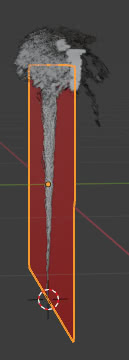
Press the "TAB" key to return to "Object Mode" and create an ivy plant by pressing the "Add new Ivy" key. We set "Max Ivy Length:2m" so the ivy will "climb" also on the upper face. Press the "Update Ivy" button at the bottom left to apply the change
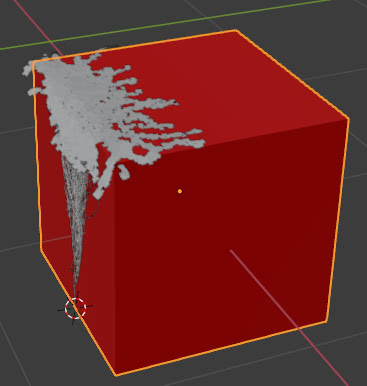
Let's now press the "3" key on the numeric keypad to look at the cube from the side

we notice that the ivy climbs up the vertical face of the cube, with tendrils floating in the air, then crawls up the upper face, adhering more and more to it.
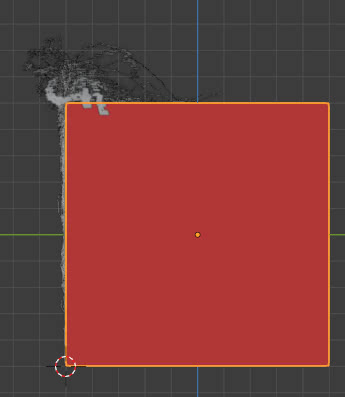
If we now increase the "Max Float Length" parameter from 0.5 to 1, the tendrils will hover even more in the air before spreading out on the upper face
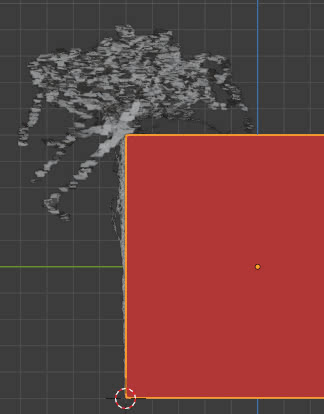
and the maximum of "chaos" will be reached by setting even low values for "Max Adhesion Length", for example 0.1, decreasing the "anchoring" capacity of the plant
on the contrary, for low values of "Max Float Length" (0.1) and high values of "Max Adhesion Length" (2.0) the ivy will "flatten" on the surface of the cube.
Weight Settings:
As we have seen in the previous examples, the ivy plant grows along a certain direction, according to a certain randomness (we have seen before how to set the seed for the random generation of the branches), takes into account the force of gravity and tries to adhere to the object that we have selected.
To better view the branches, uncheck the "Grow Leaves" option (we don't let the leaves grow on the plant) at the bottom
Now let's look at the parameters:
- "Primary Weight": it is a weight that influences growth along the dominant direction; if it has a low value (0.1) the branches will not stretch to climb
if it has an intermediate value (0.5) some branches will lengthen completely, but some will maintain an intermediate attitude,
for high values all branches will extend as much as possible
- "Random Weight": indicates how much randomness affects growth. If the value is high the ivy will grow haphazardly, in all directions at random, if it is low the ivy will grow straighter.
The default value is 0.2 for which the plain will grow like this
for low values (for example 0.01) the branches will grow straight, because the primary direction will prevail

while for high values (eg: 1) the development of the branches will be more chaotic
- "Gravity Weight": represents the influence of gravity on plant growth.
- "Adhesion Weight": represents the influence of adhesion to the reference object on the growth of the plant.
The higher the value representing the adhesion, the more the ivy will be "stuck" to the plant, while if the adhesion is low and the gravity weight is quite high, the plant will "fall to the ground".
With the default values (Gravity Weight=1, Adhesion Weight=0.1) the ivy adheres to the wall but the branches can float with some freedom, slightly separating from the wall.
if we increase the adhesion weight (Adhesion Weight=0.5) the tendrils will be more concentrated on the surface of the reference object.
If instead we increase the gravity and decrease the adhesion of the ivy to the wall (Gravity Weight=3, Adhesion Weight=0.01), the plant will be torn away by the weight and will fall down

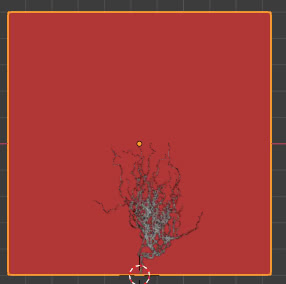
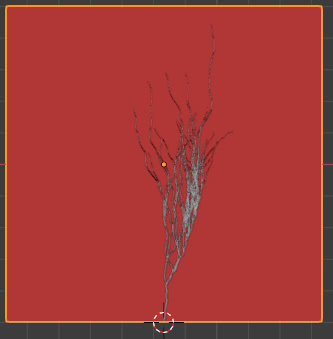
Branch Settings:
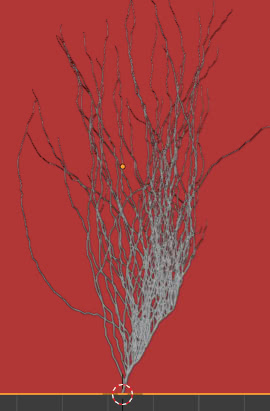
- "Branching Probability": indicates the probability of branching of the plant. The default value is 0.05, for which we have more right branching and less left branching.
With a low value (0.01) only a few branches will form
while for a value ten times greater (0.5) the initial branching will be very intense
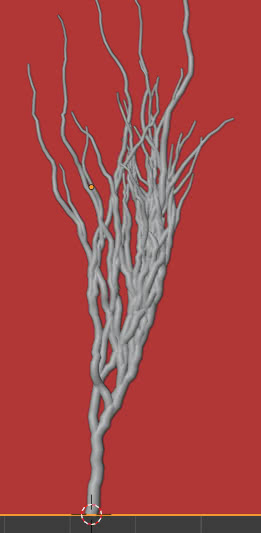
- "Ivy Branch Size": represents the radius of the "cylinder" that represents each segment of a branch. The default value is 0.001, but we can increase it at will. For example with 0.004 we will have
Grow Leaves:
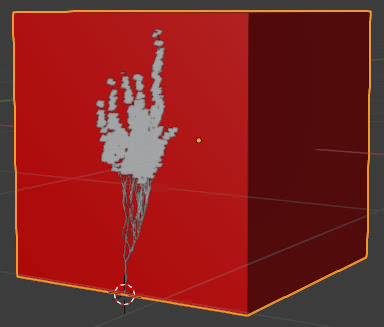
By checking this option, leaves and their options appear (grow). It can be useful to generate an ivy without leaves, both to make lighter tests with fewer vertices, and because we can use this generator to create other types of objects, such as a venous system of a human body or complex abstract compositions for example.
By ticking the "Grow Leaves" option, the last two parameters of this add-on will also appear.
Leaf Settings:
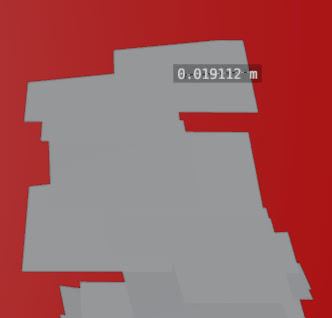
- "Ivy Leaf Size": indicates how wide the leaves must be, in particular it indicates the width of half a leaf; in fact with the default value 0.02 we create a plant with leaves of this size
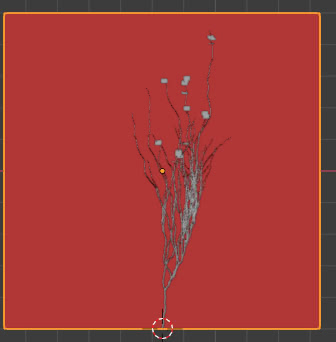
- "Leaf Probability": represents the probability that leaves will form on the plant. With the default value of 0.35 the coverage is partial and concentrated towards the parts of the branches furthest from the roots

in fact if we decrease the value to 0.05 a few leaves will grow only on the extreme tip of the tendrils
while if we increase the value, more and more leaves will grow towards the root of the plant, until they cover it all; in fact if we set "Leaf Probability" to 1 it will result

How to coat the surface of an object using the Ivy Generator:
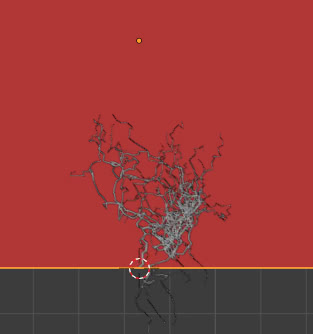
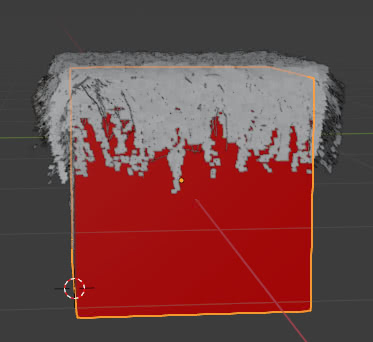
Now let's see how we can use ivy to cover the entire upper part of an object, for example the cube (1x1 in size) that we used earlier in the examples.
As in the previous examples we create the ivy plant in the same position, placing the "3D Cursor" in the middle of the lower segment of the cube (selecting the extreme points as before and pressing the "Shift+S" keys)
Let's create our ivy plant in "Object Mode", selecting the cube and clicking on the "Add New Ivy" button
To cover all the upper surface and create more dangling tendrils we assign value "Max Ivy Length: 7m", which is much greater than the 2.5 meters needed, because we have to make sure that almost all the branches reach a sufficient length. So let's click on the "Update Ivy" button, at the bottom left, to rebuild the plant based on the modified values.
(If your computer is slow, more than three million vertices will be created, you can set a time limit in "Maximum Time")
We get then
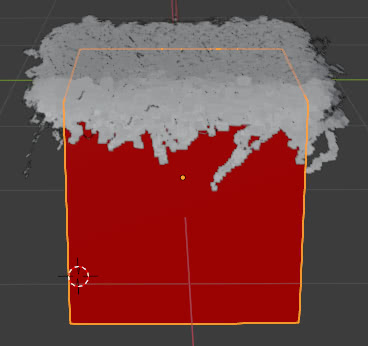
The upper surface has been covered, however the tendrils do not descend well downwards, we therefore increase the influence of gravity with "Gravity Weight: 2"
Eventually you can decrease "Branch Probability" or "Leaf Probability" if your computer is slow to calculate, because the more we increase the length of the branches, the more bifurcations are formed with equal probability, or slightly decrease "Gravity Weight" if you want to show the branches less straight and increase their fluctuation above the cube. It's up to you to modify according to your preferences.
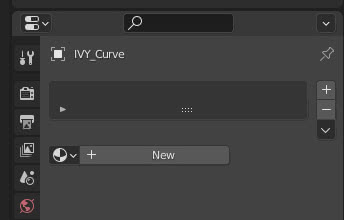
Materials of branches and leaves in the Ivy Generator:
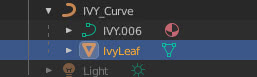
To assign a material to the branches just select the "IVY_Curve", present in the "Outliner" at the top right

and in the "Material Properties" tab click on the "New" button to create a material as usual.
To assign a material to the leaves, select "IvyLeaf" instead

and create a new material again. When we will assign the texture to the leaves, in the "UV Editor" we find that the projections of the leaves are all superimposed, we will see in the next practical example how to handle this situation.
Practical example, let's add ivy to the wall:
To explain how to add a material to the leaves, let's take the example blender_add_graffiti_wall_display_modificator.blend from the tutorial (Blender: how to add graffiti to a wall) to finish the work by adding an ivy plant.
We could use one of the vertices of the subdivision grid to place the "3D Cursor"
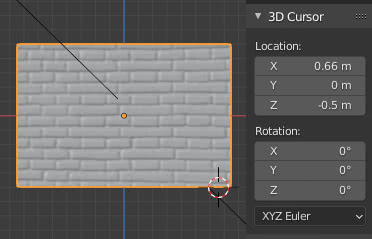
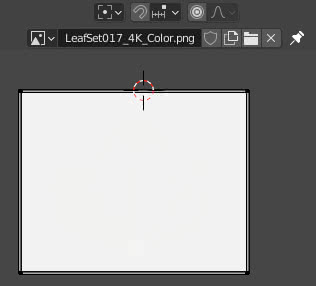
but since the plane is on the X axis and we know its dimensions, we position the "3D Cursor" by hand at the point (x: 0.66 meters, y: 0 m, z: -0.6m) in the "View" tab of the panel on the right, the one that appears by pressing the "N" key.
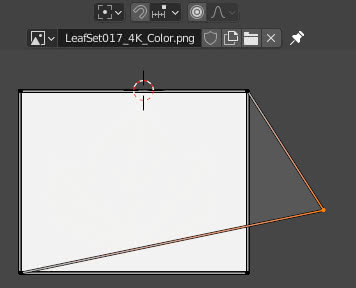
We select the plane representing the wall then, still in the panel on the right, click on the "Create" tab and in the "Ivy Generator" tab click on the "Add New Ivy" button.

To make the ivy reach the top of the wall, we assign the value "Max Ivy Length: 1.7m", then click on the "Update Ivy" button at the bottom left and we get
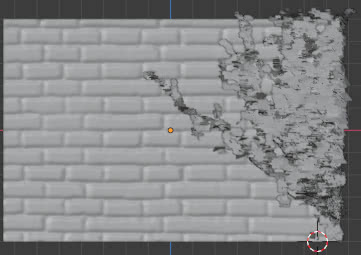
As we have seen before, to assign a material to the branches we must select "IVY_Curve" in the "Outliner", then in the "Material Properties" tab, since the image is small and the ivy tendrils are barely seen, we create a simple material composed of only one shader node "Principled", with "Base Color:#463526" (the other parameters have the default values).
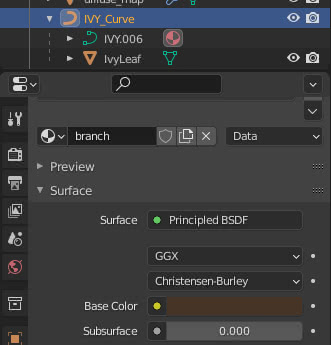
(If the ivy branches had been closer to our view, we could have created a texture by mixing two varieties of brown, inserting a "Noise Texture" or a "Voronoi Texture" into the "Fac" port of the "Mix Color")
Let's download the textures for the leaves of the plant from https://ambientcg.com/view?id=LeafSet017; the zipped archive (to download at least the 4K version because we are only interested in a part of each image) contains several files, in particular a "Color" version (ie the "photo" of the leaves), "Opacity" (which is a mask that defines the profile of the leaves, since a transparent png version is not available), "Displacement", "Roughness" and the normal "NormalDX" (for software that supports DirectX libraries) and "NormalGL" (for software that uses OpenGL libraries). For normal formats and PBR materials see also the tutorial "Blender tutorial: PBR material for brick wall".
We cut out (with a 2D graphics software) from LeafSet017_4K_Color the leaf that interests us (which fortunately is positioned at the top left)

and we use its selection to get the other maps as well (in Blender we will just use the normal one for OpenGL libraries)

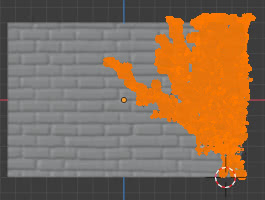
Select "IvyLeaf" (the plane representing instances of all leaves) in the "Outliner"
and as for the branches we create a new material "Leaf" in the "Material Properties" tab, by clicking on the "New" button.
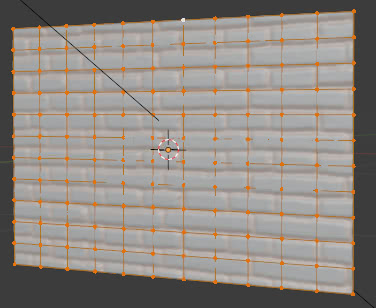
Now click on the "UV Editing" tab to access the related workspace.
In the "UV Editor" on the left we load the image of the ivy leaf, by clicking on the "Open Image" button

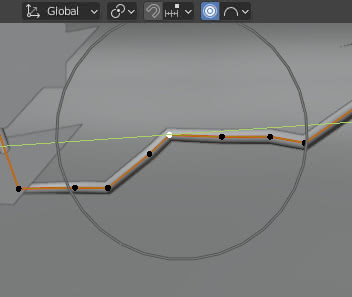
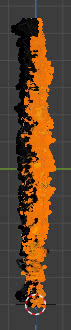
We must now position the "UV Map" well so that the plane coincides well with the beginning of the leaf (otherwise the leaves would be detached from the branches; even if in some cases the leaves are penetrated by the branches, so we would have to look for the image of a leaf with stem, to be able to manage a certain margin of error). In the "3D View" on the right, press the "TAB" key to enter "Edit Mode"
but we notice that on the left, in the "UV Editor", a white plane has appeared which prevents us from seeing the underlying image.
What happened? There is no mistake, it is simply all the planes of the leaf instances that have overlapped, thus adding up the many transparencies to form an opaque color. In fact if we try to move a vertex we discover that there are others underneath
let's then modify the transparency values in the editor: select "Edit > Preferences" from the main menu and in the preferences window select the "Themes" tab, in "UV/Image Editor" modify the transparency values of "Face" (0.004) and "Face Selected" (0.008)

We can now (by selecting and pressing the "G" and "R" keys according to the X and Y directions) resize the mesh map more comfortably

We access the "Shading" workspace by clicking on the relative tab at the top, then in the "Shader Editor" we connect the color texture ("Add > Texture > Image Texture" and loading the relative image) to the "Base Color" port of the "Principled" node, the roughness texture to port "Roughness", the "NormalGL" texture to port "Normal" using the "Normal Map" node ("Add > Vector > Normal Map").
Apart from the texture that represents the color (the photo of the leaf), the others must all have "Color Space: Non-Color" set.
Connecting the textures to the "UV" port of a "Texture Coordinate" node ("Add > Input > Texture Coordinate") indicates that we will use the "UV Map", previously viewed and resized, to correctly display the textures.
The "Opacity" texture serves to give indications on which parts are visible and which are transparent, so we connect it to the "Alpha" port of the shader.

Alternatively, if for example we need to add a translucency effect to the leaf, we can use the "Opacity" texture to mix downstream the result obtained with a "Transparent" shader ("Add > Shader > Transparent") .

If we render, pressing F12,
we notice that some leaves and branches penetrate the brick wall

or leaves that sometimes do not start from the tendril but the branch crosses them. In this case you can act in "Object Mode" by moving the entire plant by a few centimetres, or by activating "Proportional Editing" in "Edit Mode" to move only part of a branch (the relative leaves will also have to be moved afterwards)
Or, to make the scene lighter by eliminating some vertices, we can eliminate the leaves and branches that are not visible and that do not interest us in "Edit Mode": placing ourselves in side view (by pressing the "3" key on the numeric keypad) using the rectangular selection we can select the vertices of the leaves that are invisible, or not very visible because they are behind the wall, in "wireframe" mode

then by pressing the "Ctrl+L" keys we automatically select the remaining parts of the leaves
which we can delete by pressing the "X" key.
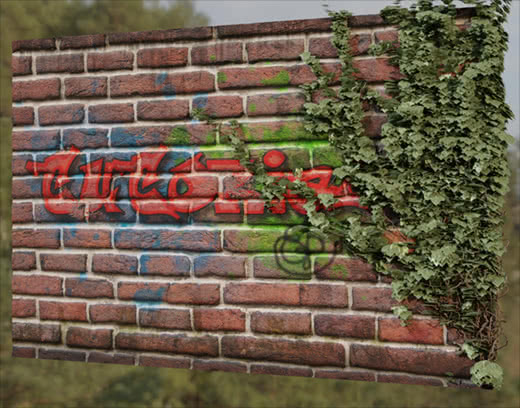
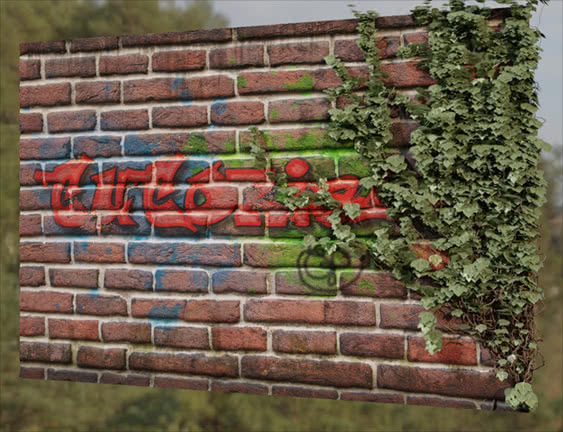
Here is the result after an initial processing, after having repositioned/rotated some leaves, moved some branches etc. in "Edit Mode"
That's all for this Ivy Generator add-on tutorial. It is a precious tool especially when we have to model the vegetation that covers abandoned houses, castles, ancient monuments or other, for which we will be able to create even more ivy plants, paying close attention to an exponential increase in the vertices of the scene. Happy blending!
Back to "Blender course: from photo to 3D wall" course