How to selectively blur an object in Blender and animation
In this tutorial we will show how to selectively blur an object in Blender using the "Compositor", leaving the nearby ones unchanged, regardless of the distance from the camera. We will first use the "Object Index Pass" with the "ID Mask" node in Cycles, then with the "Cryptomatte" node in EEVEE. Next we'll create an animation using blur, which might be useful for showcasing products or certain elements in a presentation video or documentary.
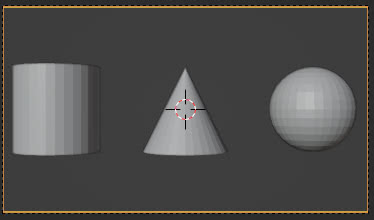
Let's start Blender, delete the default cube and create a cylinder, a cone and a sphere instead (we use these 3 solids because the blurring is more evident in them). In front view (obtained by pressing the "1" key in the numeric keypad) let's see

We assign to the objects 3 materials composed of a single "Principled" shader, with color "green" #00B201 for the cylinder, "red" #E7000C for the cone, "yellow" #E7A600 for the ball. In "Material Preview" mode we will therefore see

We select the camera, present by default, and in the panel on the right (which can be recalled by pressing the "N" key) we assign new coordinates for the position and rotation
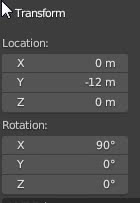
in order to frame objects frontally
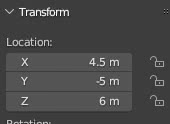
We select the lamp present by default and change the coordinates in the same way
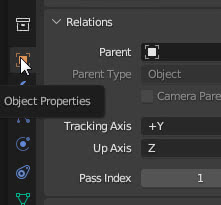
We select the cylinder and in the "Object Properties" tab on the right, in the "Relations" sub-panel, we set "Pass Index:1", so now we can identify the cylinder object with this number
similarly we assign the number 2 to the cone and the number 3 to the sphere.
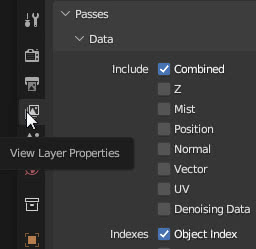
To enable the "Pass Index" of the objects, in the "View Layer Properties" tab, check the "Object Index" option
Let's selectively blur an object:
Now let's try to make sure that only the sphere is rendered blurry.
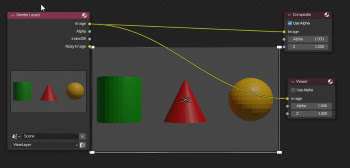
Select the "Compositing" workspace by clicking on the relative tab

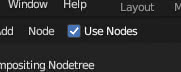
we tick on the "Use Nodes" option to be able to use the nodes in the "Compositor"
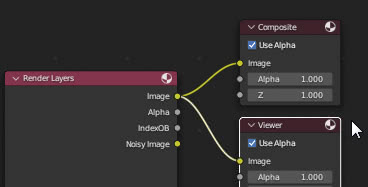
and connect to the "Render Layers" node a new "Viewer" node ("Add > Output > Viewer") which will allow us to show the previews of the results of the operations carried out in the "Compositor"
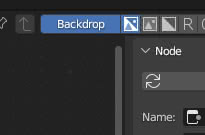
Let's check that the "Backdrop" option is enabled
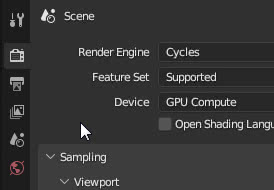
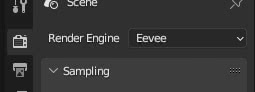
For this exercise, let's select the "Cycles" rendering engine and the GPU as the rendering device
we start the rendering by pressing the "F12" key and we get in the preview of the "Compositor"
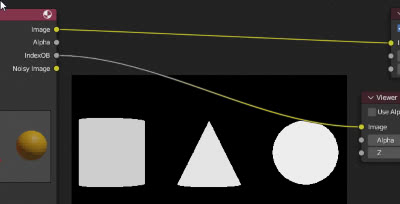
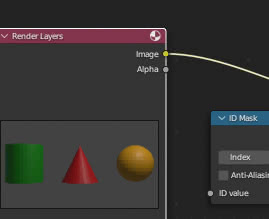
Let's now create a mask that identifies the sphere: "IndexOB" provides a mask of all indexed objects
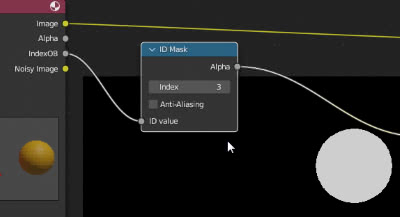
using the "ID Mask" node ("Add > Converter > ID Mask") we isolate the object with index "3" (the sphere)
We can now blur the sphere using the "Blur" node ("Add > Filter > Blur"): we need to blur the sphere present in the rendering so in its "Image" port we insert the output of the "Image" port of the "Render Layers" node; the "Size" port indicates how much the image must be blurred, and has a default value of 1 on the whole image, but we want only the sphere to be blurred, so we insert the mask we had obtained before, which is white, as input (white corresponds to the value 1) only in correspondence with the sphere and black for the rest (black corresponds to the value zero, therefore no blurring); having made this choice we check the "Variable Size" option, which "Allows a variable blur radius, if the size input is an image" therefore, after having chosen a "Gaussian" blur, we set x:40 and y:40 (blur equal in vertical and horizontal direction) we connect the "Blur" node with the "Viewer" and "Composite" nodes obtaining the desired result

If we also want to blur the other objects, just cascade the nodes: we blur an object and the image with the blurred object will serve as the starting image to blur another object and so on

Let's blur with Cryptomatte and EEVEE:
If instead of Cycles we select EEVEE as the rendering engine, to try to render faster (also in anticipation of the subsequent animation), using the node structure we had just built for Cycles,
we note that the "IndexOB" port has disappeared
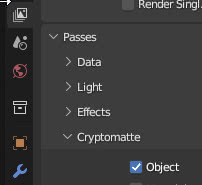
This happens because the pass "Object Index" (even the "Material Index") is not supported by EEVEE. However, the "Cryptomatte" function comes in handy, which allows you to identify objects and materials by selecting them with a dropper: in the "View Layer Properties" tab on the right, select the "Object" option in the "Passes > Cryptomatte" sub-panel
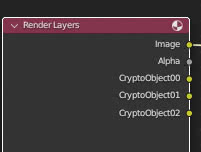
and we note that in the "Compositor" the related ports have appeared in the "Render Layers" node
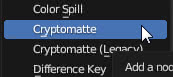
however these refer to the old "Cryptomatte legacy" node (to understand the difference between the old and the new "Cryptomatte" node and how to use it, see also "Cryptomatte in Blender 2.8 and 2.93, a revolution") but we use the new one, adding it with "Add > Matte > Cryptomatte"
We connect the "Image" input port of the "Cryptomatte" node with the "Image" output of "Render Layers" and the "Pick" output of "Cryptomatte" with the "Viewer" node, possibly start the rendering and the three objects will appear in evidence. So let's press the "+" key to the right of the "Matte ID" parameter and select the cylinder with the dropper (and the writing "Cylinder" will appear in "Matte ID") in the preview.
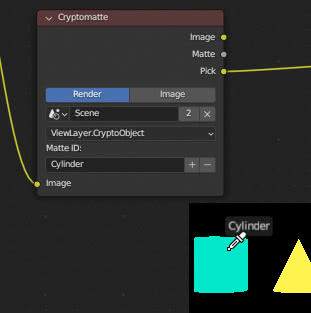
Once this operation is completed, we disconnect the "Pick" port and connect the "Matte" output of the "Cryptomatte" node, now containing the mask that identifies the cylinder, to the "Size" port of the "Blur" node (instead of the "ID Mask" node which now we no longer need and we can delete).
Let's create another "Cryptomatte" node, connect this too to the "Render Layers" node through the "Image" port and to the "Viewer" node through the "Pick" port; again we press the "+" button in "Matte ID", but this time we select the cone

As before, we disconnect the "Pick" port from the "Viewer" node and connect the "Matte" port of the "Cryptomatte" node now to the "Size" port of the second "Blur" node.
Let's add a last "Cryptomatte" node also for the sphere and repeat the previous operations, to select the sphere and connect the "Cryptomatte" node to the third "Blur" node.
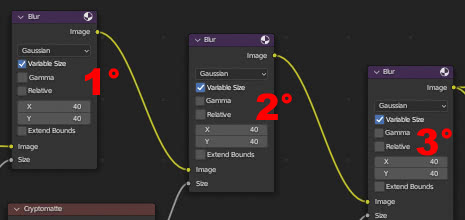
So we built this node setup to blur the sphere in EEVEE

which could also be made with a single "Blur" node and a single "Cryptomatte" node

at the moment, however, we needed a configuration of nodes with objects all blurred to use with EEVEE, to start our animation

Creating an animation sharpen one object at a time:
So let's start from the last system of nodes to create the animation
and we act only on the "x" and "y" parameters of the 3 "Blur" nodes present, which we will call first, second and third.
to position ourselves in the various frames we will use the "Dope Sheet" editor located at the bottom of the "Compositing" workspace.
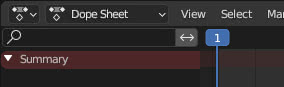
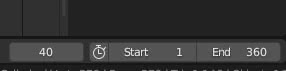
In this editor we set the number of frames to 360 in the "End" field, at the bottom right.
Let's start by animating the blur of the cylinder, leaving the rest unchanged: we fix the current situation by creating a keyframe for the x and y values, right-clicking their values in the node and selecting the "Insert keyframe" option
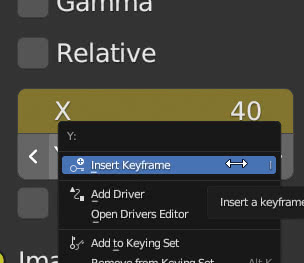
The two value fields will turn yellow (this indicates that those values correspond to keyframes)

while in the "Dope Sheet" editor the keyframe corresponds to a dot for each parameter set in it
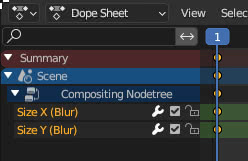
in the editor we now find two new channels "Size X (Blur)" and "Size Y (Blur)" which correspond to the x and y parameters of the node called "Blur", as can be seen in its properties in the right panel

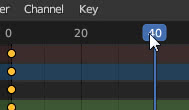
We want the cylinder to be seen clearly after 40 frames, so we click the left mouse button and drag the blue cursor in the "Dope Sheet" editor to frame 40
Why sometimes I don't see the "Compositor" keyframes in the "Dope Sheet" editor? Because it means that the "Only Show Selected" option in the form of an arrow on the right has been checked
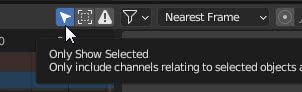
when this option is active, graphs and keyframes of only selected objects (or nodes) will be shown. To see the graphs of all the objects/nodes either select them all or disable this option by clicking on the small button (which switches from blue to grey) .
In the first "Blur" node we set x:0 and y:0, then clicking on them with the right mouse button, we create the relative keyframes

we want the cylinder to be clearly visible for 40 frames, so we drag the cursor to frame number 80,

leave x:0 and y:0 and create corresponding keyframes by right-clicking the mouse.

now we have to start the animation, in which the cylinder has to blur, which ends at frame 120. Then we drag the blue cursor to frame 120

and insert keyframes in the first "Blur" node for values x:40 and y:40; however, the animation for the cone must also start, which also starts from blurry, so we also insert keyframes for the "Blur" node of the cone at x:40 and y:40.

In the "Dope Sheet" editor we see that two new channels "Size X (Blur.001)" and "Size Y (Blur.001)" have been added,
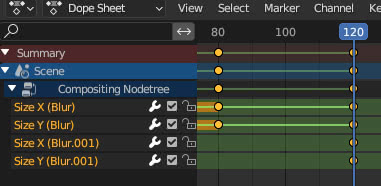
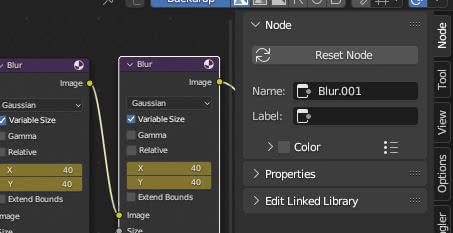
where "Blur.001" is the name of the second "Blur" node; in fact if we select it and look at the panel on the right we find
Let's continue with our animation, going faster
Let's animate the blurring of the cone: to unblur the cone we drag the blue cursor to frame 160, set the x:0 and y:0 values in the second "Blur" node and create the related keyframes with the right mouse button. We show clearly the cone for 40 frames, drag the blue cursor to frame 200, create keyframes for x:0 and y:0 in the second "Blur" node; to return the blur to the cone we drag the blue slider to frame 240 and create keyframes for x:40 and y:40 in the second "Blur" node.
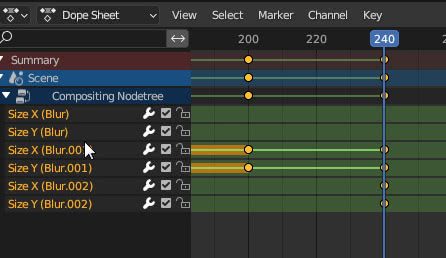
Again corresponding to frame 240, we also create keyframes in the third node "Blur", which is associated with the sphere, for the values x:40 and y:40 and we note in fact that new channels have appeared "Size X (Bur.002)" and "Size Y (Blur.002)" corresponding to the x and y of the third node (which is called "Blur.002")
Let's animate the blur of the sphere as we did before with the cone: to remove the blur from the sphere we drag the blue cursor to frame 280, set the x:0 and y:0 values in the third node "Blur" and create the relative keyframes with the button right mouse. We show clearly the sphere for 40 frames, drag the blue cursor to frame 320, create keyframes for x:0 and y:0 in the third "Blur" node; to get the blur back on the sphere we drag the blue cursor to the 360 frame and create keyframes for x:40 and y:40 in the third "Blur" node, thus ending our animation.
Summing up:
Frame 1: Blur_Cylinder(40, 40), Blur_Cone(40, 40), Blur_Sphere(40, 40)
Frame 40: Blur_Cylinder(0, 0), Blur_Cone(40, 40), Blur_Sphere(40, 40)
Frame 80: Blur_Cylinder(0, 0), Blur_Cone(40, 40), Blur_Sphere(40, 40)
Frame 120: Blur_Cylinder(40, 40), Blur_Cone(40, 40), Blur_Sphere(40, 40)
Frame 160: Blur_Cylinder(40, 40), Blur_Cone(0, 0), Blur_Sphere(40, 40)
Frame 200: Blur_Cylinder(40, 40), Blur_Cone(0, 0), Blur_Sphere(40, 40)
Frame 240: Blur_Cylinder(40, 40), Blur_Cone(40, 40), Blur_Sphere(40, 40)
Frame 280: Blur_Cylinder(40, 40), Blur_Cone(40, 40), Blur_Sphere(0, 0)
Frame 320: Blur_Cylinder(40, 40), Blur_Cone(40, 40), Blur_Sphere(0, 0)
Frame 360: Blur_Cylinder(40, 40), Blur_Cone(40, 40), Blur_Sphere(40, 40)

In "Output Properties", in the "Output" panel, we set the rendering as a sequence of PNG files (so that we can start over in case of crash)

and press the "Ctrl+F12" keys to render the animation
(To transform the PNG image sequence into an MP4 file, see also "Blender convert a sequence of images into mp4 video")
thus getting

Thus ends this tutorial to selectively blur an object in Blender, which also allows you to give an illusion of movement and depth change, a more flexible tool than the classic defocus. Happy blending!